• The CraftSessions Story
  • Our Past Retreats
  • Blog
  • Newsletter
  • Contact
Menu

The Craft Sessions

Street Address
City, State, Zip
Phone Number

The Craft Sessions

  • About
    • The CraftSessions Story
    • Our Past Retreats
  • Blog
  • Newsletter
  • Contact

The post about steeking!

August 1, 2014 thecraftsessions
Unfinished but the steek has been cut! Knitting and photo by Felicia Semple.

Unfinished but the steek has been cut! Knitting and photo by Felicia Semple.

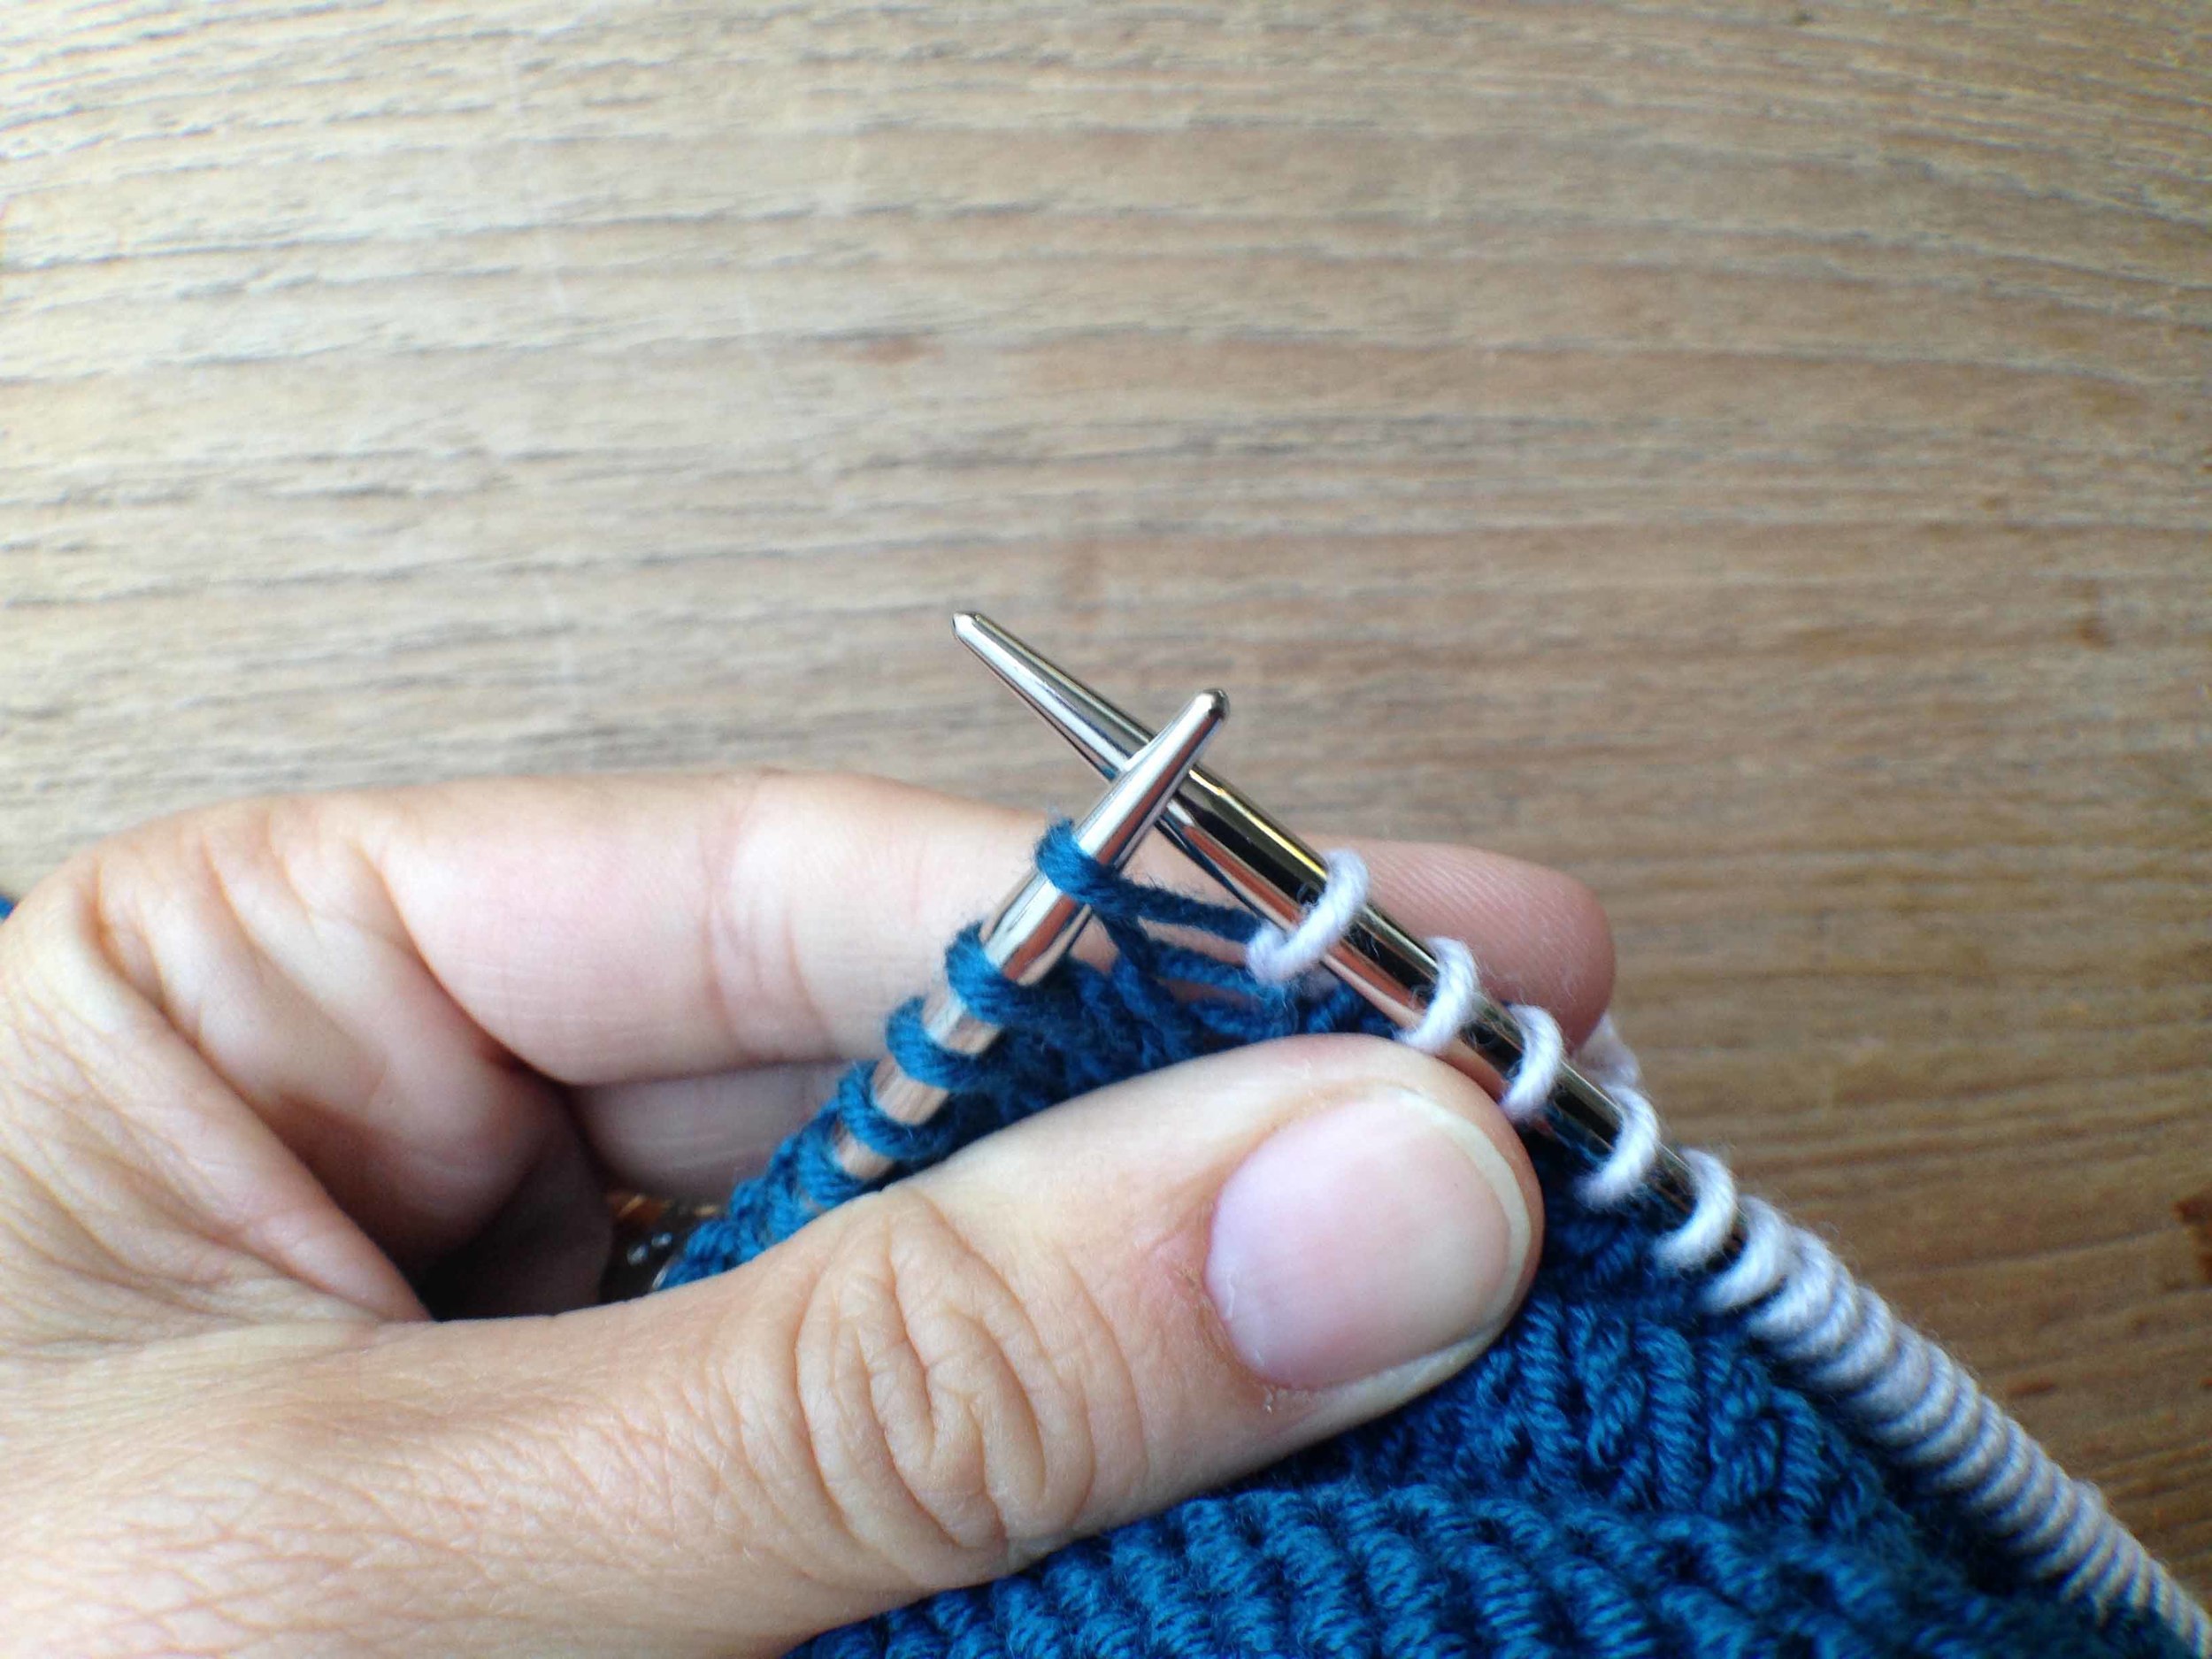
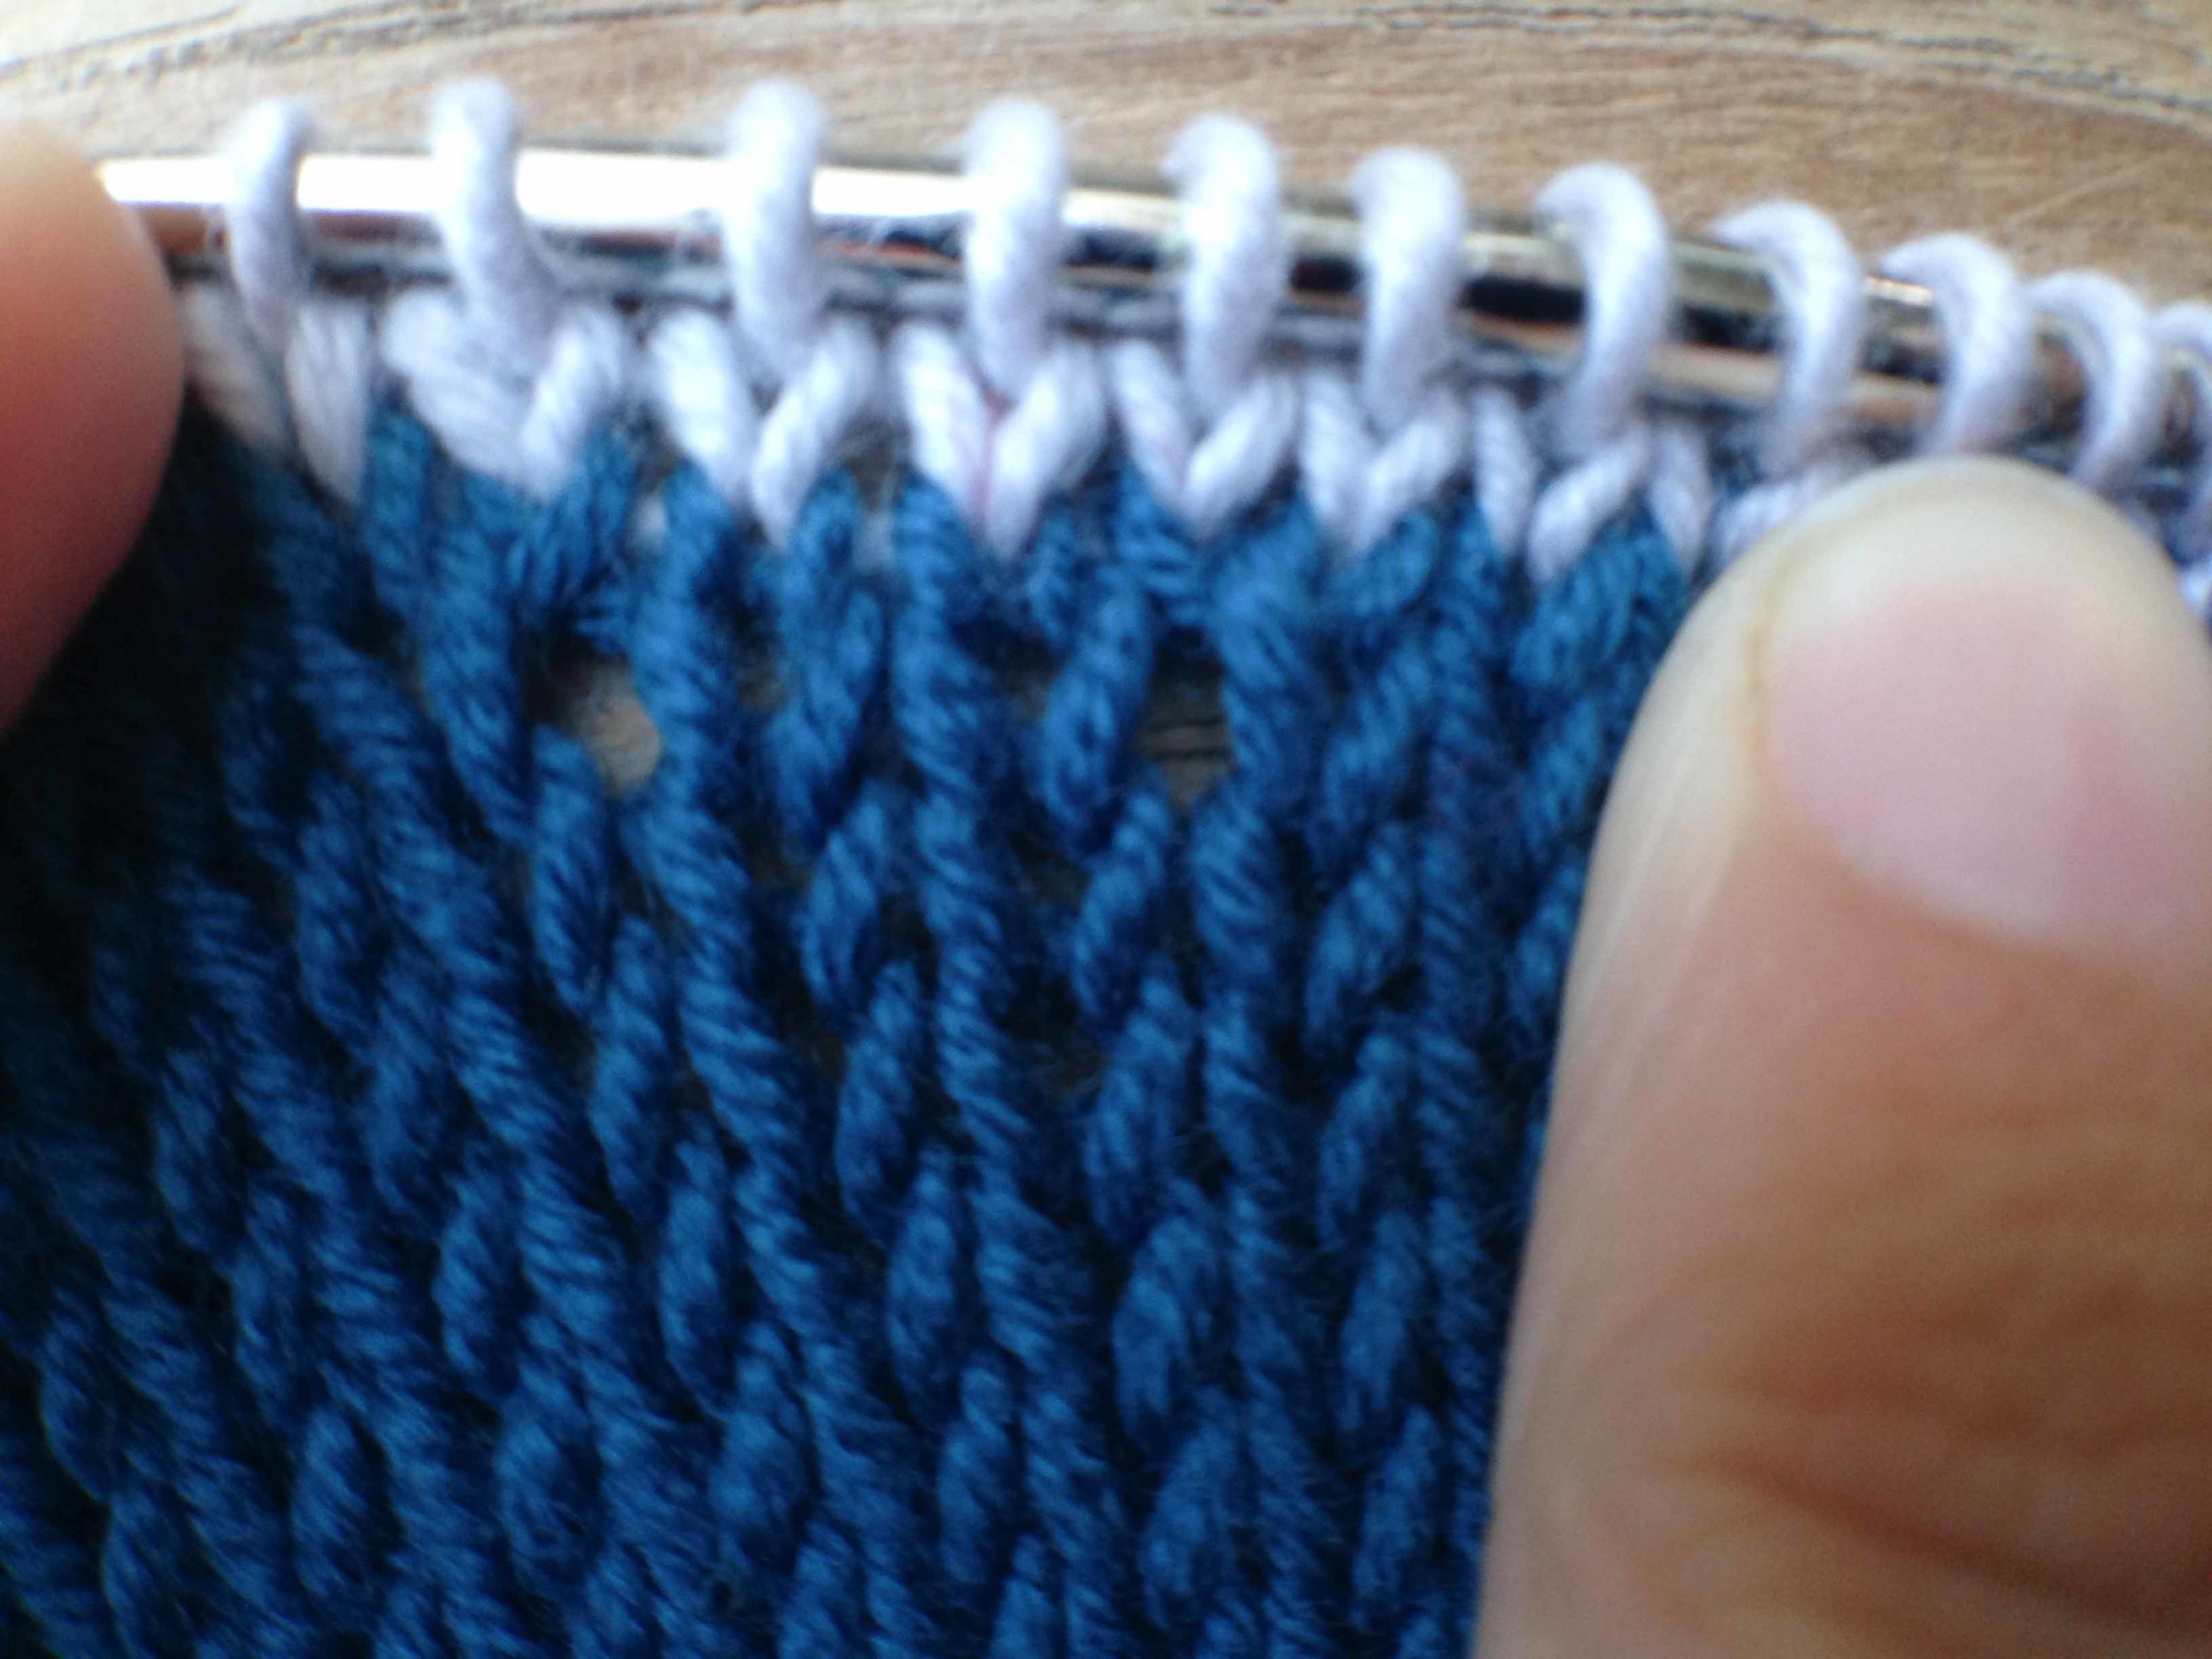
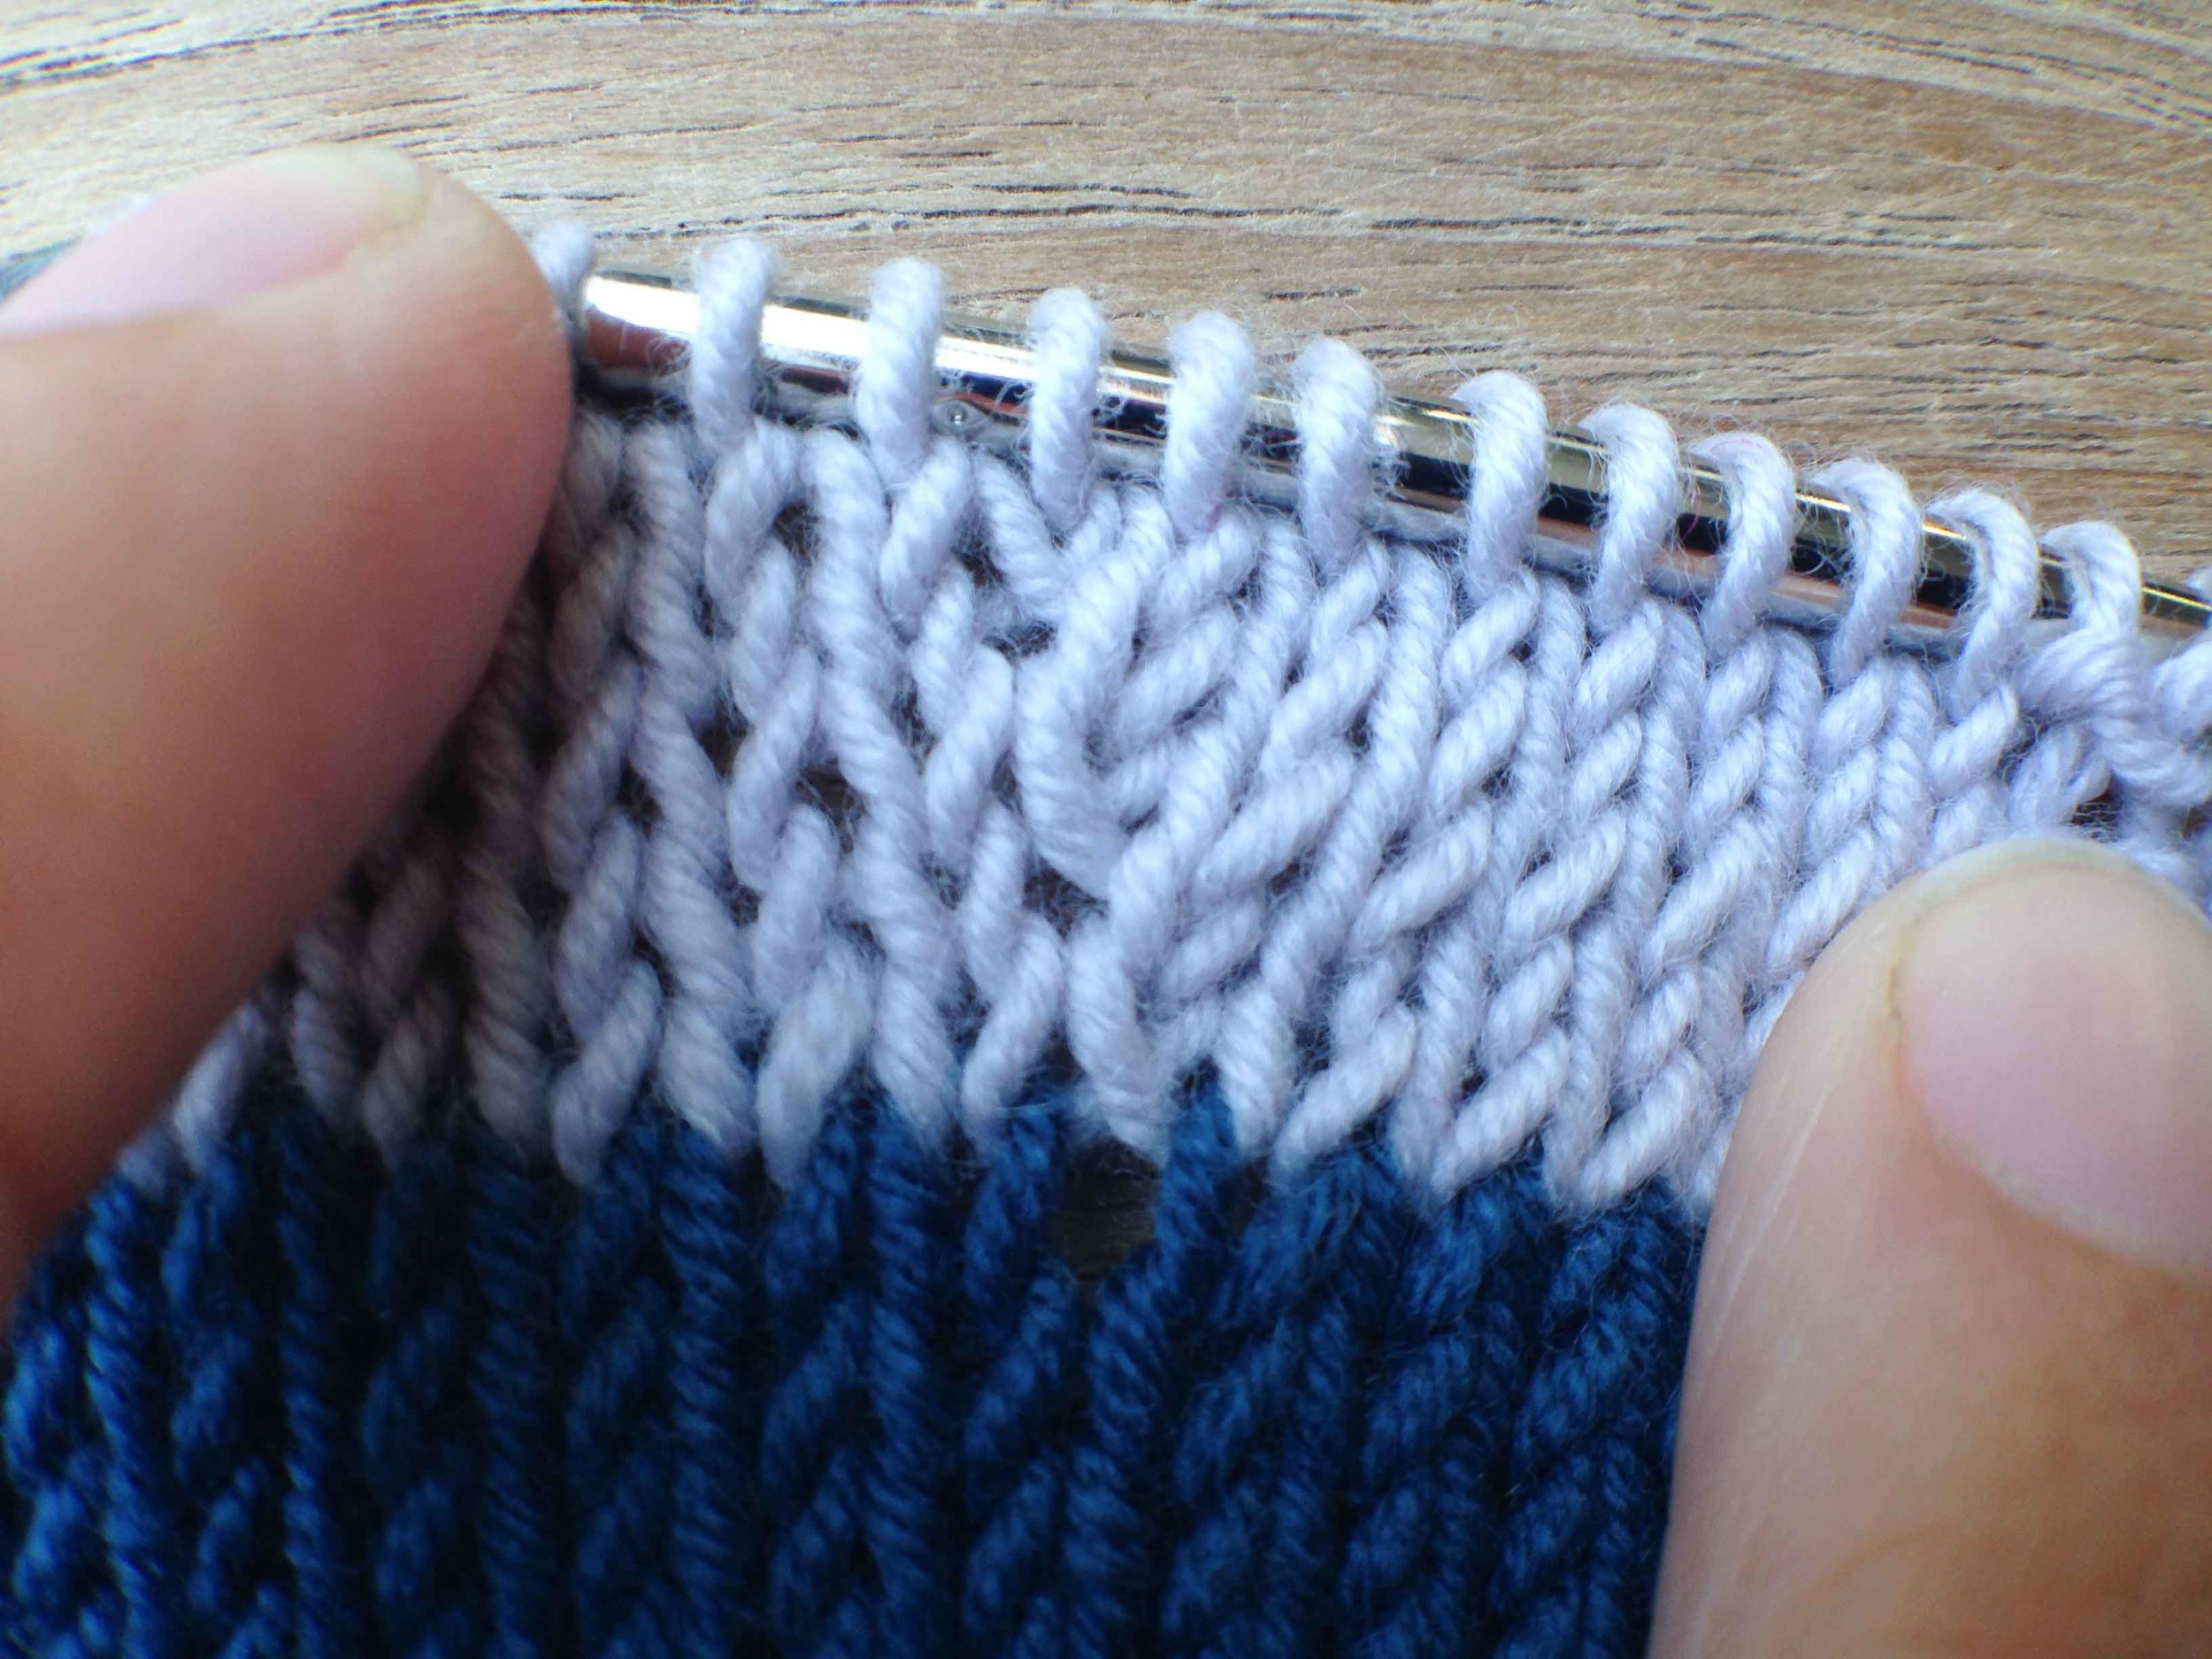
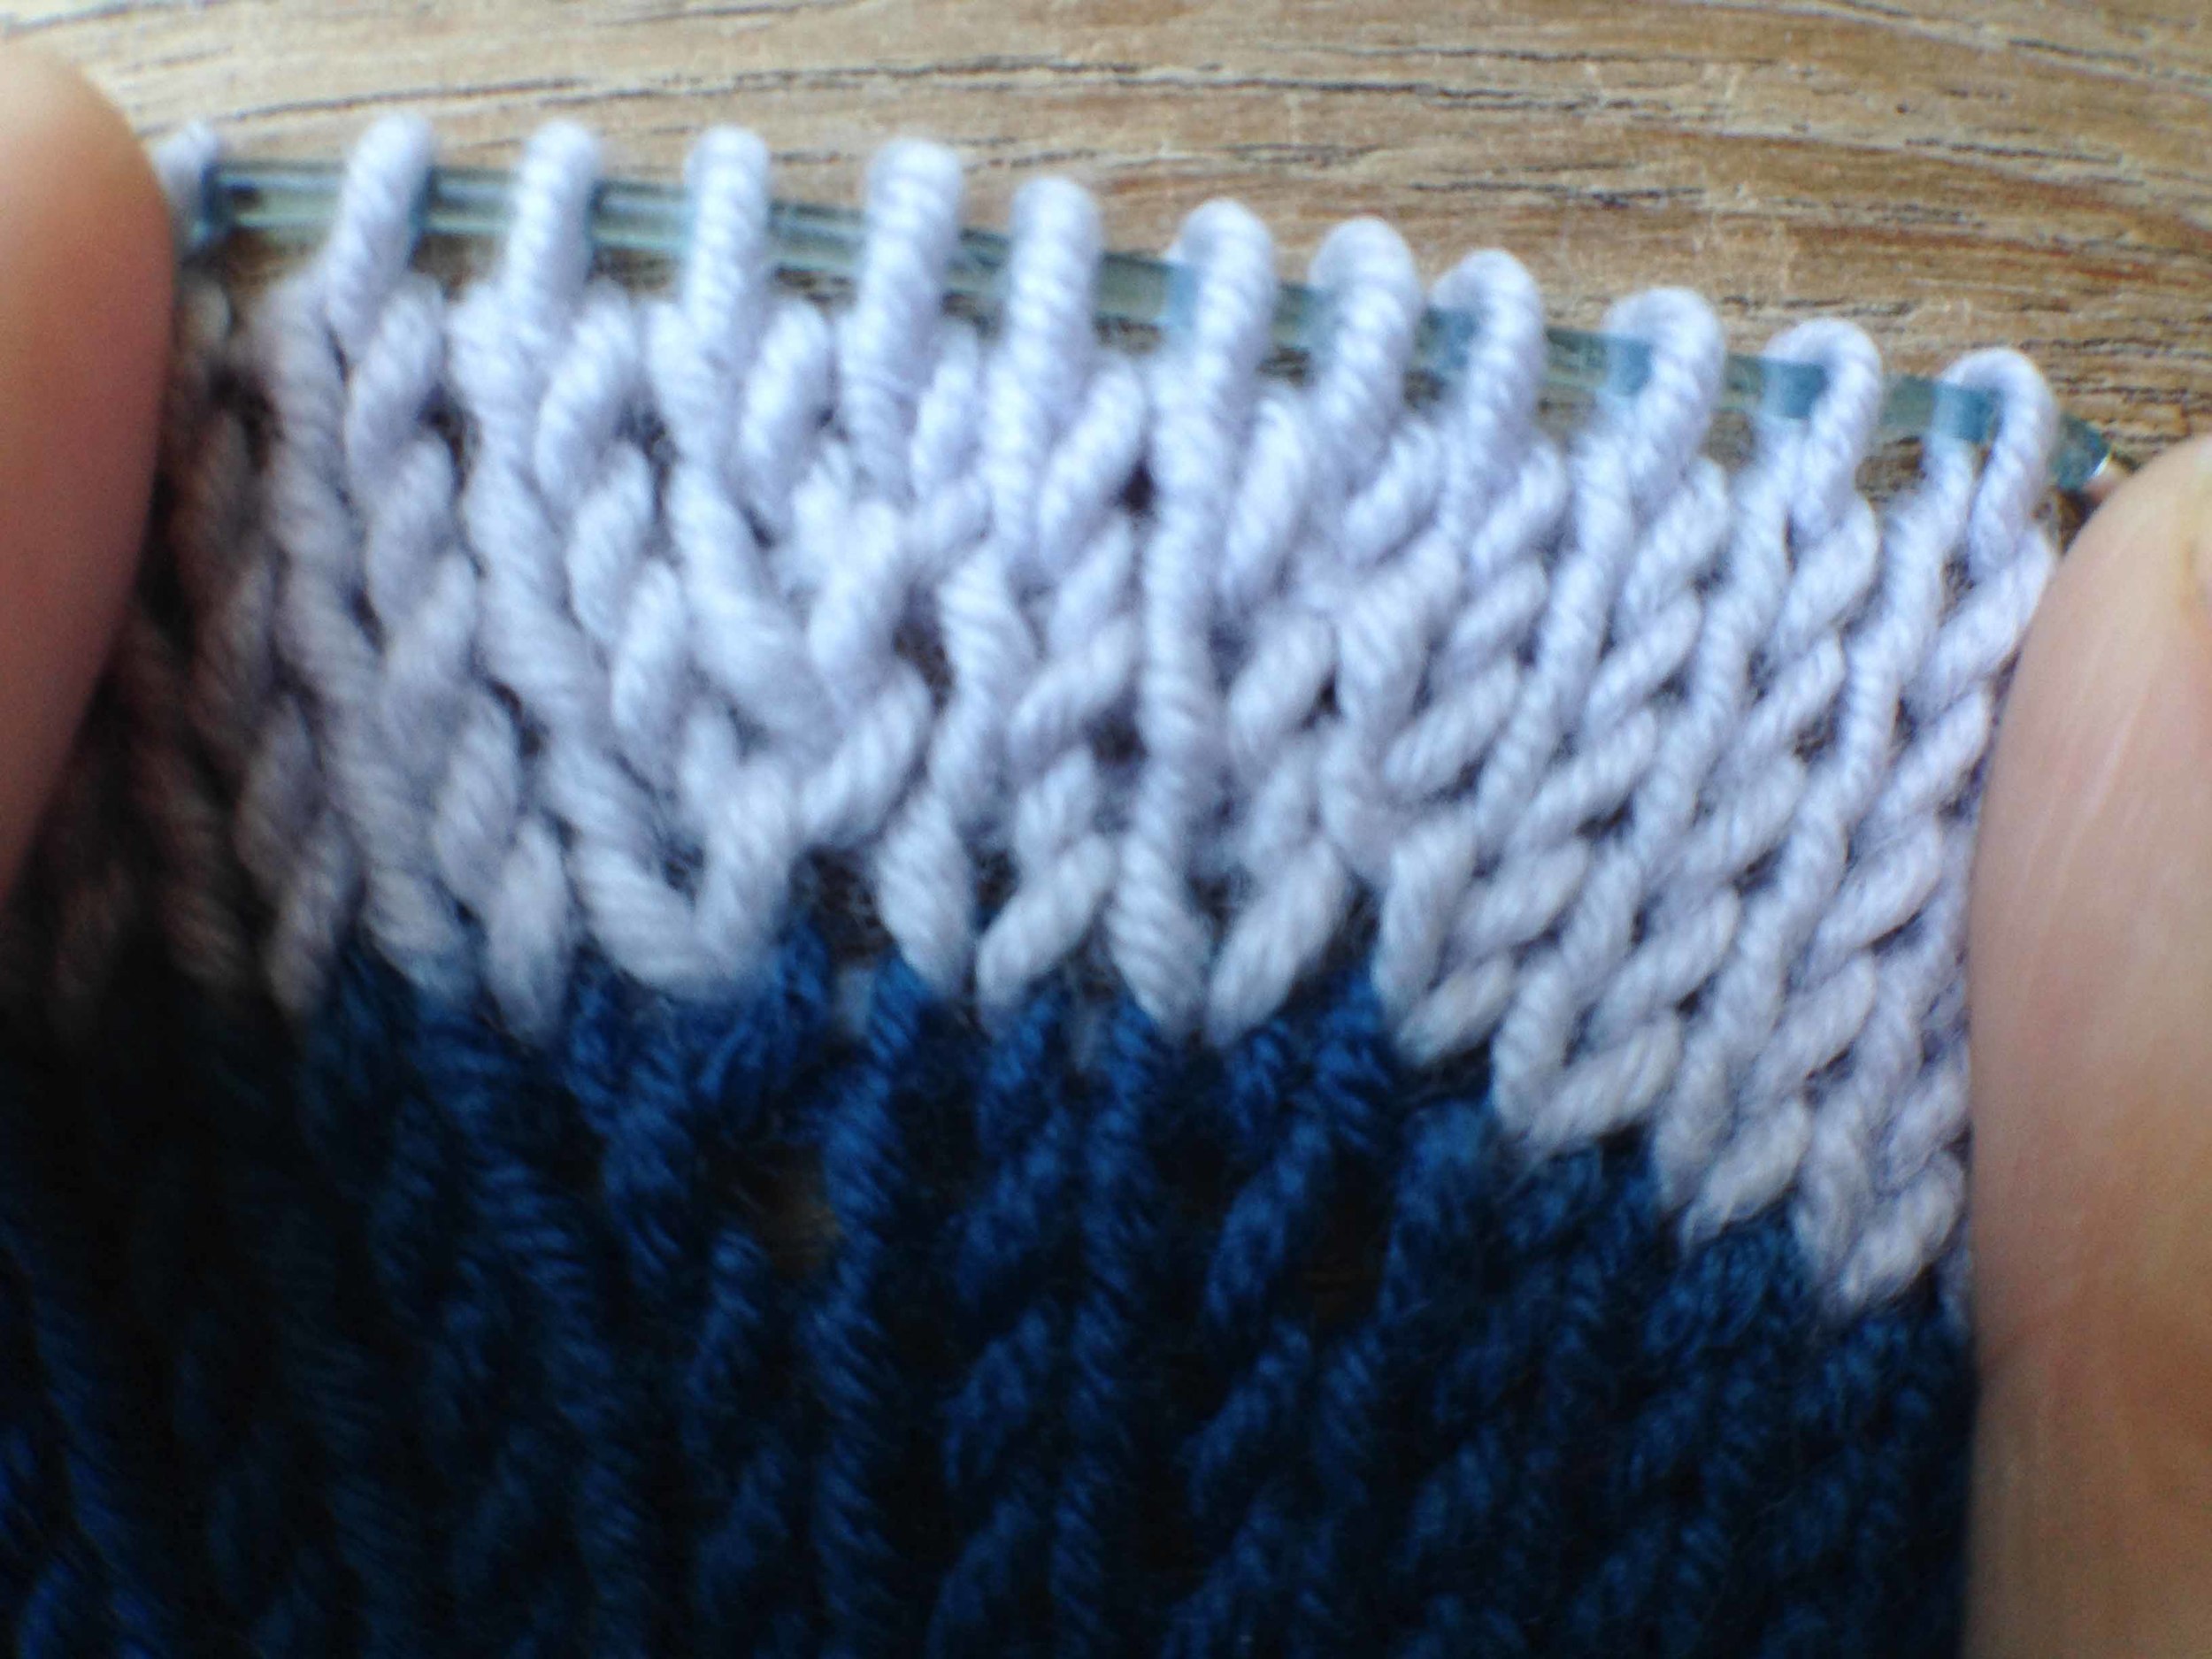
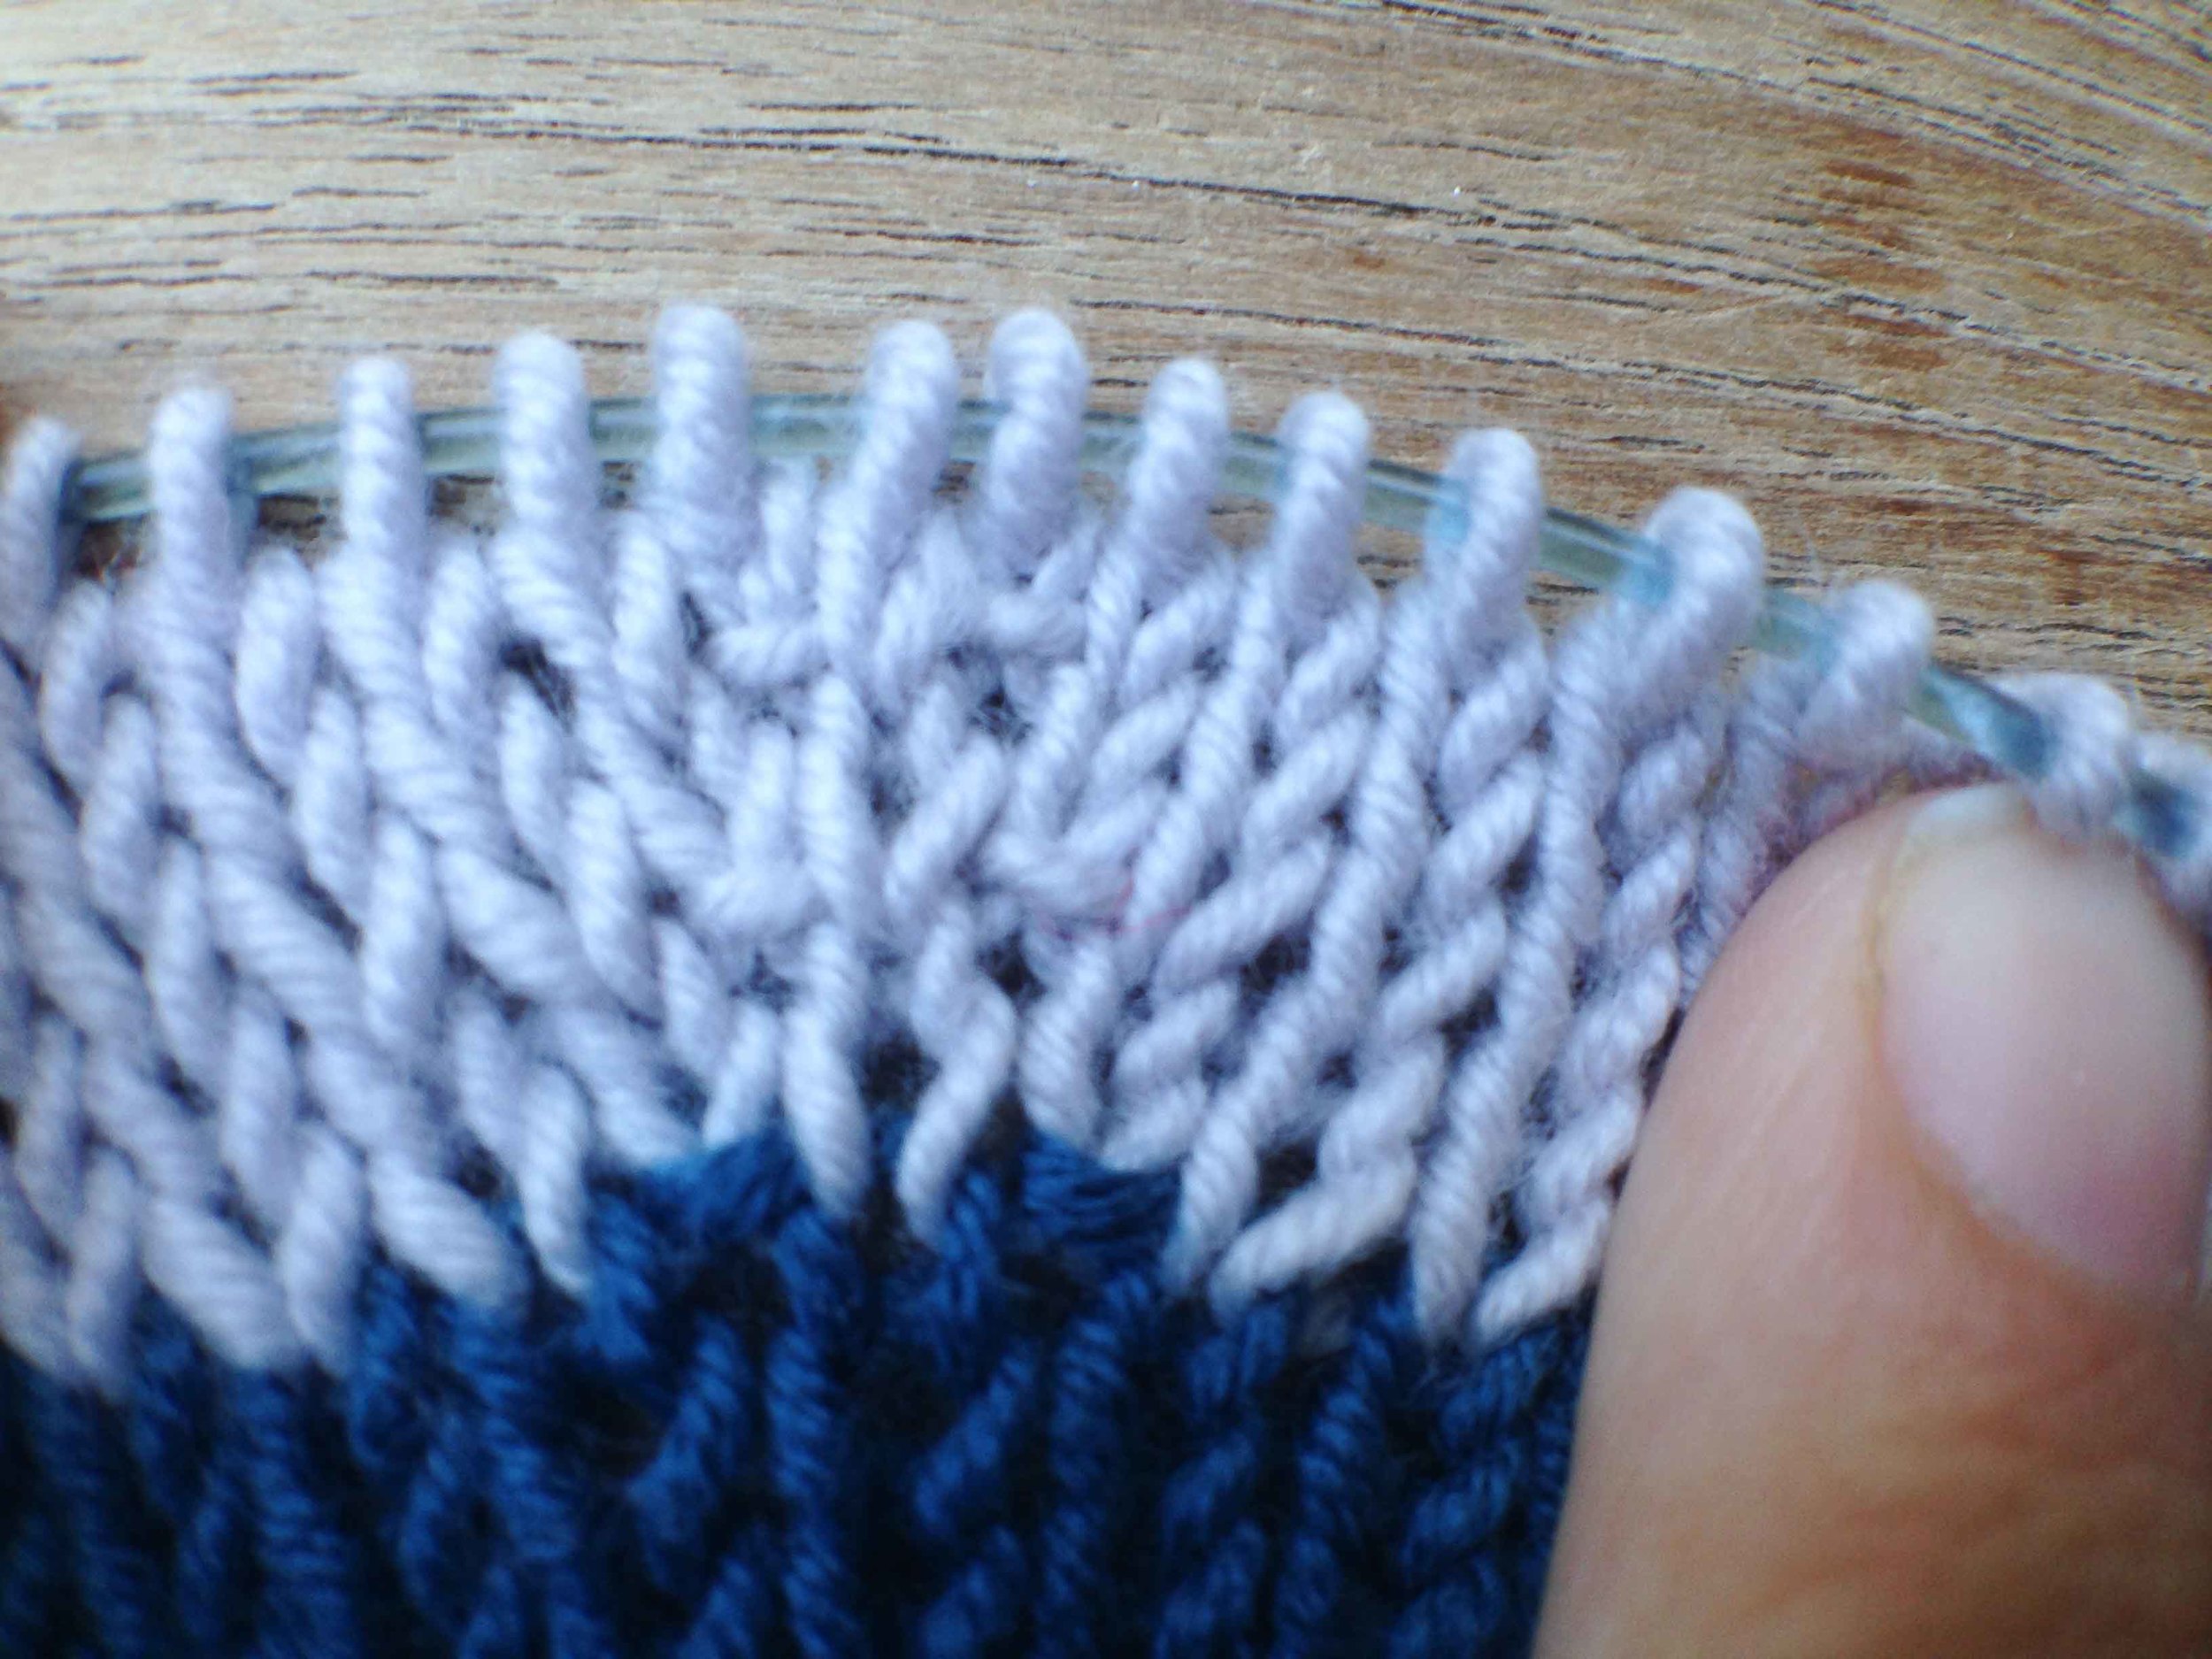
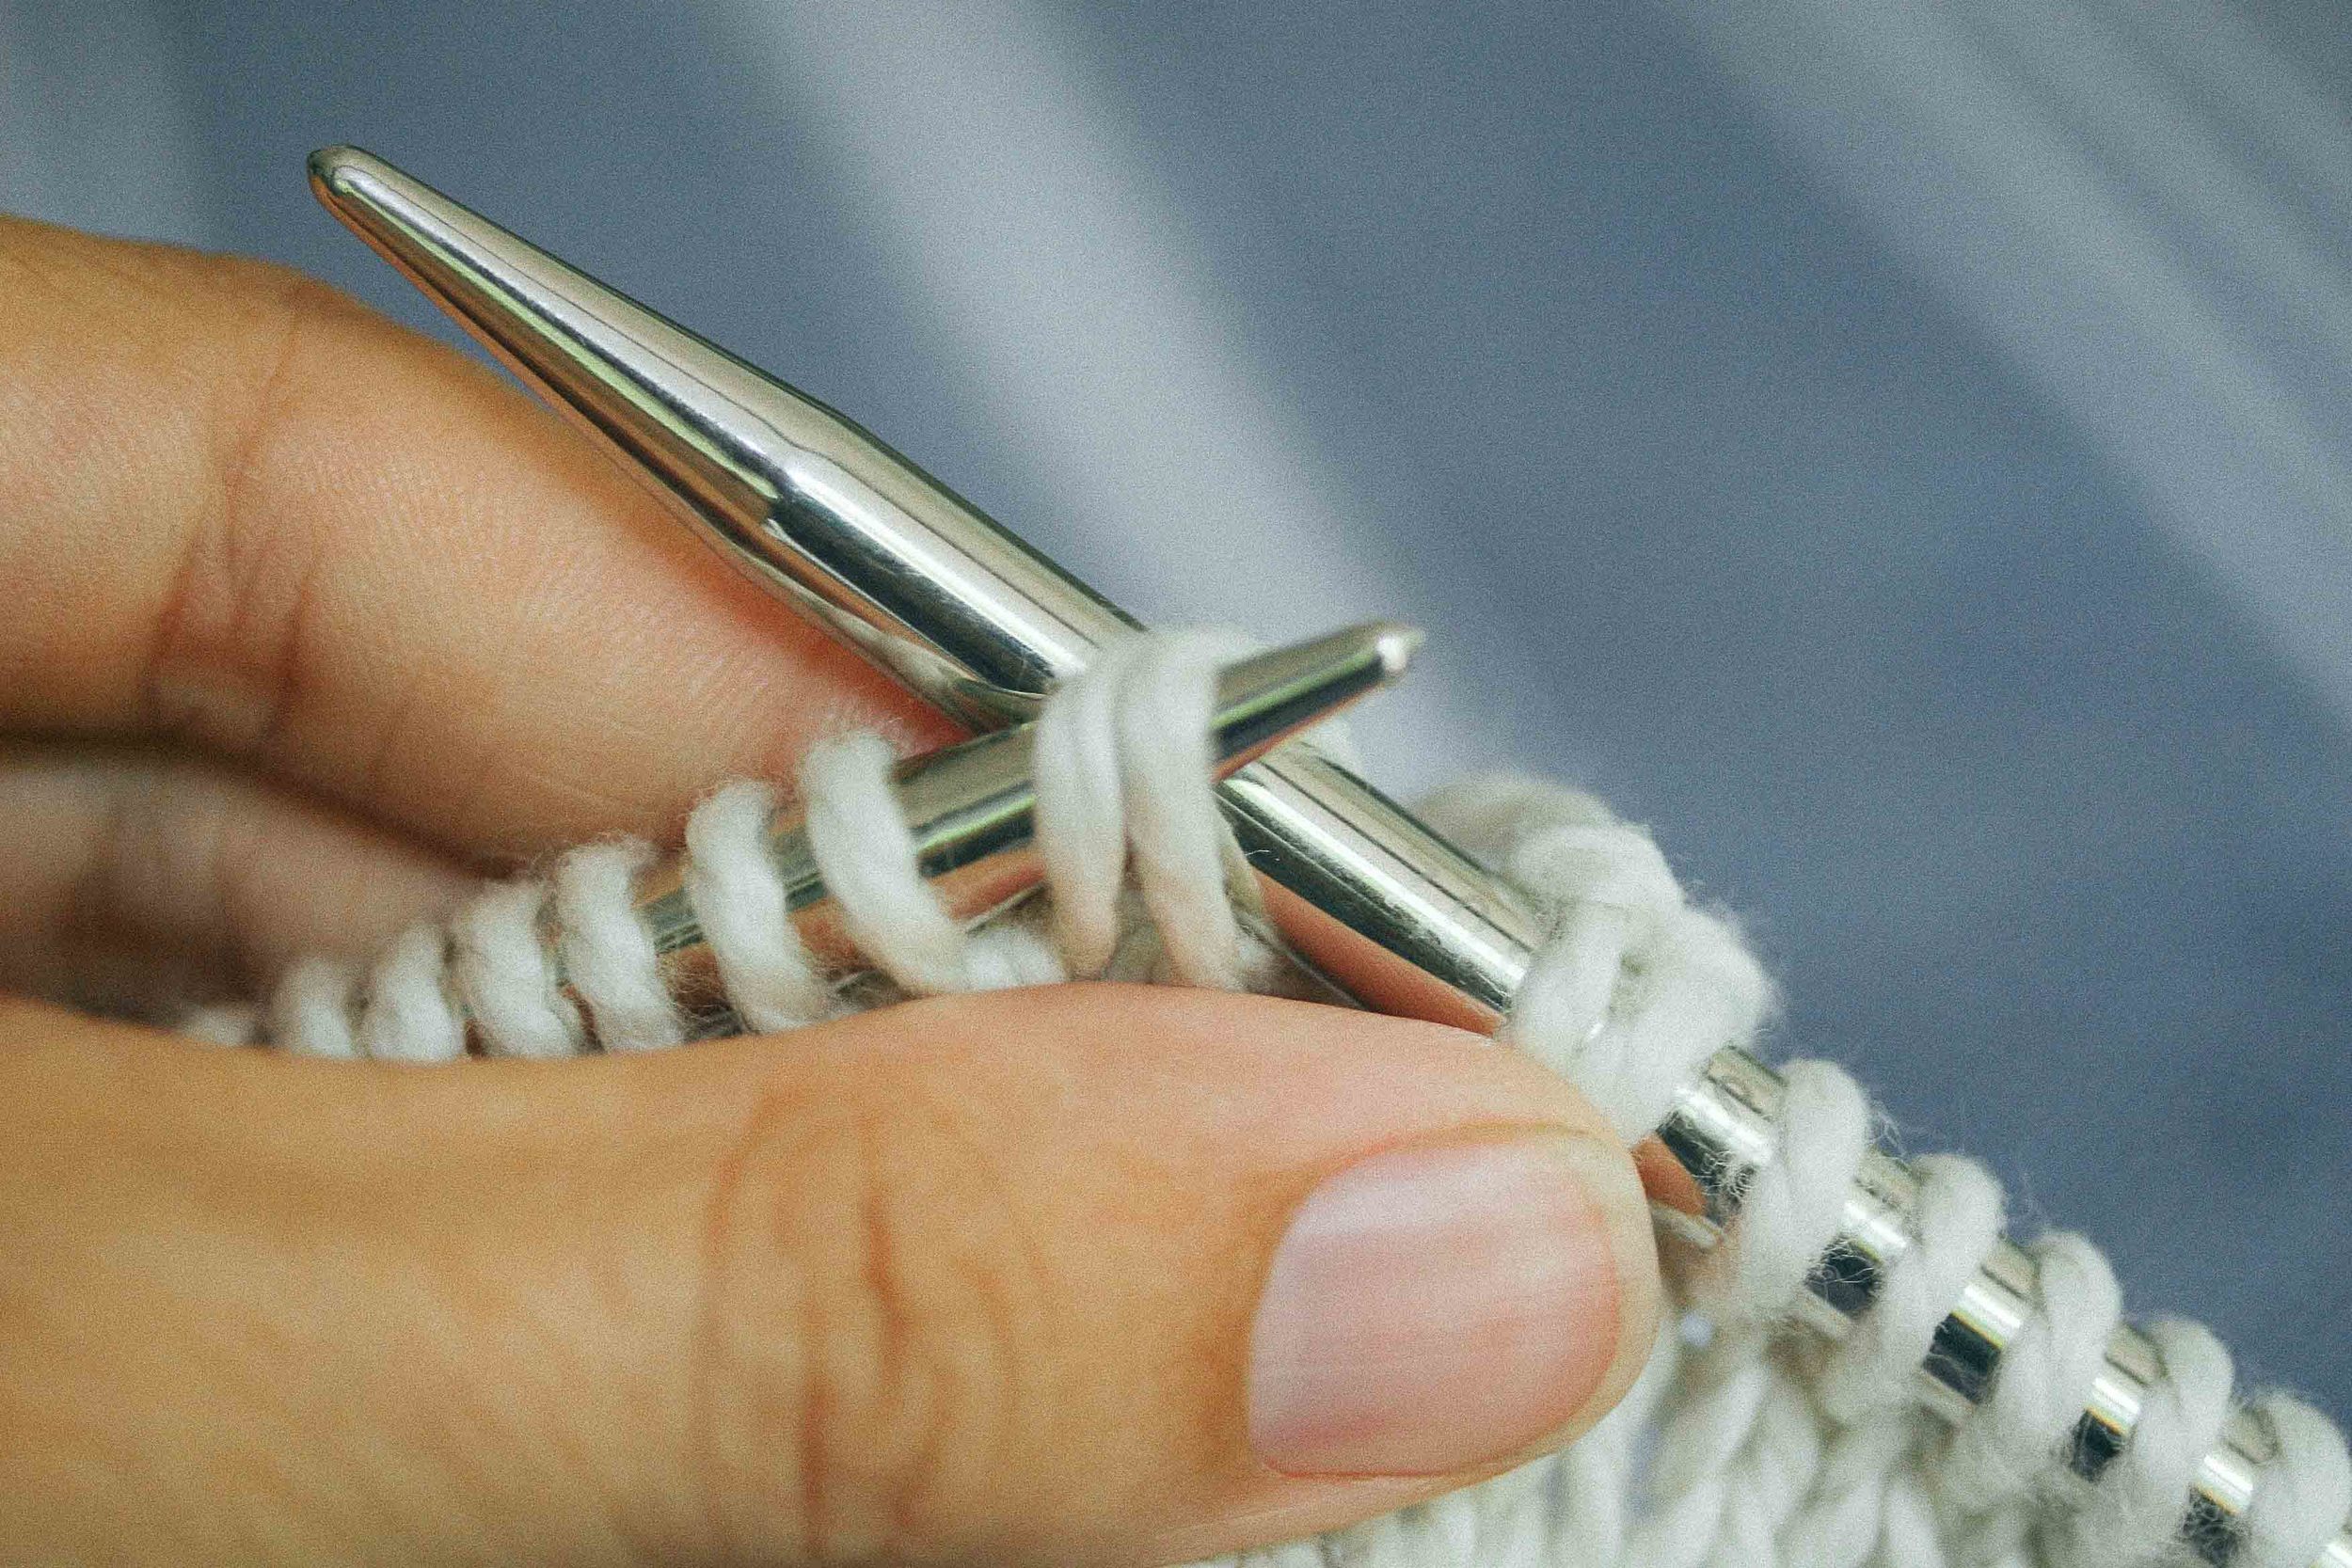
So I finally found the time and space to cut the knitting. The delay was more about finding time when I had clean fingernails, and someone to take a photo for me, than an issue with the steek. Long term camping is not always very glamourous. Especially in the rain - and we have had a lot of rain in the last week. The dirt gets so stuck under your nails, and ingrained in your finger tips that only a good soaking will get it out. And there is nowhere to soak.

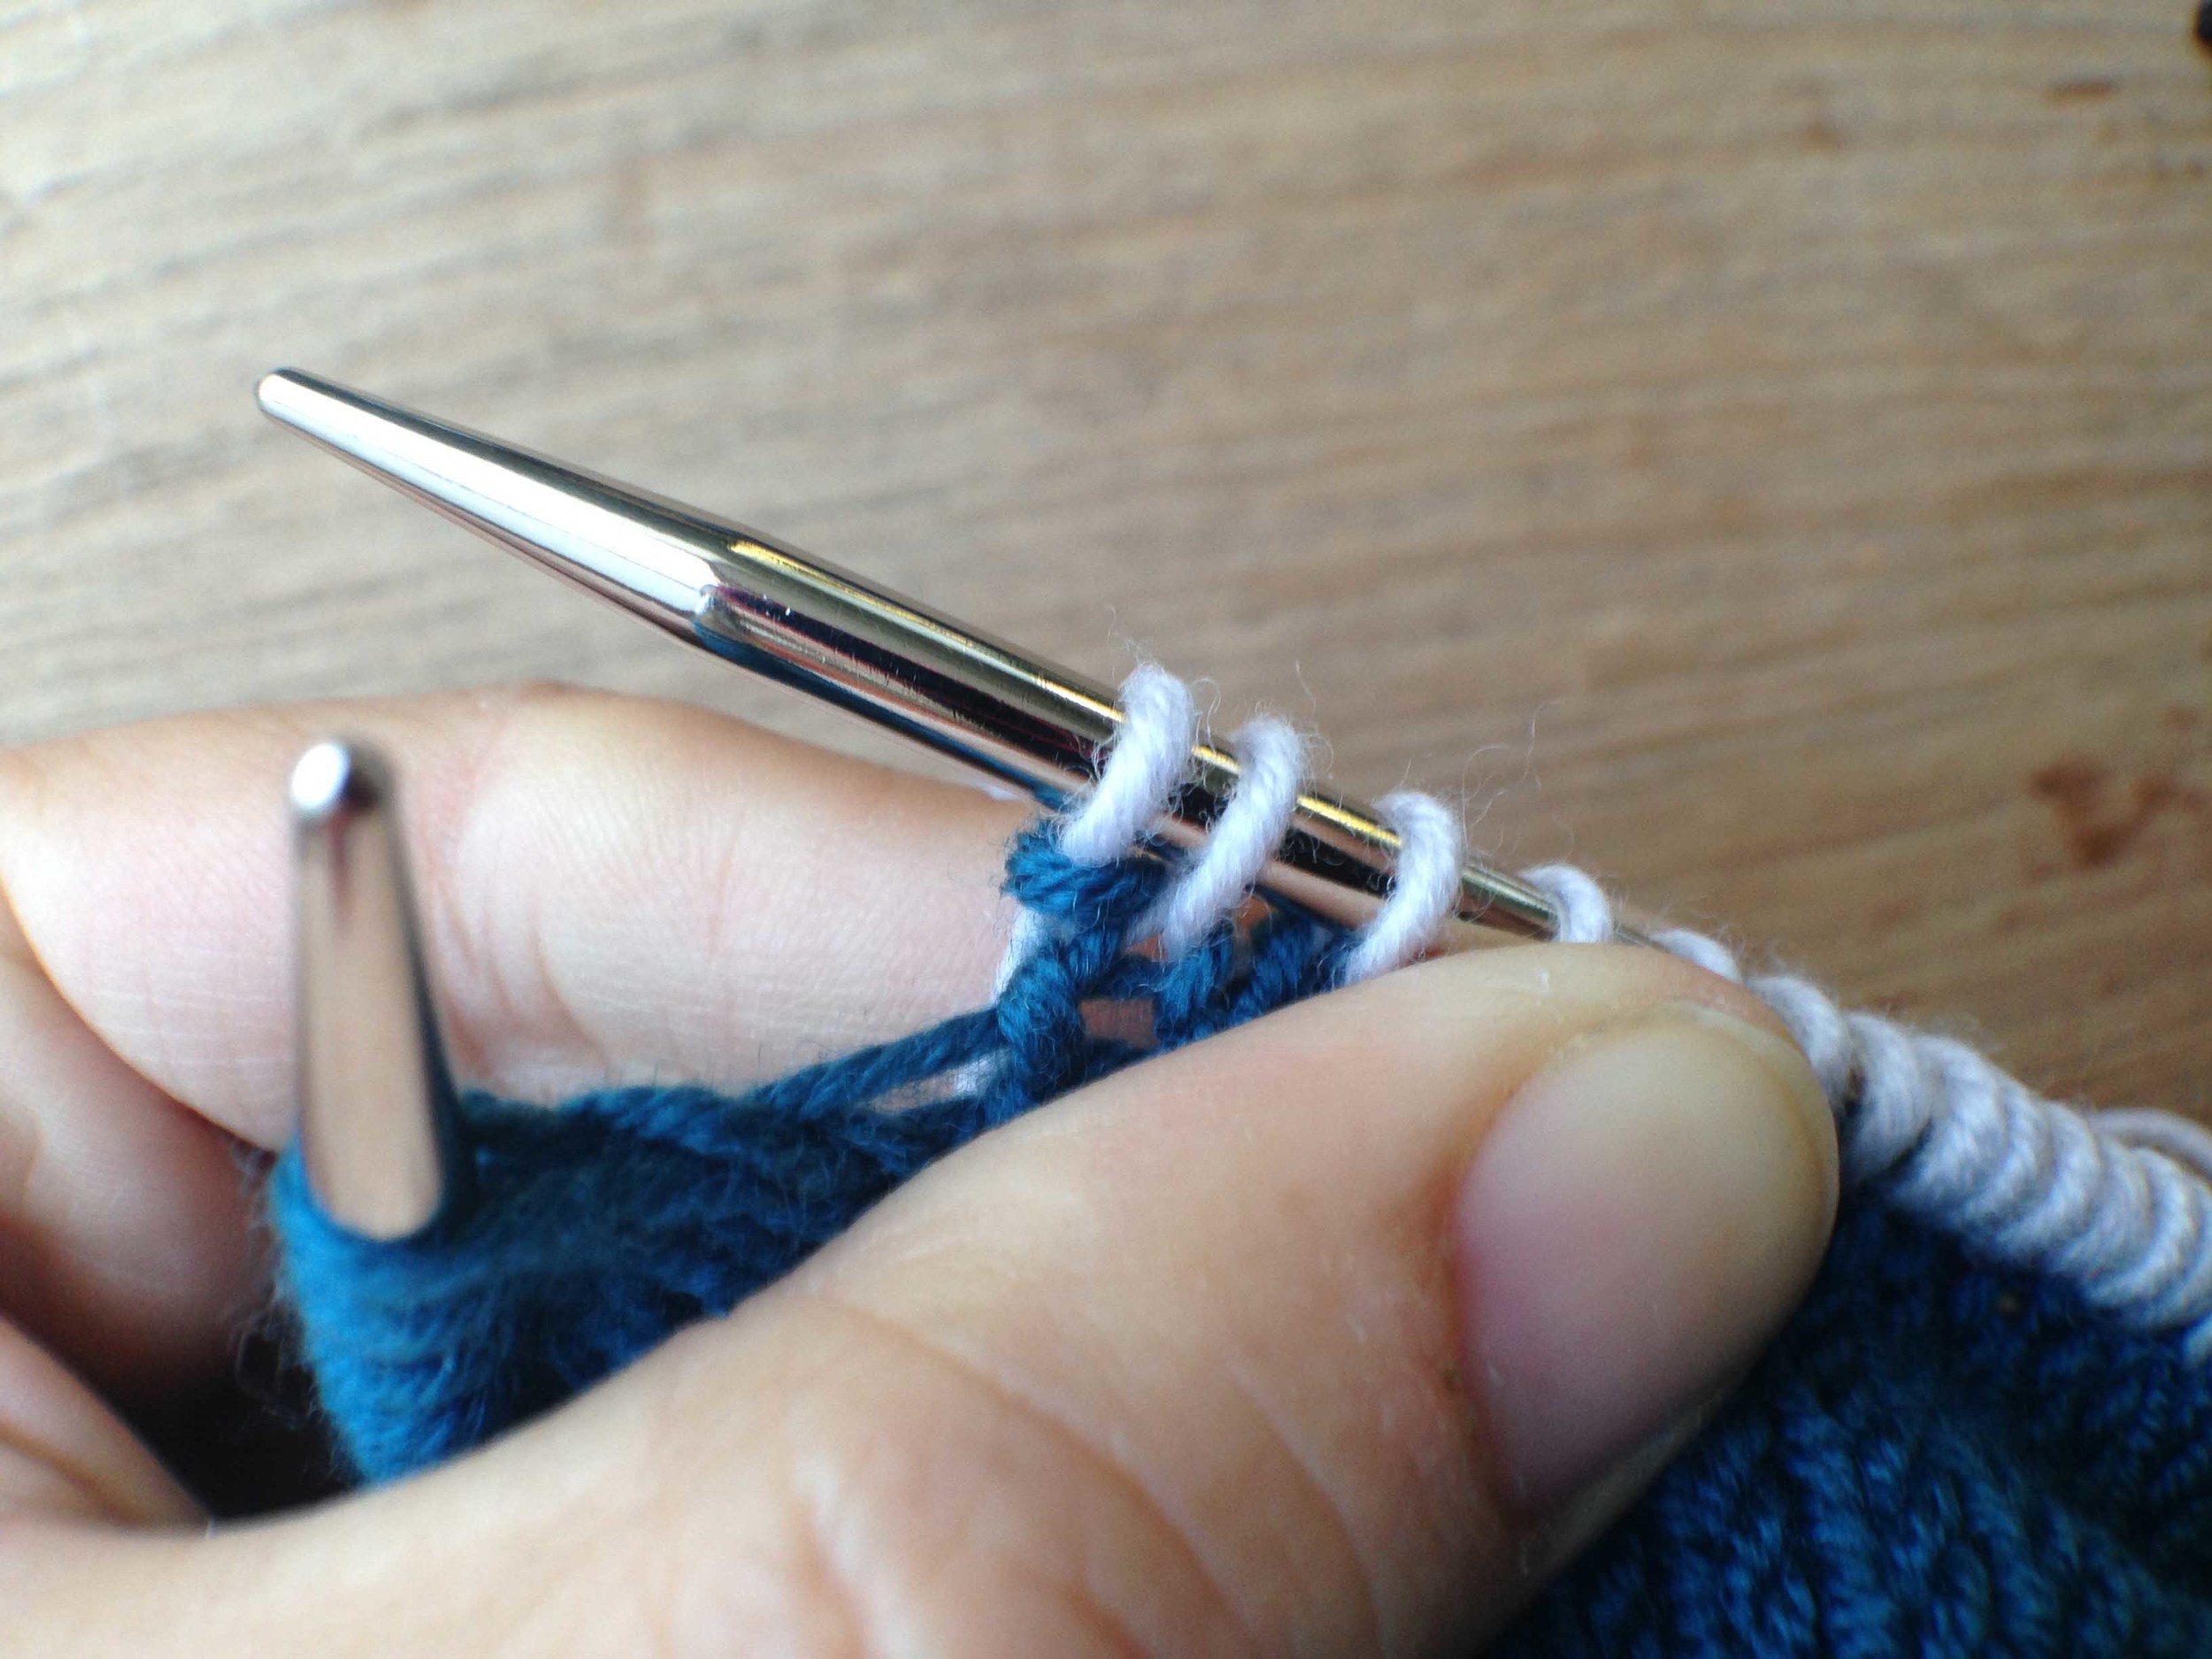
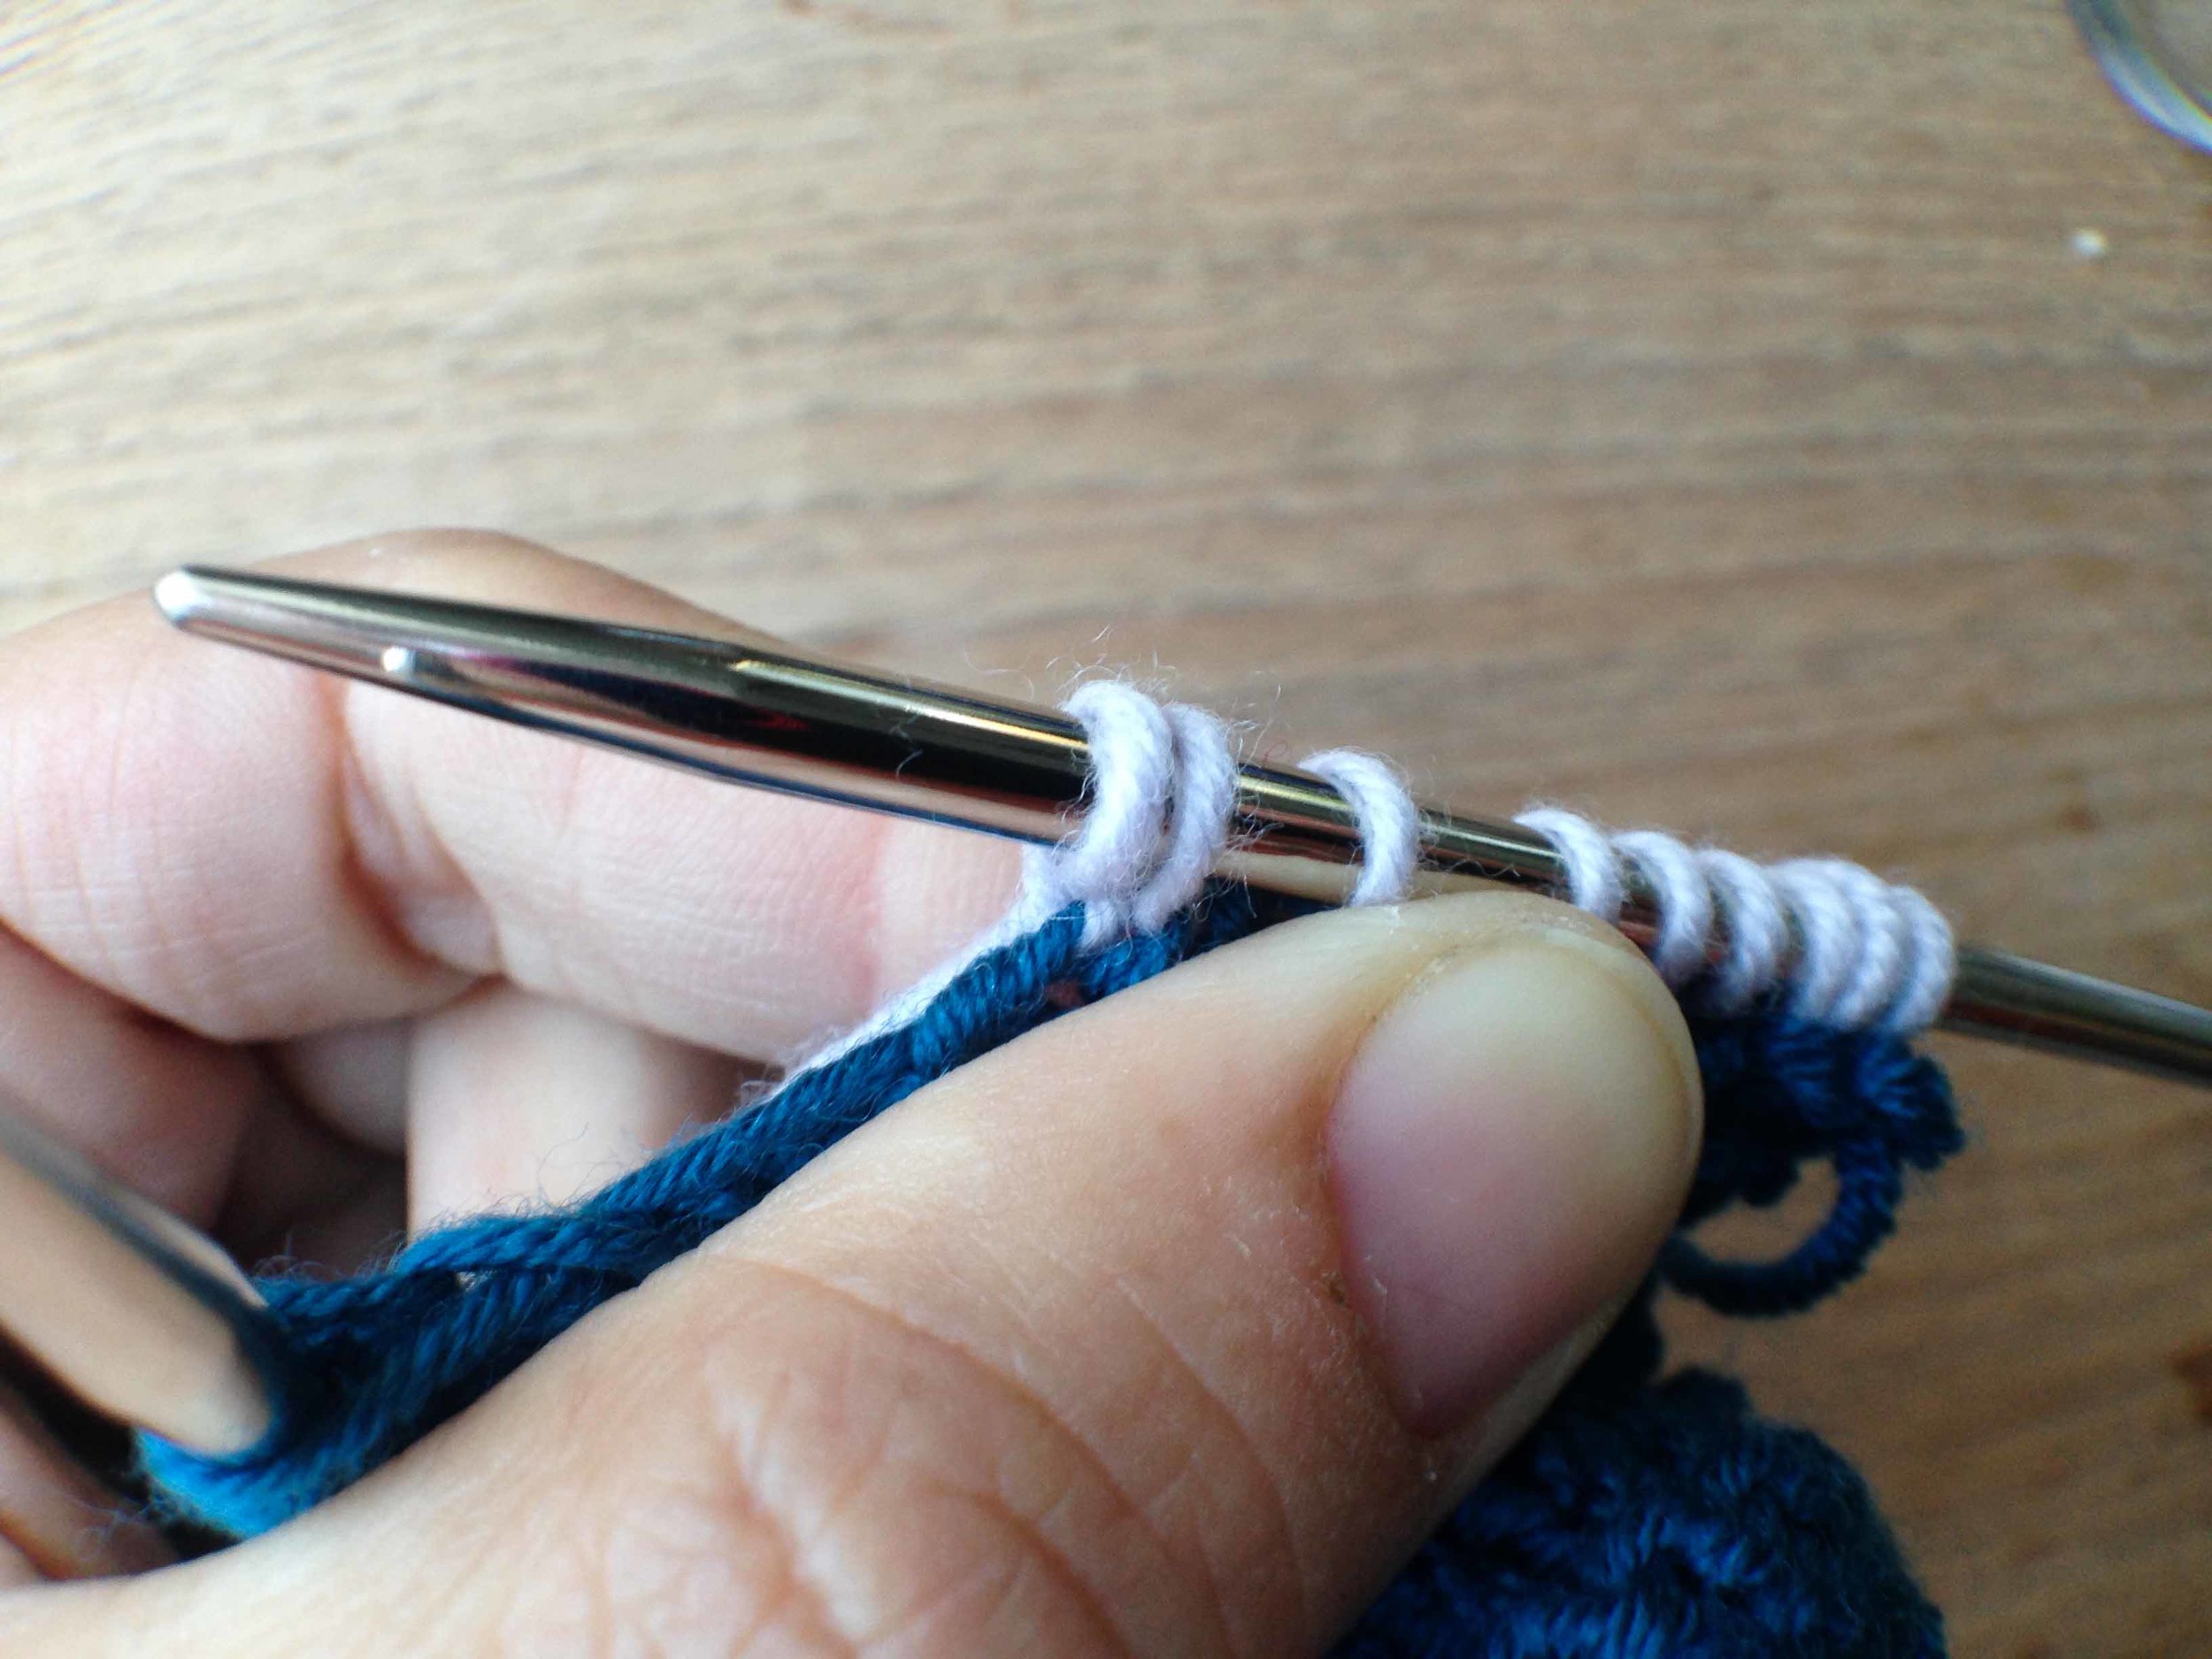
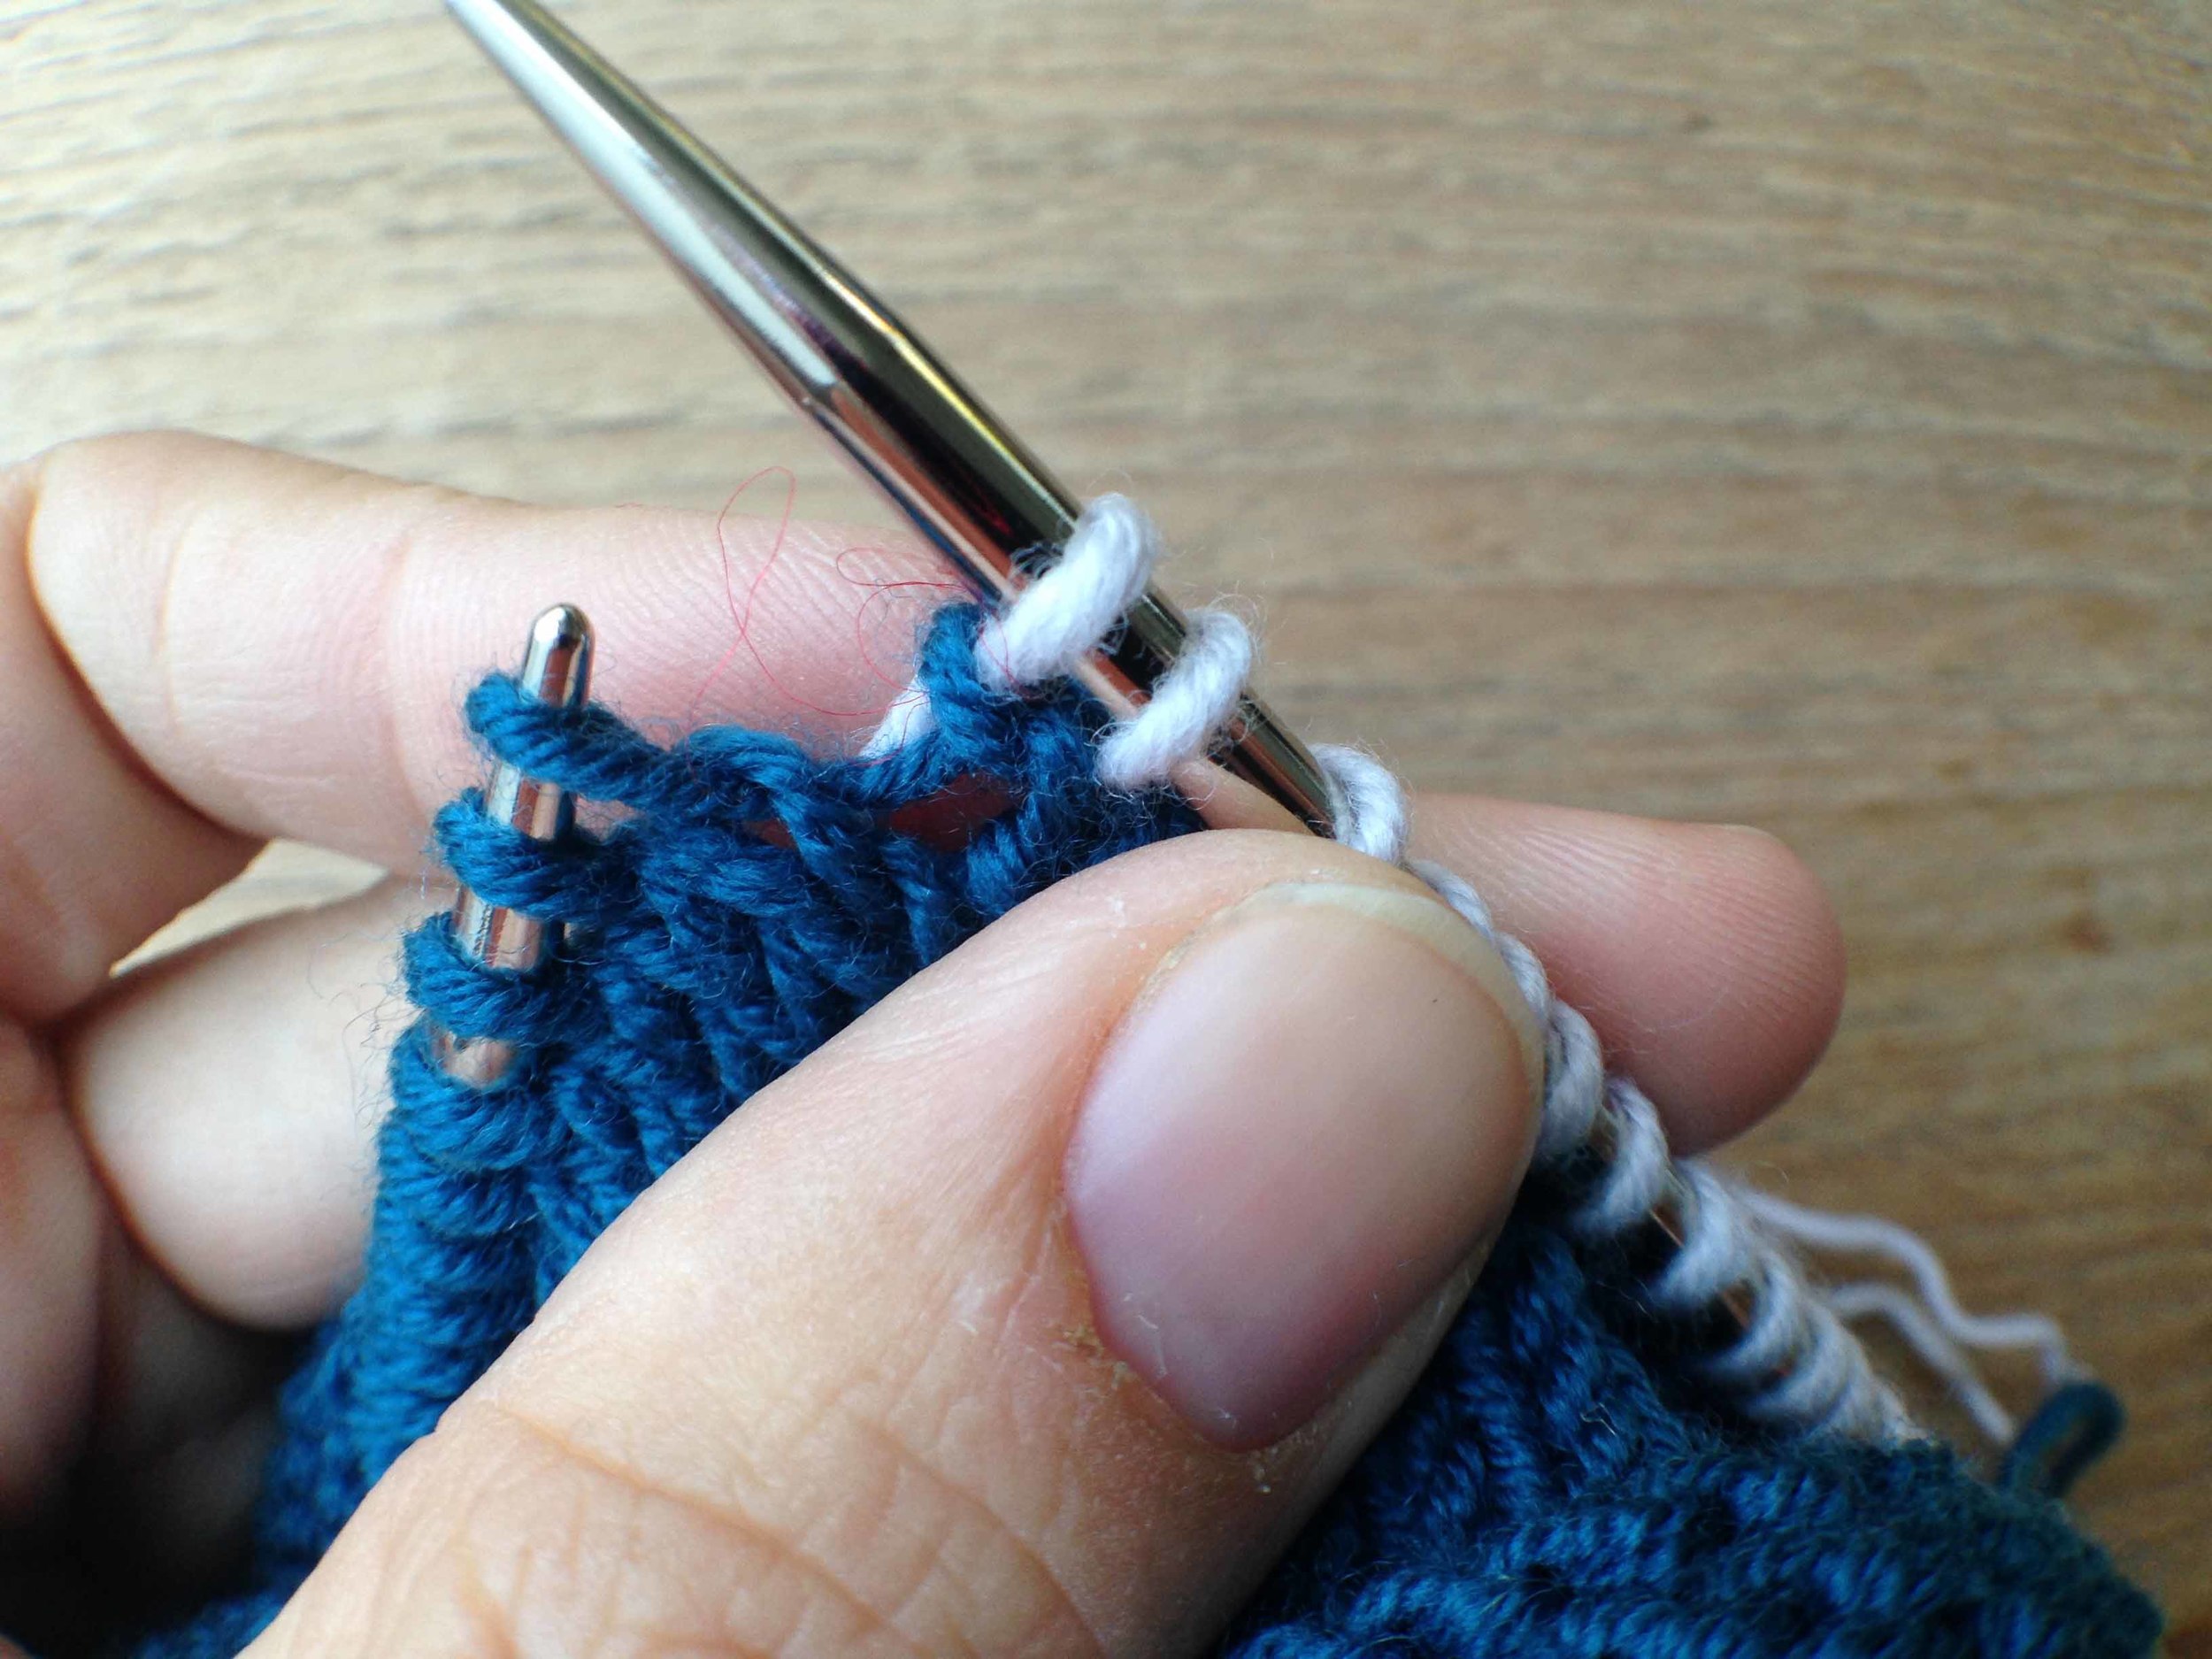
I digress. With the help of my middle child, I cut the steek! And I have to say that it is one of the most fun things you can do as a knitter. Even as I write this down I can hear that it sounds a bit nanna. But it's not. It feels devilish. Like smoking at the milk bar around the corner from your house when you were 16. Not that I would have done something like that ;).  

More digression.

This post is not a how-to. More a progress report. 

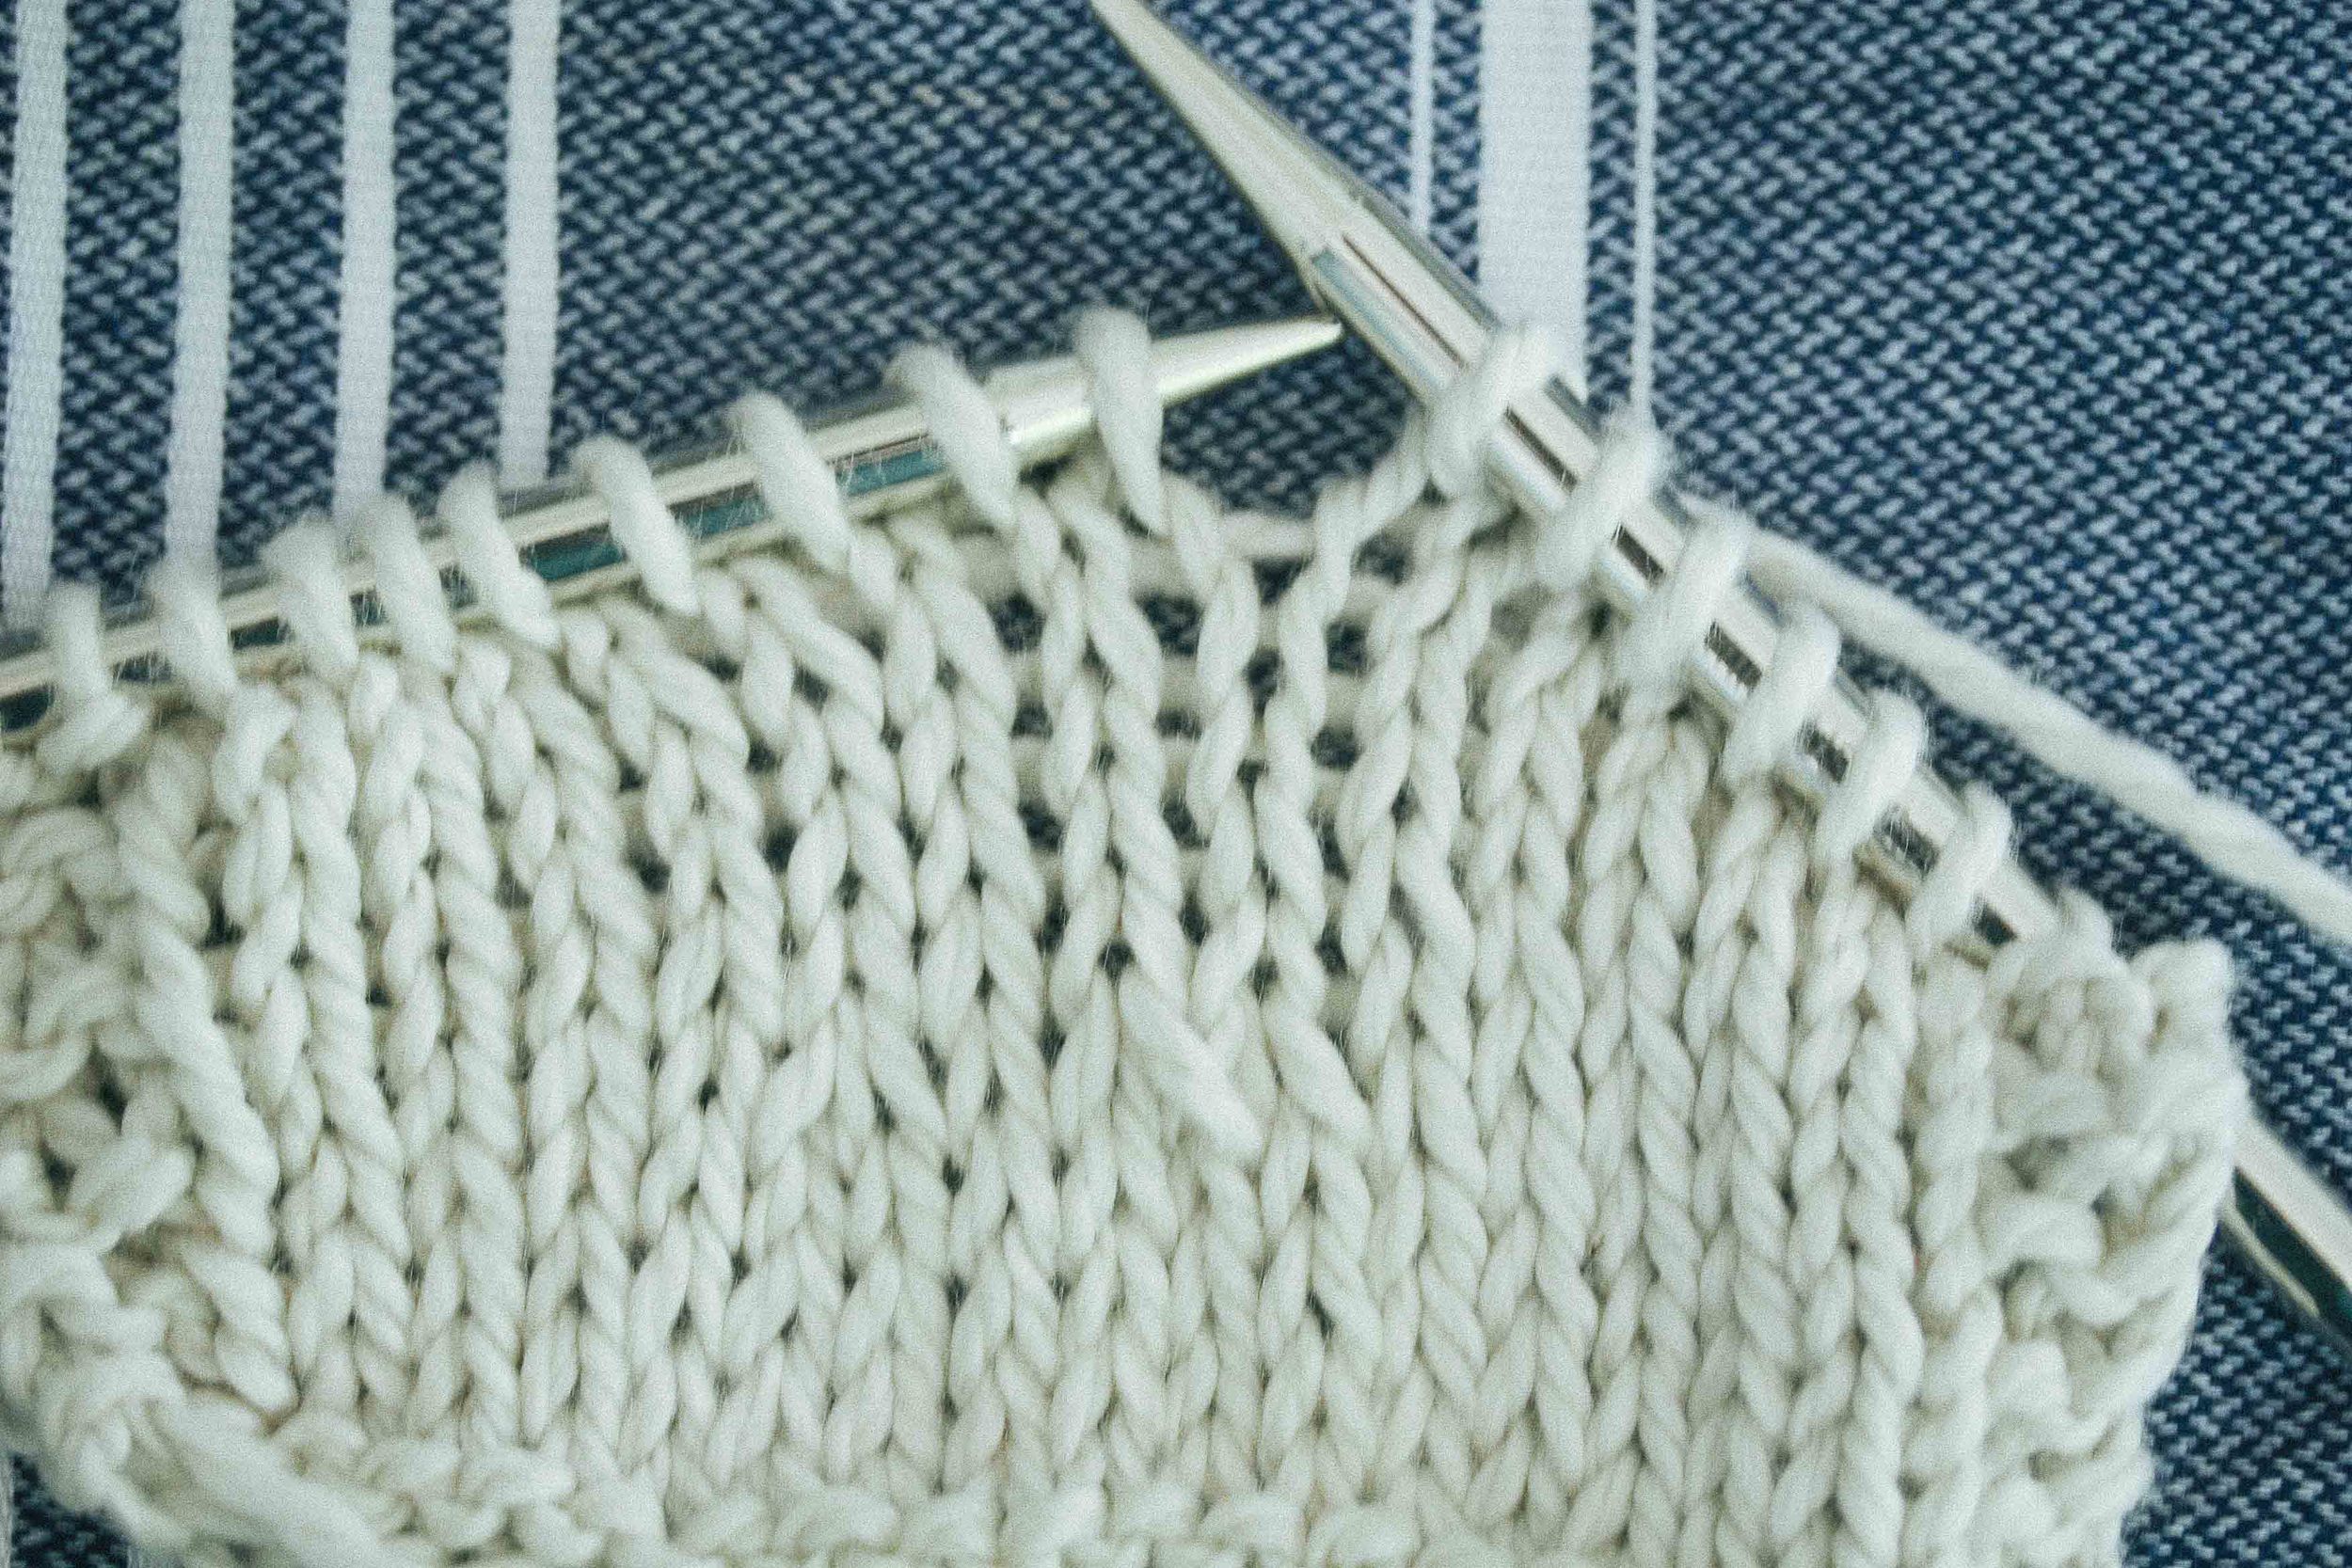
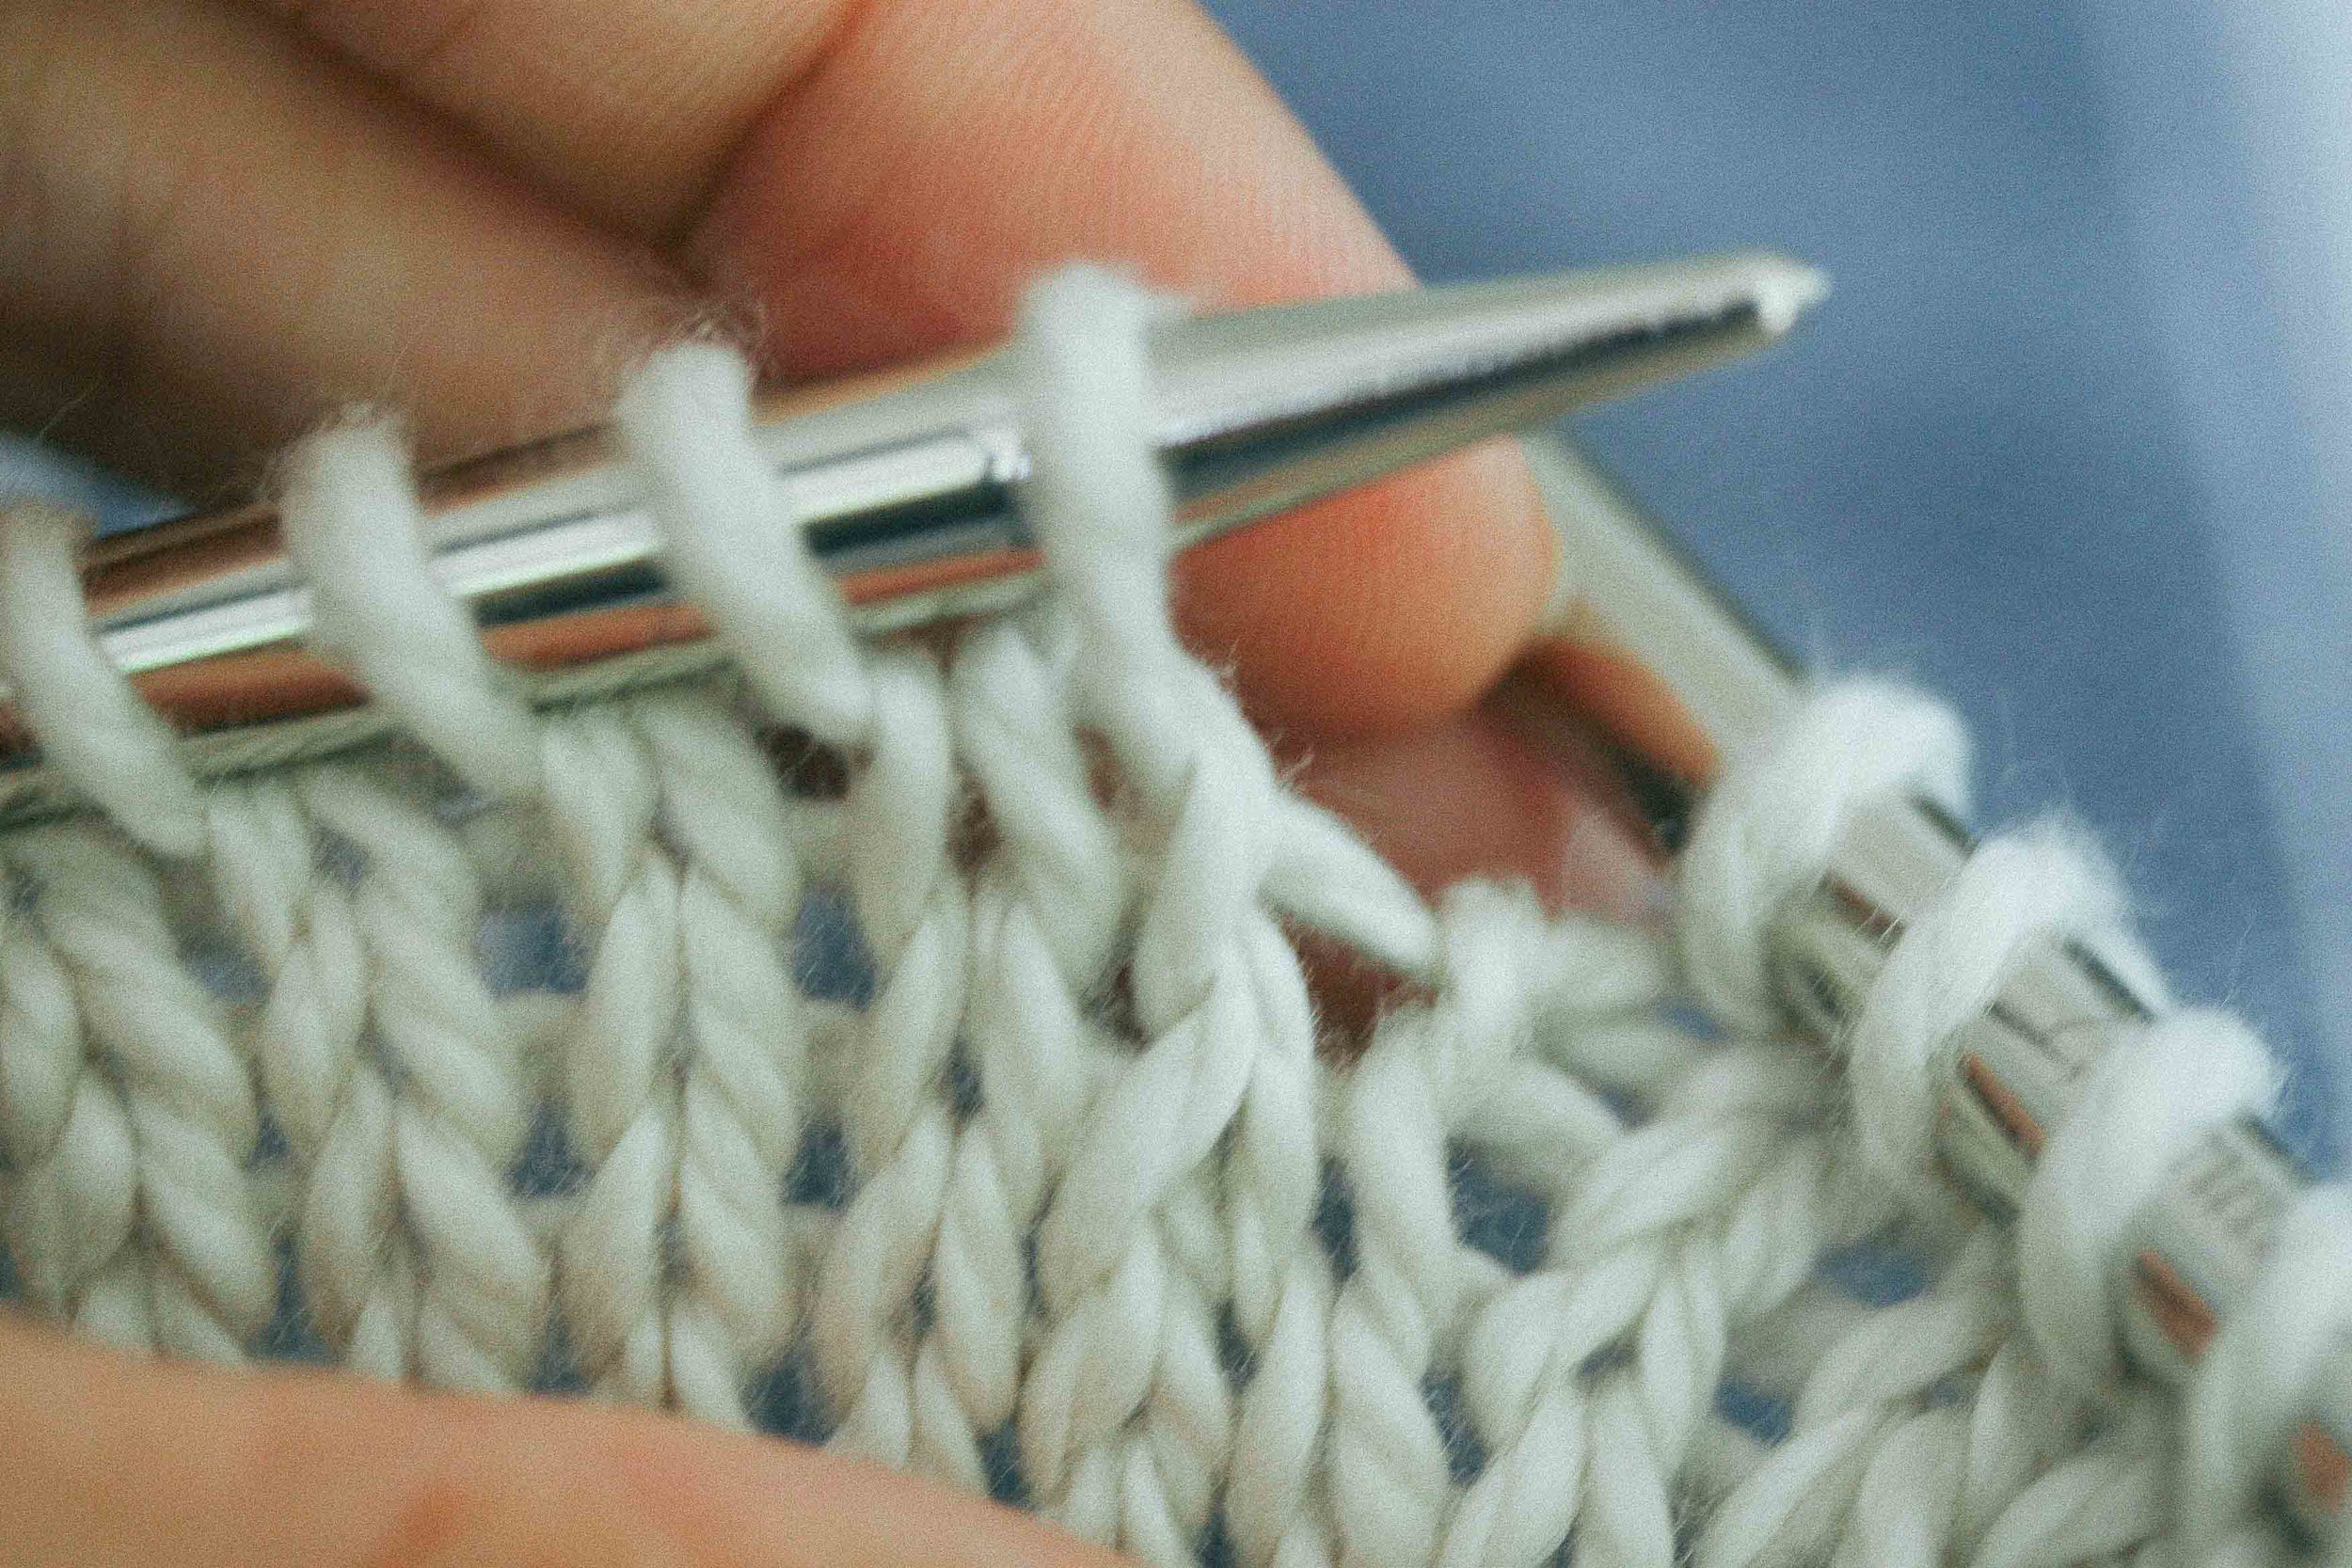
I have posted a short instagram video clip if you want to watch or have not yet seen a steek live. 

And if you were after a how-to I have two options for you.

1. In person. Sadly/happily our Steeking workshop, which is taught by Julia Billings at this year's retreat, is fully booked out. I'm thinking we should possibly repeat it next year as it was so popular! In the mean time you can experience Jules teaching steeking at Sunspun in Melbourne in October. Please contact them for the details.

2. Online. Have a look at the lovely Kate Davies site where she shows you how it is done. She also has a great post on different types of finishes here.

There is also a fantastic series on steeking by Eunny Jang in her defunct blog. This was how I first got my steeking confidence. It is a great read, as is much of the rest of her site.

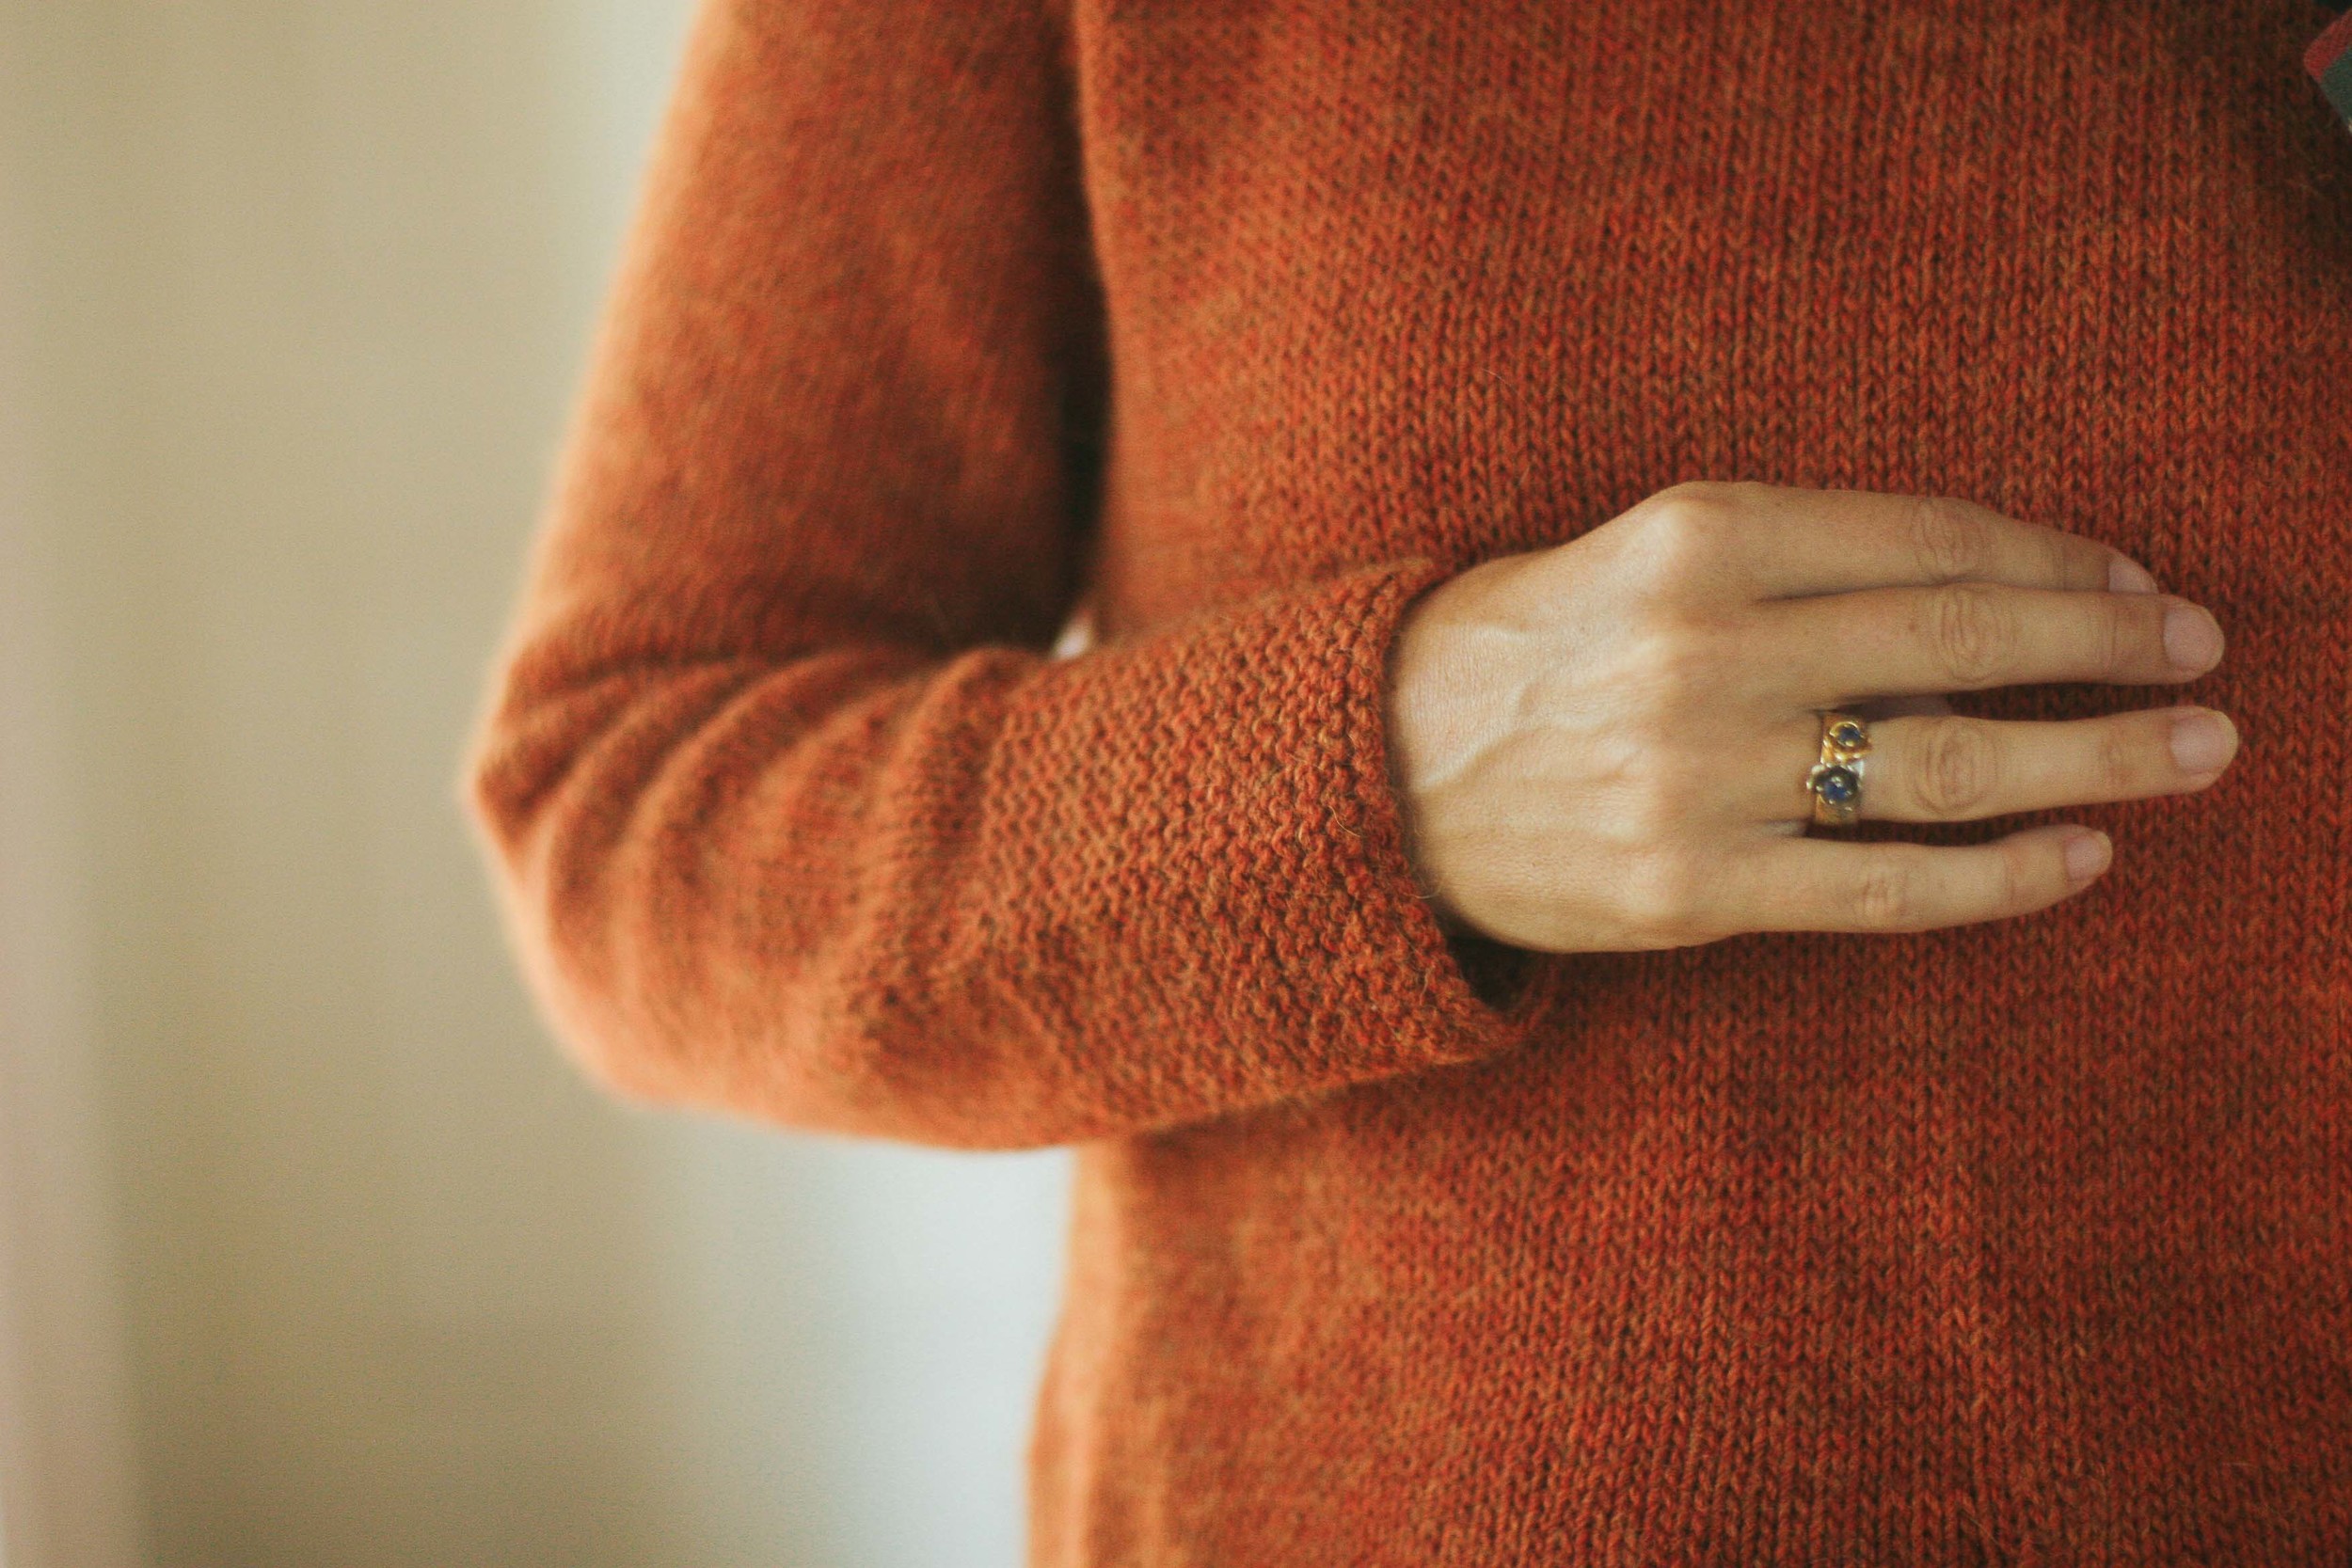
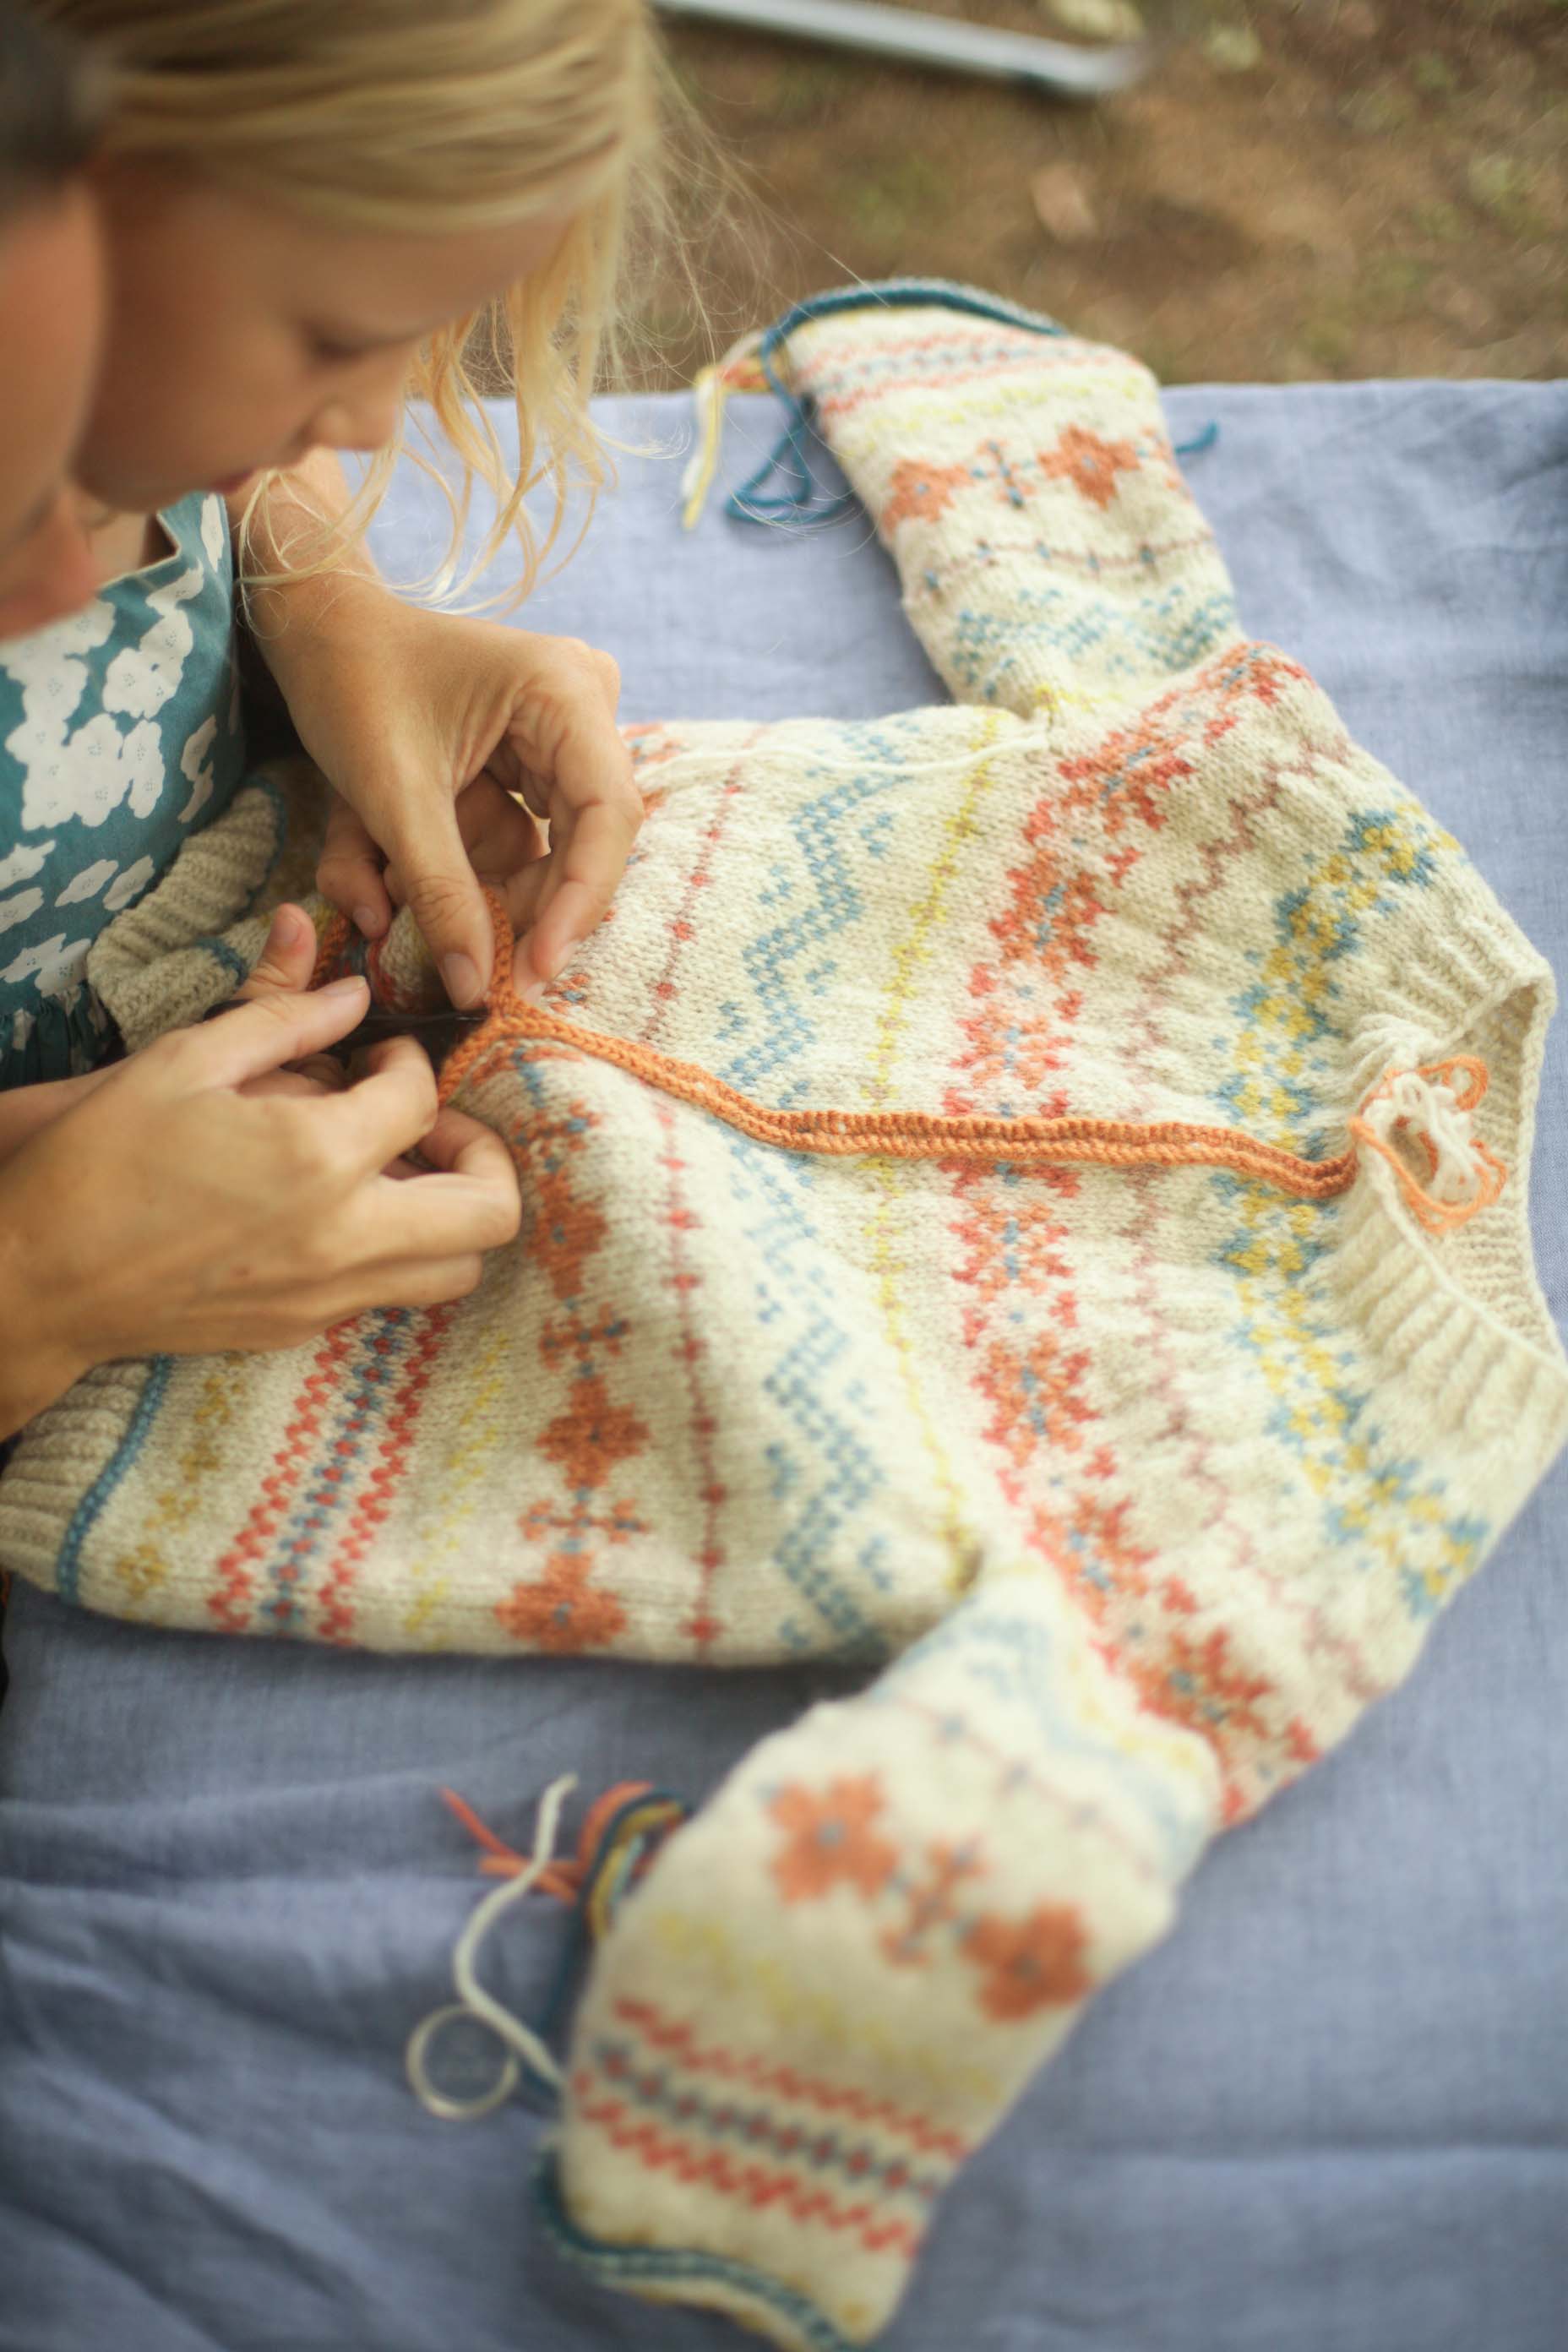
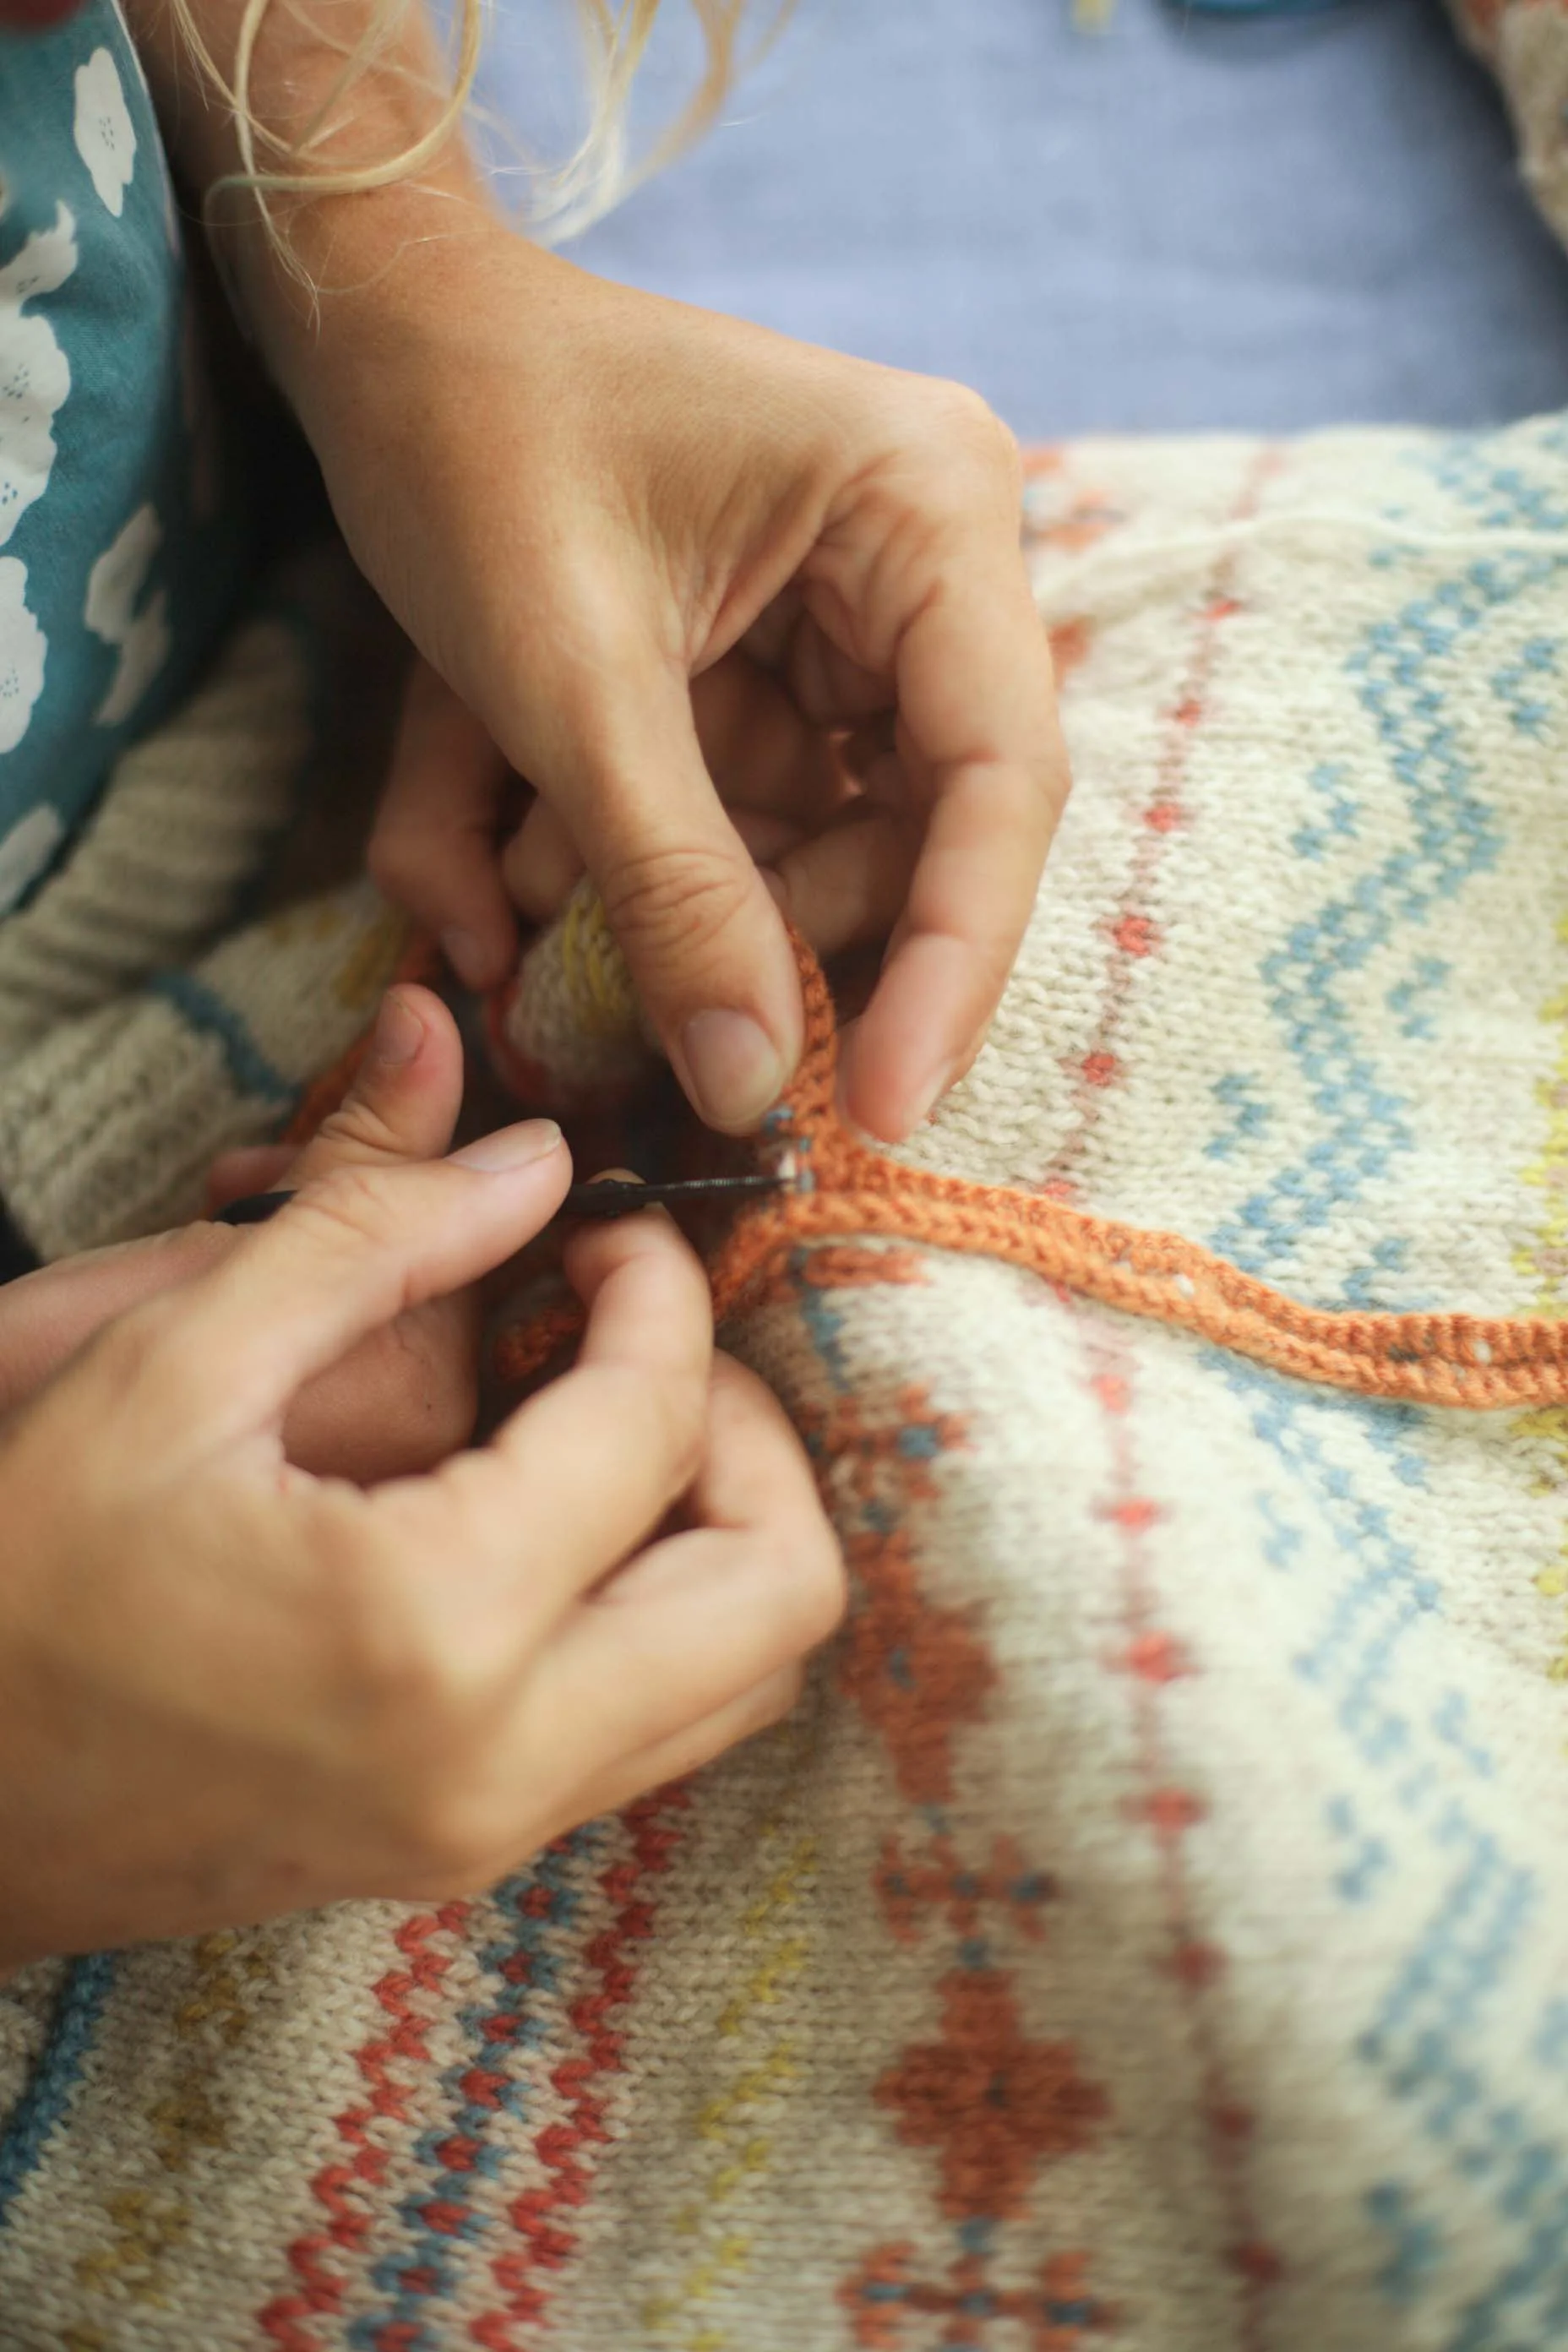
The cardigan still isn't finished - which I like. I like that it has been my companion over these last four months as we have travelled about. And while I have knitted numerous other short-term projects over our time away, nothing that has the love that has gone into this work. This project has meaning to me. I learnt, I persisted and I'm hoping to love it. 

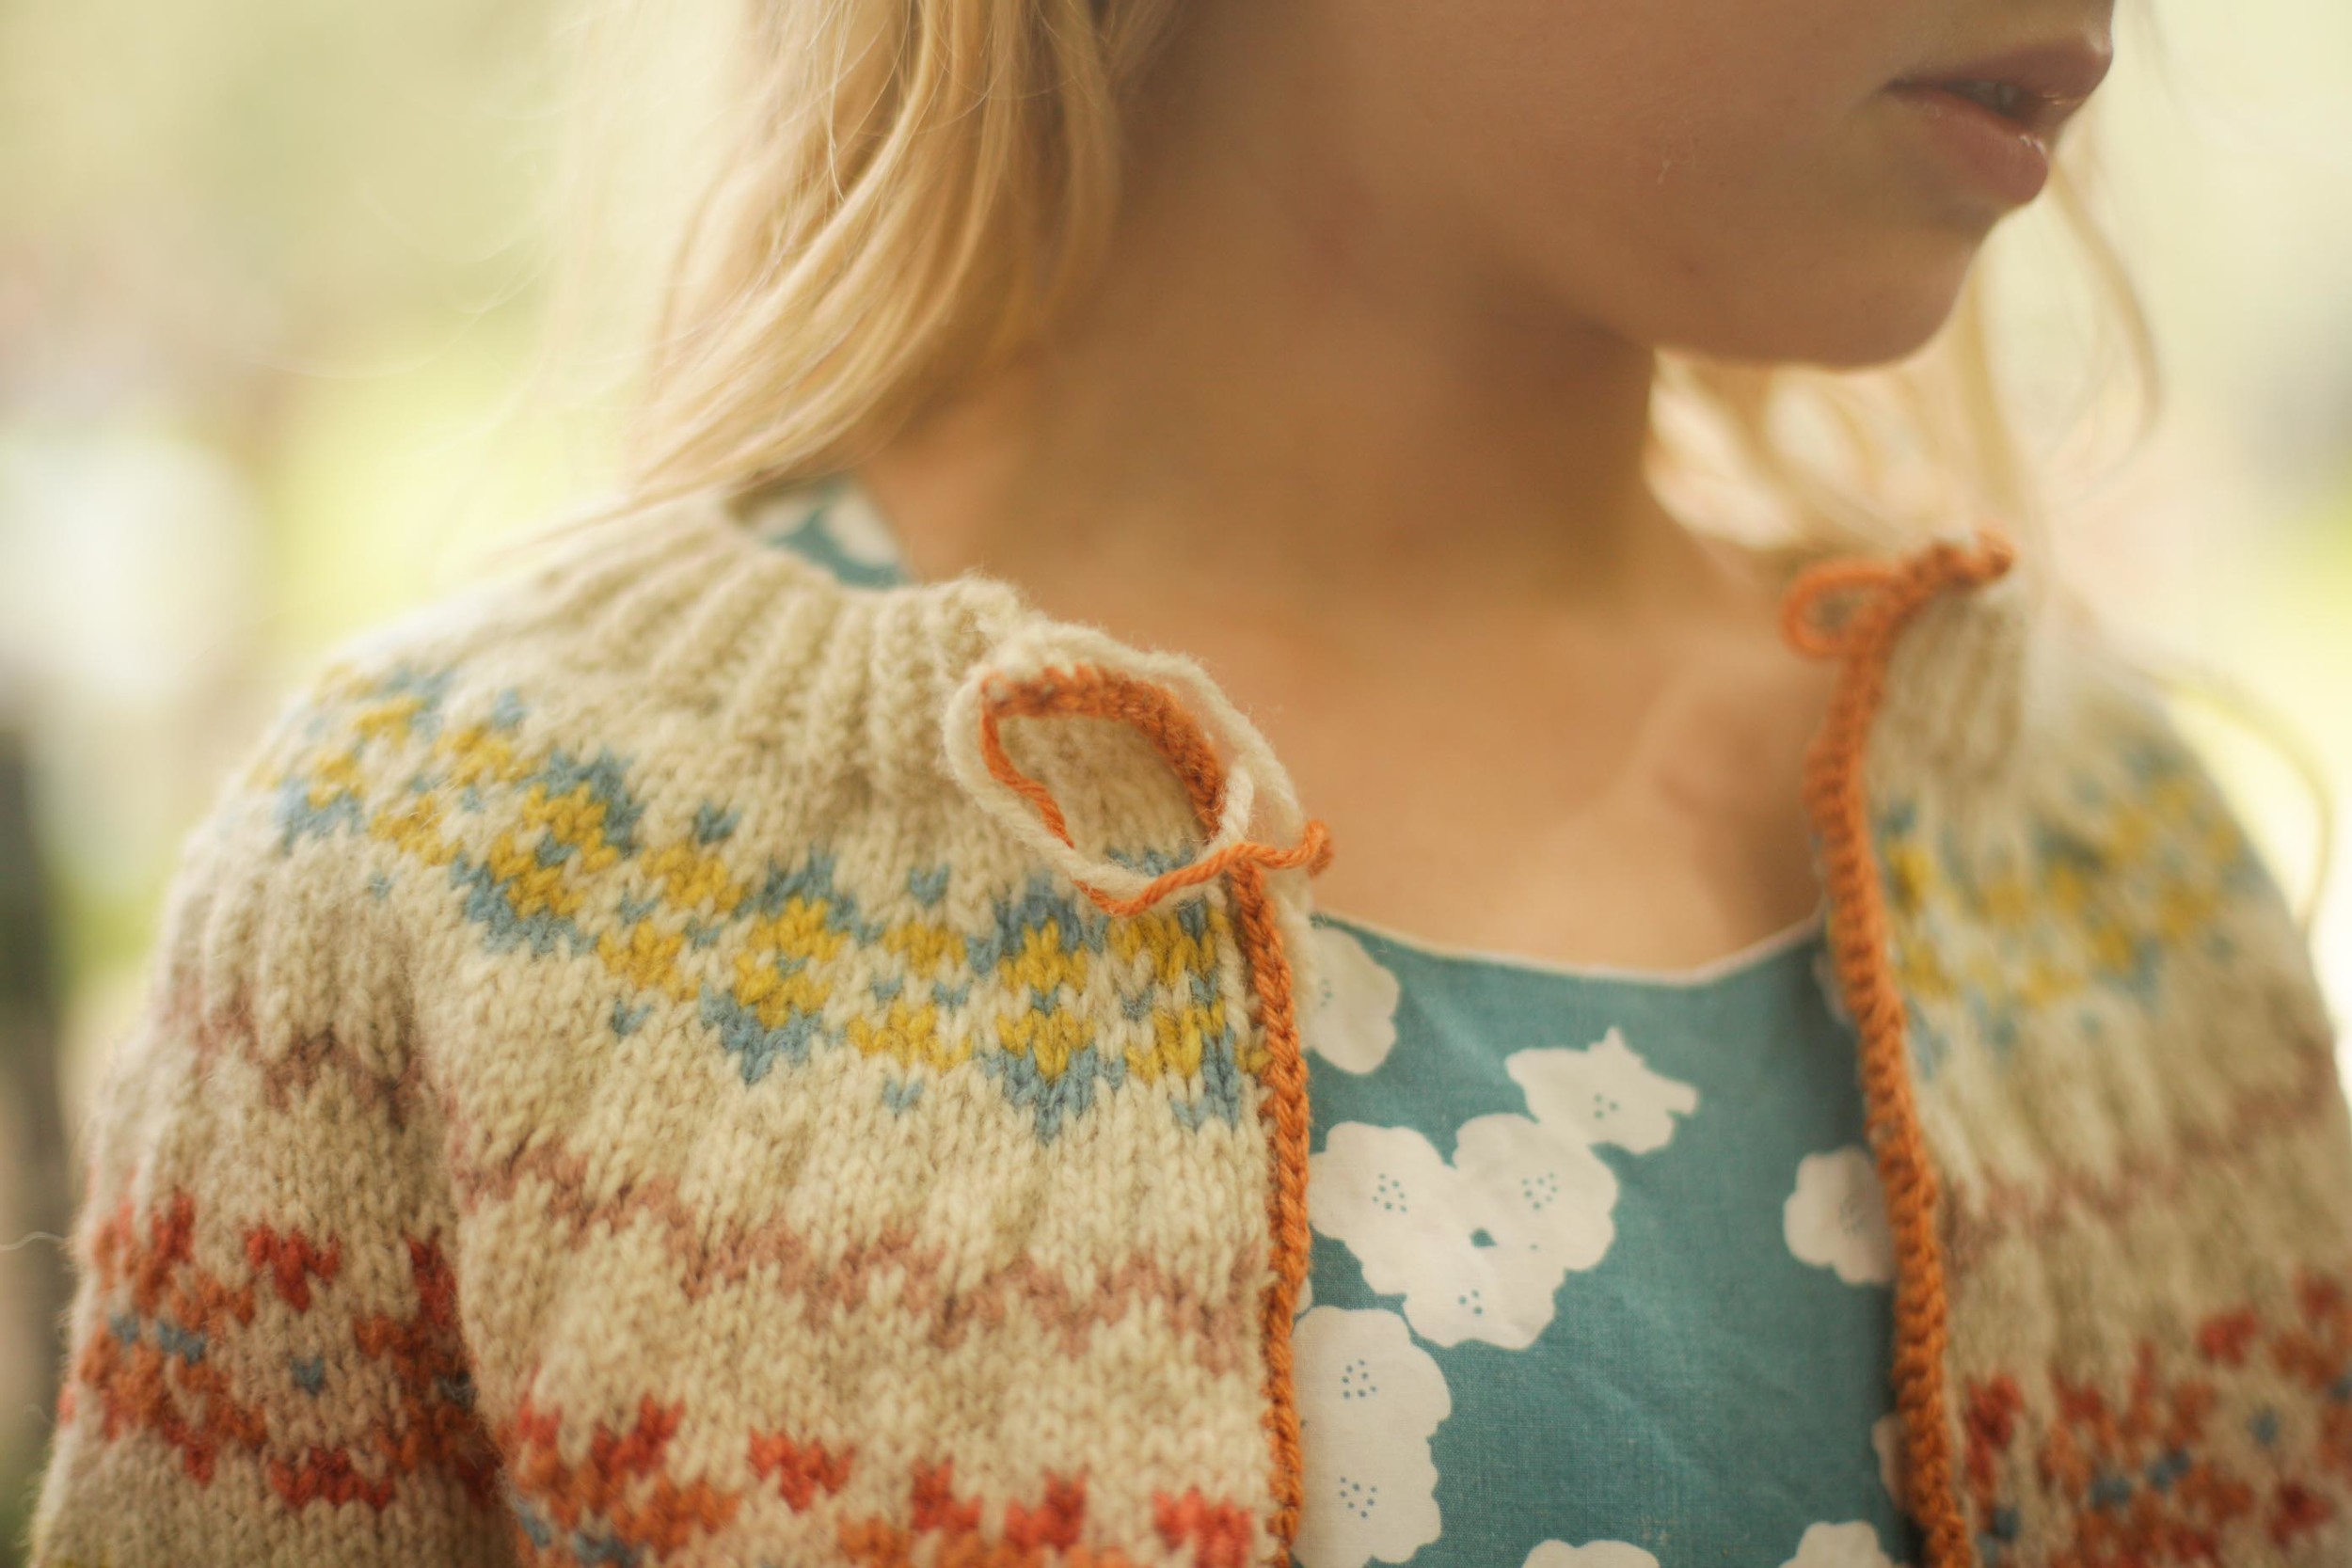
It still needs button bands and an extra motif added to each sleeve to make them a little longer. I'll let you know when I'm done. 

Have you ever steeked anything? Does the idea of steeking make you feel the joy? Or some fear….

Felicia x

PS. Only one week to go until registration closes! Feel free to email me if you have any questions about workshop availability.

In How To, Inspiration Tags knitting, knittingtipsandtricks, steeking, colourwork
12 Comments

Learn to Read Your Knitting - Part 3 - Increases

May 27, 2014 thecraftsessions

So my apologies for the big break in this series. I had camera gear issues and travel issues.

In order to take the photos for this series you really need a macro lense. And I had one. A lovely birthday present a few years ago from my family. But then a week or so before we left on holiday my camera died. The fixing shop said that my only option was to buy a new one as they no longer make the part I need. OK - not a great time but I got on ebay and found one. But then my old macro lens won't fit the new camera. So bit by bit I've been trying to sort it out.

In the mean time I finally came up with a way of taking the photos I need. I purchased a little macro thing for the iPhone and off we go. Most of them are OK but the odd photo is a little crappy so my apologies. 

If you are seeing these posts for the first time the two previous subjects we covered are linked below.

Learn to Read Your Knitting - Part 1 - Stitch Structure - This post was called The Secret to Becoming A Great Knitter

Learn to Read Your Knitting - Part 2 - Decreases

And now on to the post….

Increases

Now this is a fun post - if you like this sort of thing. Learning to read your increases will mean that you no longer need to count rows between waist increases, nor will you need to count increase after increase when knitting a top down sweater. You will be able to knit knit knit away, counting your increases when you think you are close and then when you arrive at your correct number of increases, doing a quick stitch count to ensure you are where you need to be. 

We are going to cover the three most commonly used increases (in my experience). They each have different characteristics so it is really important to understand how they work in order to accurately read them.

The three we are going to cover are

  • M1 - Make 1 in the style of Elizabeth Zimmerman.
  • M1L/M1R - Make 1 left and Make 1 right.
  • kfb - Knit front and back which is also sometimes known as kfab or even k1f&b.

And there are three key things about learning to read them.

  • The first is to understand where the stitch is occurring.
  • The second is to understand what they look like.
  • The third is how to count rows since the increase and how to count the number of increase rows you have done.

As I have said in the two previous posts - the best way to understand this for yourself is to actually knit these stitches with some scrap yarn and then have a look at what they look like. Look on the row you have knitted them and then at the end of a few rows. Again - skip the wine while you are at it - this requires a little bit of brain space. 

I am using a different colour yarn for the increase row in order to try to make things a little clearer. I finished with the blue yarn on a purl row and then start on the grey with a knit row that is the increase row. I hope that helps to make it a little clearer.

Where the stitch occurs!

So let's start with where the increase stitch is occurring. What I mean by that is what row is the increase occurring on. Each of these three increases occurs in a different place. 

Make 1

A M1 occurs in the actual row you are knitting as it is just making a twist of the working yarn and placing it onto the right needle. I love this increase for it's simplicity and speed.

The M1 is simply a loop of yarn twisted on to the right hand needle. You don't knit into it until the row after the increase row. 

FeliciaSemplePitch5.jpg

Here is what it looks like next to the previous normal stitch. So if you look at the base of the second last stitch you can see that it is a loop pulled through the blue stitch below. The last grey stitch on the needle is simply a loop over the needle which initially tends to sit snug up against the last normal stitch until you knit it on the next row.

Make 1 Left / Make 1 Right

With the M1L/M1R the increase stitch occurs in the previous row to the one you are now knitting - so the last row. This is because you pick up and knit one of the bars that runs between two stitches from the previous row.  

Before doing a M1L or a M1R you pull the two needles apart slightly to show the bars of yarn running horizontally between the two stitches on the previous row. 

Before doing a M1L or a M1R you pull the two needles apart slightly to show the bars of yarn running horizontally between the two stitches on the previous row. 

This is showing the beginning of a M1L which you can tell as the yarn is slanting towards the left. 

This is showing the beginning of a M1L which you can tell as the yarn is slanting towards the left. 

This shows the finished stitch. As you can see the actual increase stitch occurs on the previous row to the actual increase row as below the new grey stitch there is a blue twist of wool. I'm hoping that makes sense. 

FeliciaSemplePitch11.jpg

When you are doing this stitch in wool that is all the same colour it is really important to understand that the increase occurs on the previous row because as you are counting upwards from the increase you need to remember that you actually have an extra stitch in your row count. Another way to think of it is that you have an extra loop as you are counting up from the increase - so if you have knitted one row since your increase row you will see what looks like three stitches in the row count - the twist of yarn that is the increase, the stitch from the increase row and the stitch on the needle. 

Knit front and back

Kfb or kfab is different again. The increase is created from a stitch in the previous row by first knitting into the front of the stitch and then twisting your needle around and knitting into the back of it. However you don't end up with an extra loop of yarn - instead you have a bar of yarn. This is created as you cross from knitting the stitch at the front to the stitch at the back. Have a look as you do it. It will make more sense. This feature of the increase means that it is very easy to count these increases as you just count from the loop coming out of the bar upwards.

This photo shows the start of kfb. This is the knit stitch.

This photo shows the start of kfb. This is the knit stitch.

FeliciaSemplePitch15.jpg

You leave the stitch on the needle. That is the blue stitch - the grey stitch is the one you have just pulled through it. You now put your needle into the back of the stitch. This is where the bar is created. Can you see how by now knitting into the back of this stitch we are pulling a loop through the blue stitch which will mean the blue stitch will be pulled horizontal - there is your bar. 

The second last grey stitch is the knit stitch and the last grey stitch on the right needle is the increase stitch with the bar below it.

What they look like!

So we have already kind of seen what they look like above but I thought it would be good to have a look at what they look like when you create them AND what they look like after you have knitted one more row. 

A M1 on the increase row.

A M1 on the increase row.

Make 1

A M1 looks simply like a loop on the row you do the increase on and then after knitting one more row has a count of two stitches if you count the stitch on the needle and the increase stitch. This is what it will look like if you are knitting from a pattern that says something like this;

Row 1: Increase row

Row 2: Purl one row. 

You can see that there is a twist of grey yarn and then the stitch on the needle. So the increase row and one more row.

You can see that there is a twist of grey yarn and then the stitch on the needle. So the increase row and one more row.

And this is what it looks like if you have an increase rows and then knit three rows.

And this is what it looks like if you have an increase rows and then knit three rows.

Make 1 Left / Make 1 Right

I only showed a M1L above but the below photo shows a M1L, then two knit stitches, then a M1 R.

A M1 L after it has just been knit. You can tell it is a M1L rather than a M1R as the blue loop leans left on the top of the loop.

A M1 L after it has just been knit. You can tell it is a M1L rather than a M1R as the blue loop leans left on the top of the loop.

And here is the stitch after you have knitted the increase row and one more row.

Slightly crappy photo but you can see here (reading from right to left) a M1L then two normal knit stitches and then a M1R. Under each M1 stitch there is a small hole. Generally this is not too visible. I am slightly stretching the knitting to make the increase stitch visible. Please note that although you have only knitted the increase row plus one more row, so 2 rows, that there is actually three stitches counting upwards. The blue increase stitch and then then two grey stitches. 

A terrible photo but just about the pin you can see the twist of the M1L, two stitches and then the M1R. Then there is the increase row and three more rows.

Knit front and back

This increase is probably the simplest to read because of the neat bar. The bar means that sometimes you don't want to use this increase, especially if you don't want the increases to be as noticeable. 

This photo actually shows two kfb in a row which is a common raglan increase technique. You can see to the left of my thumb a grey normal stitch and then a stitch coming out of a blue bar, then another normal stitch and then another grey stitch coming out of a blue bar.

This is kfb after the increase row and three more rows. As you can see there are four loops coming out of the bar including the one on the needle.

How to count increase rows!

Make 1

OK - so in the photo above we have three increase rows. We have done six rows of knitting since the first increase (including the increase row), four rows of knitting since the second row of knitting (including the increase row) and two rows since the last increase (includes the increase row as well as the stitch on the needles).

Make 1 Left / Make 1 Right

So just to be super repetitive - this increase is actually made in the row below the increase row. This is very obvious in my two colour knitting but not so much when you are knitting in a single colour. 

So you can see here that the first increase is in the blue row. There are three increases each side of two normal knit stitches. And we have done six rows (including the increase row) since the first increase.

Knit front and back

So this is two kfb in a row which is a common increase technique for a raglan. The stitch marker (I should have left it in!) would go just to the right of the central row of knit stitches in the image.

In a pattern this would read - knit until one stitch before marker then kfb, slip marker, kfb then knit until…..

This image is the same as the last increase we covered - except that there aren't two knit stitches separating the increases. There are three increases each side of the marker and we have knit six rows including the first increase row. 


I have just realised that I have forgotten to do a yarn over (yo). I will cover it if I get time, but a simple way to think of it (knowing all you now know) is to understand that when you do a yo the increase actually occurs in the row after the increase row….another day maybe.

That is all I have time for tonight as I am about to get kicked out of the wifi place. Let me know what you think! Clear, not clear? Anything else you want me to cover….I have a few ideas...

Felicia x

In How To Tags learntoreadyourknitting, knitting
18 Comments

Getting bottom up sweaters to fit beautifully

March 4, 2014 thecraftsessions
FeliciaSemple-18.jpg

So I'm away on a bit of a road trip. About 9000k in the last three weeks - so fun. And the super lucky thing about it is that I have got to share the driving, which means a fair whack of knitting time each and every day. Obviously the parenting malarkey has got in the way a little bit of the quiet-uninterupted-knitting-time-on-a-road-trip you may be imagining. But I have been productive none the less.

And so - I've finished Lila. The lovely Lila as she is known in our household. And lovely she is.

All details of my version can be found on Ravelry.

FeliciaSemple-15.jpg
FeliciaSemple-13.jpg

I really think Lila is the perfect pattern - and Carrie Bostick Hoge it's designer, is a genius. Genius!

What I love about the pattern is it's all round cosiness and comfort - while still retaining an elegant shape. Elegant isn't a word I use too often about something in my wardrobe but in this case it is appropriate. Lila may just be the perfect sweater for autumn, winter and spring. I see myself wearing it over a frock and tights, or maybe a Wiksten Tank dress and jeans. And over my pyjamas - totally perfect for that.

That said - while I love the result - my (first) version is a fairly major stuff up. I am trying to channel my mistakes are how you learn post and forget that I wrote a blog post about how to choose the perfect sweater pattern to enable you to make the sweater you really want.  

I wanted ease - for the cosiness factor. The lovely woman with the curls in the photos has a few inches of ease and it looked great. What could go wrong?

Well friends, I chose the wrong size. See the critical bit with any oversized jumper, in my opinion, is that it fits you really well around the shoulders. This doesn't. It is sloppy and the arms are too big. I recovered it slightly after blocking by committing a cardinal knitting sin, and throwing it in the dryer. And it did pop back into size a little. 

This shows too big sleeves and underarms...and probably the body too...

This shows too big sleeves and underarms...and probably the body too...

This shows the extra fabric around the underarm. 

This shows the extra fabric around the underarm. 

So how much ease is too much? I am have a 35" bust and I chose a 38" size in the pattern and ended up with a 38". And for me that is too big. And the lesson here is that for me I need a pattern that has little to no ease at the bust when the actual sweater is oversized. 

But after saying all that I love it, and it was fun to knit and so am very happy to do it again. I see myself with other colours and will be knitting this again. Perhaps in lovely soft grey like the sample. Yum.

Anyway there was a point to this post and it was to tell you about how I knit my bottom up sweaters to give them a better chance of fitting. Knitting a sweater from the bottom up means that you can't try it on as you go. And trying it on as you go (like you are able to do when you knit top down) can make it much easier to get the fit right.

FeliciaSemple-11.jpg

Getting bottom up sweaters to fit beautifully.

The order you knit a bottom up sweater is the critical bit. Normally you knit the sleeves and body up to the underarm, before joining them and knitting the yoke. The issue with this is that you don't know the length of the yoke (as it hasn't yet been knit) so your body or sleeve length might not finish where you want them too. 

Huh? How does that work? Well the pattern might state a yoke length BUT your row gauge might be very different from the pattern, and therefore the length of your actual yoke could be anything from 1 to even 3 inches different to the pattern. What this means in reality is that a pattern that is supposed to fit right under your undearms doesn't, and instead ends up about 2 inches away from your underarm. This means that your sleeves will be two inches longer than the pattern states. 

I hope that makes sense? Row gauge is the key and these days it isn't always stated AND I personally have never been able to get the same row gauge a pattern states. It seems to be a tricky thing to achieve - to get the same row and stitch gauge as someone else.

The difference of an inch or two of sleeve length can be really annoying. Say you like a sweater that you can pull down over your hands in winter, an inch or two shorter than necessary results in futile pulling. Or conversely you may be the kind of person who hates sleeves around your wrists. That extra inch or two could drive you nuts.

Love this sleeve length for a cosy winter jumper.

Love this sleeve length for a cosy winter jumper.

And once the body and sleeves have been knitted it is very difficult to fix without totally pulling out the yoke or some other crazy long-winded work around.

So what to do? How to get the sleeve and the body to the right length? 

This is tricky but I have a super simple answer! The most common issue is sleeve length so initially I am going to deal with that but I apply the same thing to body length* at the bottom.

Step 1: 

Choose the right size - Ha!
And swatch and wash your swatch. Blocking your sweater can drastically change the fit of your garment. The more you know about how your yarn will behave at a given gauge the better. So if you know that your swatch grows in length by about 10% then you need to knit your sleeves 10% shorter than your desired length!!

Step 2:

Knit the body up to the underarms. See below for clarification *.

Step 3: 

Don't knit the sleeves!!

Step 4: 

Read the pattern and look for the stitch count for when you knit to the top of the sleeve - so just before you join the body and the sleeves. Provisionally cast on that number of stitches using waste yarn.

There are hundreds of tutuorials for a provisional cast on. I am lazy and just cast on the right number of stitches, then purl one row. I then cut it off with scissors.....lazy lazy but I can never seem to remember provisional cast-ons without my friend youtube on hand and that is just a hassle.

Step 5:

Join the body and the sleeves as the pattern suggests BUT rather than joining actual sleeves join your provionally cast on sleeve stitches to the actual body.

Step 6:

Knit the yoke as described.

Step 7:

Undo the provional cast on (cut it off in my case) and knit the sleeves top-down. This ensures you get the sleeves to fit because you can try it on and modify the decreases as appropriate to your arms. AND you can ensure you get the sleeves the right length. Yihaa!

FeliciaSemple-14.jpg

So - a simple answer that you can use on any bottom up in the round pattern, to help you get a great fit.

Wishing you a lovely week! 

Felicia x

* This trick also works with the body length and fit if want more control over those. In that case you would just do a provisional cast on for the sleeve and the body. Join them together using the working yarn and then knit your yoke. Then knit your body and your sleeves top down. Best of both worlds. Bottom up yoke and top down sleeves and body.

In How To
22 Comments

Part 1 - Knitting Tips and Tricks - Counting

February 25, 2014 thecraftsessions
FeliciaSemple-11.jpg

Another new ongoing mini-series prompted and inspired by the lovely Jen and Martine - my mates who I have been assisting through the process of beginner knitting. Working with them has made me realise that there are so many things about knitting (and also sewing but that is for another day) that it isn't possible to learn in books. And it is really valuable stuff. The kind of stuff you learn from experience and experimenting. From being in the right place at the right time with the right knitter. Or picking a pattern that usefully tells you how to do something. So much of knitting is assumed knowledge and I am only realising through working with them all that I actually know more than I think I do. It's the little things.

And so I have decided that occasionally, as I think of them, I will write them down for you in the hope they help you.

First up we are going to do counting. An oft overlooked annoying point for knitters. Counting stitches, counting gauge and counting rows. I can make it easier.

1. Counting stitches

This is possibly the best "trick" I know and it isn't even a trick. But it will change your life if you are a knitter!

I have no idea if I made it up or I read it somewhere. My apologies for not crediting the genius that came up with it (if there was one), but I have been doing it so long I don't know to not do it y'know?

Doing a stitch count to check you are on track is one of the only times where I condone counting in knitting. Generally I think you should learn to read your knitting and so there should be little reason to count. Stitch counts here and there however, are essential. Really important. 

The number of times early on I had to count my 300 stitches (my first project was Birch) and kept loosing count, over and over and over again and taking for-e-ver. Well you probably don't need the details. Incredibly frustrating, 1,2,3,4,5, .....145,146.....

Later in my knitting career I started counting in twos. 2,4,6,...you get the picture. Still loosing count and still wasting my life and my knitting time.

So the trick! - the trick is to count in FIVES!! Yes fives. I swear this is life changing.

Your eyes can actually clock five stitches at a time. They really can - five stitches look a certain way. They make sense to the eyes and make it so much quicker to count and much much harder to loose your place. You may need a small amount of practice but you can pick this up really quickly and it will save you SOO much time. All about the joy!

2. Counting your gauge

I often hear of people struggling to count their gauge and so I thought I would share what I do which makes it super easy. You just need a few sewing pins, a ruler or tape measure of some description and you are good to go.

Lay your swatch on a bed/couch/something firm but squishy. Take out your tape measure and lie it towards the top of your swatch. Make sure that you follow the line of stitches across from your first stitch so you are measuring along the same row and not crossing rows. 

Mark out the start and finish of your 10cm/4" with pins making sure that you start on the left hand side of a V - see our Learn to Read Your Knitting post - Part 1 if this doesn't make sense. Put your final pin in exactly where the 10cm/4inch mark is. 

Mark the start and the end, making sure you begin on the left hand side of a V.

Mark the start and the end, making sure you begin on the left hand side of a V.

I find it easier to use a different colour pin to mark each 5 stitches. Look for the Vs.

I find it easier to use a different colour pin to mark each 5 stitches. Look for the Vs.

Leaving the ruler/tape measure in place put a pin in every 5 stitches. You can do this easier because you know that you are looking for the Vs - right. Five Vs then a pin and then another five Vs etc until you reach the 10cm/4inch mark.

Leave the pins in and then count the number of left over stitches between the last marker for a five and the final pin that marks 10cm/4inches. Make sure that you count 1/2 stitches and even 1/4 stitches at the end if you have them. Be as accurate as you can. 

And here is the critical bit....Repeat towards the bottom of the swatch. It also helps if you do it before and after you have washed your swatch. This tells you what gauge you will be getting when you are knitting, as well after it has been blocked.

Here is another example just because ...

FeliciaSemple-3.jpg
This shows that we have 3 and 3/4 stitches in the last bit. Giving us 23.75 stitches as the gauge.

This shows that we have 3 and 3/4 stitches in the last bit. Giving us 23.75 stitches as the gauge.

One final example. This large gauge knitting often is tricky because the yarn stretches so much. Make sure it is relaxed when you count. And don't do what I am doing in the picture and counting when it is on the needle....

One final example. This large gauge knitting often is tricky because the yarn stretches so much. Make sure it is relaxed when you count. And don't do what I am doing in the picture and counting when it is on the needle....

3. Counting rows

In the Learn to Read Your Knitting - Part 2 post we talked about counting rows. The best way I've found is to mark the first V you are counting with a pin in the hole of the stitch. Then stretch the fabric slightly before using the needle tip to count the Vs going upwards. Stretching the fabric width-wise and length-wise makes the individual stitches easy to see. You can also use pins here to mark 5 rows to make it easier, or you have a lot of rows to count.

Same two examples for you - which I like because they are both lightly hairy yarn (both contain alpaca) and are slightly harder to read - which is good because you can see that using this stretching pin "trick" you can easily see the stitches.

FeliciaSemple-5.jpg
Counting the Vs.

Counting the Vs.

The other thing that will help is to put a contrasting colour on the table behind the knitting when you are trying to count. Then when you stretch the knitting you can more clearly see the holes. If you have light coloured knitting use a dark fabric and vice versa.


I didn't realise before I wrote the post but the key to counting is 5.....who knew?

I really hope that was helpful. Try the counting 5s thing. It really is lifechanging. Let me know if you like it.

Felicia x

In How To Tags knittingtipsandtricks, knitting
9 Comments

Learn to read your knitting - Part 2 - Decreases

February 18, 2014 thecraftsessions

Learn to read your knitting – Part 2 – Decreases

Thanks for all the love for Part 1 of our new series, Learn to Read Your Knitting. If you want to have a look at Part 1 you can find it here - The Secret to Becoming a Great Knitter.

Learning to read which kind of decrease you have made, and how many rows you have knitted since the last decrease, is one of the simplest and yet most helpful things you can learn.

Learning to read which kind of decrease you have made will come in handy when you have done something like heavily modified a sleeve, left it for a year and then are trying to figure out what you did OR when you see (as I once did) a gorgeous vintage pullover in a cabinet displayed on the wall and you are desperate to copy the gorgeous raglan shaping it had. 

And learning how to count the rows since your last decrease row gives you total freedom from writing down the number of rows that you have completed. Freedom!! And it means you can quickly power through knitting the body or sleeve or yoke without needing to refer (too often) to your pattern. 

Today we are going to look at the two most common decreases - a k2tog (knit two together) and a ssk (slip slip knit). K2tog is a right leaning decrease. The ssk is a left leaning decrease that is similar to the sl1k1psso in look - so what I write about the ssk will also apply to that decrease.

These decreases are commonly used for;

  • sleeves when working from the top
  • yoke decreases when working from the bottom e.g. in a raglan
  • side seam decreases when working from the bottom.


1. What is a decrease stitch?

A decrease stitch is simply a single loop pulled through two (or three) stitches - decreasing the number of stitches from two (or three) to a single stitch. This is true regardless of whether it is a k2tog, ssk, sl1k1psso or even a sl1 k2tog psso. 

FeliciaSemple5.jpg

2. Reading the number of rows since the decrease row

The theory for reading the number of rows you have knitted since you did the decrease row, is exactly the same no matter what type of decrease you are doing – and it is easy to learn. The only thing that is a slight bit trickier, is reading the number of rows it in the round versus doing it flat. Both are so easy though, you will be reading your knitting in no time.

Again you can do this yourself. Just watch your decreases as you make them. Learn what they look like. Please remember to only use light/mid coloured yarn that isn’t too fluffy when you begin. Round yarns are easier too. AND we are still working only on stocking stitch. Again my apologies for my pictures which are still using a yarn with a slight twist. I am away and a bit stuck with what I have on hand.....

FeliciaSemple25.jpg

The decrease point can often be found as we can see two lines of Vs merging and/or if you run your fingers around the fabric (thumb on top and pointer underneath) then you can often also feel it. Along a sleeve, this decrease is often in the curled up edge if you are knitting flat. This finger trick will help - it doesn't work so well with a flat yarn - round yarns are easy.

To read the number of rows since the decrease we simply need to find the single loop that was pulled through the two loops and then we count up from there. That single loop is in the decrease row. 

Look for one stitch sitting on top of another and find the loop coming out of them. AND because we know that the structure of a knit stitch has a V at the bottom and a loop at the top, we can count upwards starting with the hole in the middle of the V. Poke your needle tip into each hole in the V - it helps!

The decrease stitch is the loop below the stitch on the left hand needle. You can see the two stitches that were decreased below this stitch. 

The decrease stitch is the loop below the stitch on the left hand needle. You can see the two stitches that were decreased below this stitch. 

The decrease row is generally the first row in the decrease repeat section of the pattern. Normally a pattern will say something like;

“ROW 15: (RS) Decrease row......

ROW 16-22: Knit 7 rows in pattern.

Then repeat Rows 15-22 X times.”

So an 8 row repeat in this case.

So here is the key to counting - The number of rows we have knitted including the decrease row/round includes the stitch (the loop) that comes out of the two loops, then all the Vs in a direct line above it, as well as the stitch that is on the needle. 

Count the rows and see if you can figure it out. Answer at the end * - a bit like the crossword in the paper ;)

Count the rows and see if you can figure it out. Answer at the end * - a bit like the crossword in the paper ;)

How I wish you were all in my lounge right now so I could show you rather than trying to type it out. I have made you some pictures and hopefully they help but if I have lost you then please ask questions in the comments. I'm going to try saying it a few different ways to bring you all along, so please feel free to skip ahead if you have got it.

So to really spell it out - our pattern tells us to do a decrease row and then to knit 7 rounds, then we are looking for 8 stitches total in a vertical line above the two stitches sitting on top of one another. The decrease stitch (which is the loop pulled through the two stitches) as well as the stitch on the needle are both included. We have the first loop (pulled through the two stitches), six more Vs above it and then a stitch on the needle which makes your 8. In an eight row repeat you are due a decrease round for the next row.

And another one - this time we are looking at the decrease below the first stitch on the left needle. This one is a k2tog and a little trickier to see. Look for two lines of stitching becoming one. One of the two stitches sits behind the other. Agai…

And another one - this time we are looking at the decrease below the first stitch on the left needle. This one is a k2tog and a little trickier to see. Look for two lines of stitching becoming one. One of the two stitches sits behind the other. Again the number or rows is at the end**

If we are knitting a flat piece of work, it is a little simpler to count the number of rows because we know if we are at the start of a right side (RS) row then we have knitted an even number of rows including the decrease row.

If we are knitting in the round we don’t have the advantage of being able to assume that we have completed an even number of rows BUT because we can count our Vs, then we simply carefully count up and include the stitches on the needle. Done.

The picture below is an example of what it would look like when you are up to a yoke decrease. When you are counting rows to decrease at the yoke then you often do the decrease round every second row.  If you have one loop coming out of the decrease stitch (which the stitch on the left needle below) then it is time for another decrease round.

If this was a yoke, and the decrease was every second round we would be up to a k2tog.

If this was a yoke, and the decrease was every second round we would be up to a k2tog.

3. What kind of decrease is that?

OK. So the final thing we need to understand today is the difference between what a ssk (left leaning) and a k2tog (right leaning) look like. There are other variations you will do and you should learn them over time but these two are the most common. 

This is tricky to explain but pretty simple. The pictures should help I hope.

The key is this - whichever stitch goes onto the right needle first when doing the decrease dictates which way the stitch will lean and which decrease you have done. The stitch that is first on the right needle ends up in front of the second stitch on the needle. 

When you do a k2tog you put the right needle tip into the second stitch on the left needle before then putting it into the first stitch on the left needle.

Right needle into the second stitch on the left needle and then the first stitch on the left needle. This pulls the second stitch in front of the first.

Right needle into the second stitch on the left needle and then the first stitch on the left needle. This pulls the second stitch in front of the first.

The single loop is pulled through the two loops from back to front.

The single loop is pulled through the two loops from back to front.

A little hard to see due to my yarn but look just below the stitch on the right hand needle. You can see that the second stitch is now sitting in front of the first.

A little hard to see due to my yarn but look just below the stitch on the right hand needle. You can see that the second stitch is now sitting in front of the first.

This pulls the second stitch on the left needle on top of the first. The loop is then pulled from the back to the front through the first stitch on the left needle first and then through the second stitch on the left needle - giving you a right leaning decrease. The second stitch ends up on top. 

With a ssk you are changing the order of the stitches to ensure that the first stitch on the right needle is actually the first stitch on the left needle. This pulls the first stitch on top of the second stitch giving you a left leaning decrease. 

Slip one stitch from left needle to right.

Slip one stitch from left needle to right.

Slip the second stitch from left to right needle.

Slip the second stitch from left to right needle.

This means that now the first stitch went on to the right needle first so it will end up on top. 

This means that now the first stitch went on to the right needle first so it will end up on top. 

FeliciaSemple12.jpg
The single loop being pulled through the two stitches on the needle.

The single loop being pulled through the two stitches on the needle.

The first stitch is now sitting on top of the second stitch.

The first stitch is now sitting on top of the second stitch.

As always the best way to learn is to watch what you are knitting. Have a look at your decreases. Straight after you have done one. On the next row and the next. It will make sense in time - promise!

Questions?? Happy to answer anything - and also please let me know if there is something else you want me to tackle. 

Next up we do increases.....

Felicia x

UPDATE: Learn to Read Your Knitting - Part 3 - Increases is now up on the blog. 

Learn To Read Your Knitting - Part 1 - Stitch Structure - post was called The Secret to Becoming a Great Knitter. 

*Including the decrease row there are six rows. The decrease is a ssk.

**Including the decrease row there are eight rows. The decrease is a k2tog.

In How To Tags learntoreadyourknitting, knitting
26 Comments
← Newer Posts Older Posts →

Welcome! I'm Felicia - creator of The Craft Sessions and Soul Craft Festival.

This blog aims to celebrate the connection between hand-making and our well-being.
These posts aim to foster a love of hand-making and discuss the ways domestic handcrafts elevate our everyday.

I love the contributions you make to this space via your comments and learn so much from each and every one. x

Thoughts On Craft

Simple Sewing 101

Stash Less

The RetreaT

Featured
Making Fast Fashion: Some More Of The Grey
Apr 19, 2022
Making Fast Fashion: Some More Of The Grey
Apr 19, 2022
Apr 19, 2022
Is My Making Fast Fashion?
Apr 12, 2022
Is My Making Fast Fashion?
Apr 12, 2022
Apr 12, 2022
Why Gauge Matters
Apr 5, 2022
Why Gauge Matters
Apr 5, 2022
Apr 5, 2022
Craft As Simple Mundane Forward Movement
Mar 29, 2022
Craft As Simple Mundane Forward Movement
Mar 29, 2022
Mar 29, 2022
Craft As A Virtuous Cycle*
Mar 22, 2022
Craft As A Virtuous Cycle*
Mar 22, 2022
Mar 22, 2022
Craft & The Slow Nostalgic Finish
Mar 15, 2022
Craft & The Slow Nostalgic Finish
Mar 15, 2022
Mar 15, 2022

popular posts

Craft As A Project V’s Craft As A Practice

Our Fear Of Going Back

Making Is Not Inherently Creative

Why All Crafters Need A Visual Diary

Craft As A Manifestation Of Love And Loss

Moving On From Perfectionism

The Secret To Becoming A Great Knitter!

Simple Sewing 101 - Part 1

Craft In The Middle Of Motherhood

Another #theyearofthescrap #ellenscardigan using some #oldmaidenaunt alpaca silk from many years ago. What I love about this little cardy is it’s simplicity and how little yarn it uses. Perfect for scrap knitting. I now have a little pile of ba
New blog post: Craft as elevating the mundane! I think this idea is so important. 🌿 'Making is about enriching the moments of our lives; it’s about making the mundane (and not the extraordinary) more abundant and that bit more lush…. el
Block 8/12 - I’m so excited to be back making this for my smallest for her 10th birthday. It’s a #stash_less #theyearofthescrap quilt that is based on an incredible #geesbend quilt. And it’s all scraps and precious bits and pieces.
Another #theyearofthescrap #ellenscardigan using some #oldmaidenaunt alpaca silk from many years ago. What I love about this little cardy is it’s simplicity and how little yarn it uses. Perfect for scrap knitting. I now have a little pile of ba New blog post: Craft as elevating the mundane! I think this idea is so important. 🌿 'Making is about enriching the moments of our lives; it’s about making the mundane (and not the extraordinary) more abundant and that bit more lush…. el Block 8/12 - I’m so excited to be back making this for my smallest for her 10th birthday. It’s a #stash_less #theyearofthescrap quilt that is based on an incredible #geesbend quilt. And it’s all scraps and precious bits and pieces.
The Blog Archives!
  • April 2022
  • March 2022
  • February 2022
  • December 2021
  • March 2021
  • February 2021
  • November 2020
  • July 2020
  • June 2020
  • May 2020
  • April 2020
  • March 2020
  • February 2020
  • December 2019
  • March 2019
  • February 2019
  • January 2019
  • December 2018
  • November 2018
  • October 2018
  • August 2018
  • July 2018
  • May 2018
  • April 2018
  • March 2018
  • February 2018
  • January 2018
  • December 2017
  • November 2017
  • October 2017
  • September 2017
  • August 2017
  • July 2017
  • June 2017
  • May 2017
  • April 2017
  • March 2017
  • February 2017
  • January 2017
  • November 2016
  • October 2016
  • September 2016
  • August 2016
  • July 2016
  • June 2016
  • May 2016
  • April 2016
  • March 2016
  • February 2016
  • January 2016
  • December 2015
  • November 2015
  • October 2015
  • September 2015
  • August 2015
  • July 2015
  • June 2015
  • May 2015
  • April 2015
  • March 2015
  • February 2015
  • January 2015
  • December 2014
  • November 2014
  • October 2014
  • September 2014
  • August 2014
  • July 2014
  • June 2014
  • May 2014
  • April 2014
  • March 2014
  • February 2014
  • January 2014
  • December 2013
  • November 2013
  • October 2013
  • September 2013
  • August 2013
  • July 2013
  • June 2013
Featured
Making Fast Fashion: Some More Of The Grey
Apr 19, 2022
Making Fast Fashion: Some More Of The Grey
Apr 19, 2022
Apr 19, 2022
Is My Making Fast Fashion?
Apr 12, 2022
Is My Making Fast Fashion?
Apr 12, 2022
Apr 12, 2022

We Live and work on the traditional lands of the Wurundjeri people of the Kulin nation.
We acknowledge that sovereignty was never ceded and pay our respect to elders past, present and emerging.

Copyright the Craft Sessions 2020

Logo designed by the lovely Mara of Printspace and Girling Design