• The CraftSessions Story
  • Our Past Retreats
  • Blog
  • Newsletter
  • Contact
Menu

The Craft Sessions

Street Address
City, State, Zip
Phone Number

The Craft Sessions

  • About
    • The CraftSessions Story
    • Our Past Retreats
  • Blog
  • Newsletter
  • Contact

On Growing Our Confidence And How Making Isn't Hard

December 7, 2021 thecraftsessions

The wonderful Petra’s dream project - she spoke about her coat at Soul Craft this year.

Hello lovely crafters,

I've been thinking a lot over the last few weeks, about the part confidence plays in making a thing. What is it? How we get it? Where does it comes from? But especially about how sometimes a lack of it stops us from engaging in the type of making we would love to be doing.

So many of us have a dream project that we would love to be doing, that we aren't even starting of, because of the stories we tell ourselves about our own capacity. Often, what is stopping us, is simply the lack of belief that we can. And so we wait…

What are we waiting for? For more skills? To feel ready?

The stunning coat at the top of the post was made by the lovely Petra Wallace - who I interviewed for Soul Craft this year - about making her dream project. I've been lucky enough to witness Petra develop her making practice over many years - and develop her confidence.

As I was editing the interview to get it ready to post the other day, it made me mindful that confidence is something that we build over time, bit by bit, project by project. And that confidence is multifaceted.

To my mind, I think sometimes we believe that we need to learn a bunch of technical skills in order to make the thing we want to make. But actually the process of learning is much more encompassing. Much of our capacity to make something comes down to whether we have, not just technical skills, but also the physical skills we need to manipulate our materials and most importantly the emotional skills of navigating what goes right and wrong in the process.

Editing Petra's presentation clearly highlighted to me the three kinds of confidence we need to grow to make a thing.

We need to grow our;

a.technical skills

b.physical ability

c. emotional intelligence.

Hey! That makes me excited just to write it down.

These individual confidences, which are essentially each a type of skill, can't all be learnt at once. We learn them bit by bit, in context, over time. If we are lucky, some of them we bring to our making from other parts of our life. But some of it we can only learn by engaging with the materials in the making. Engagement is the way.

Ok. So here, it's important to note that we build them within a cultural context that broadly says that learning craft is hard and complicated. Important because our expectations impact both our engagement in the thing and the outcome of that engagement.

My first knitting project was a lace shawl called Birch by Rowan. As I didn't know any knitters, and I didn't know that lace shawls were supposed to be “hard”, I simply knitted it. And yeah it was tricky, and I made many mistakes but I figured it out over time. The version in the photo below is Mark III, taht I made for a friend for her wedding. And if you have sharp eyes and can read your knitting you can see that I'm still making mistakes. One of those leaves is not like the others…. :)

But here is what I'm wondering. Maybe if I had been told it was really difficult I wouldn't have even tried?

It's worth thinking about the stories we have about what we are capable of - and of what it takes to make the thing we want to make. Because maybe we are making up how hard it actually is.

We have learnt so many skills in our lifetime. Skills much harder than wrapping yarn around sticks. We've learnt to walk and talk and ride bikes and drive cars and type and tie shoelaces. Each of these skills is much harder than learning to make the thing we want to make.

Obviously the only exception being the shoelaces as that is essentially what knitting is. Pulling loops of yarn through another loop.

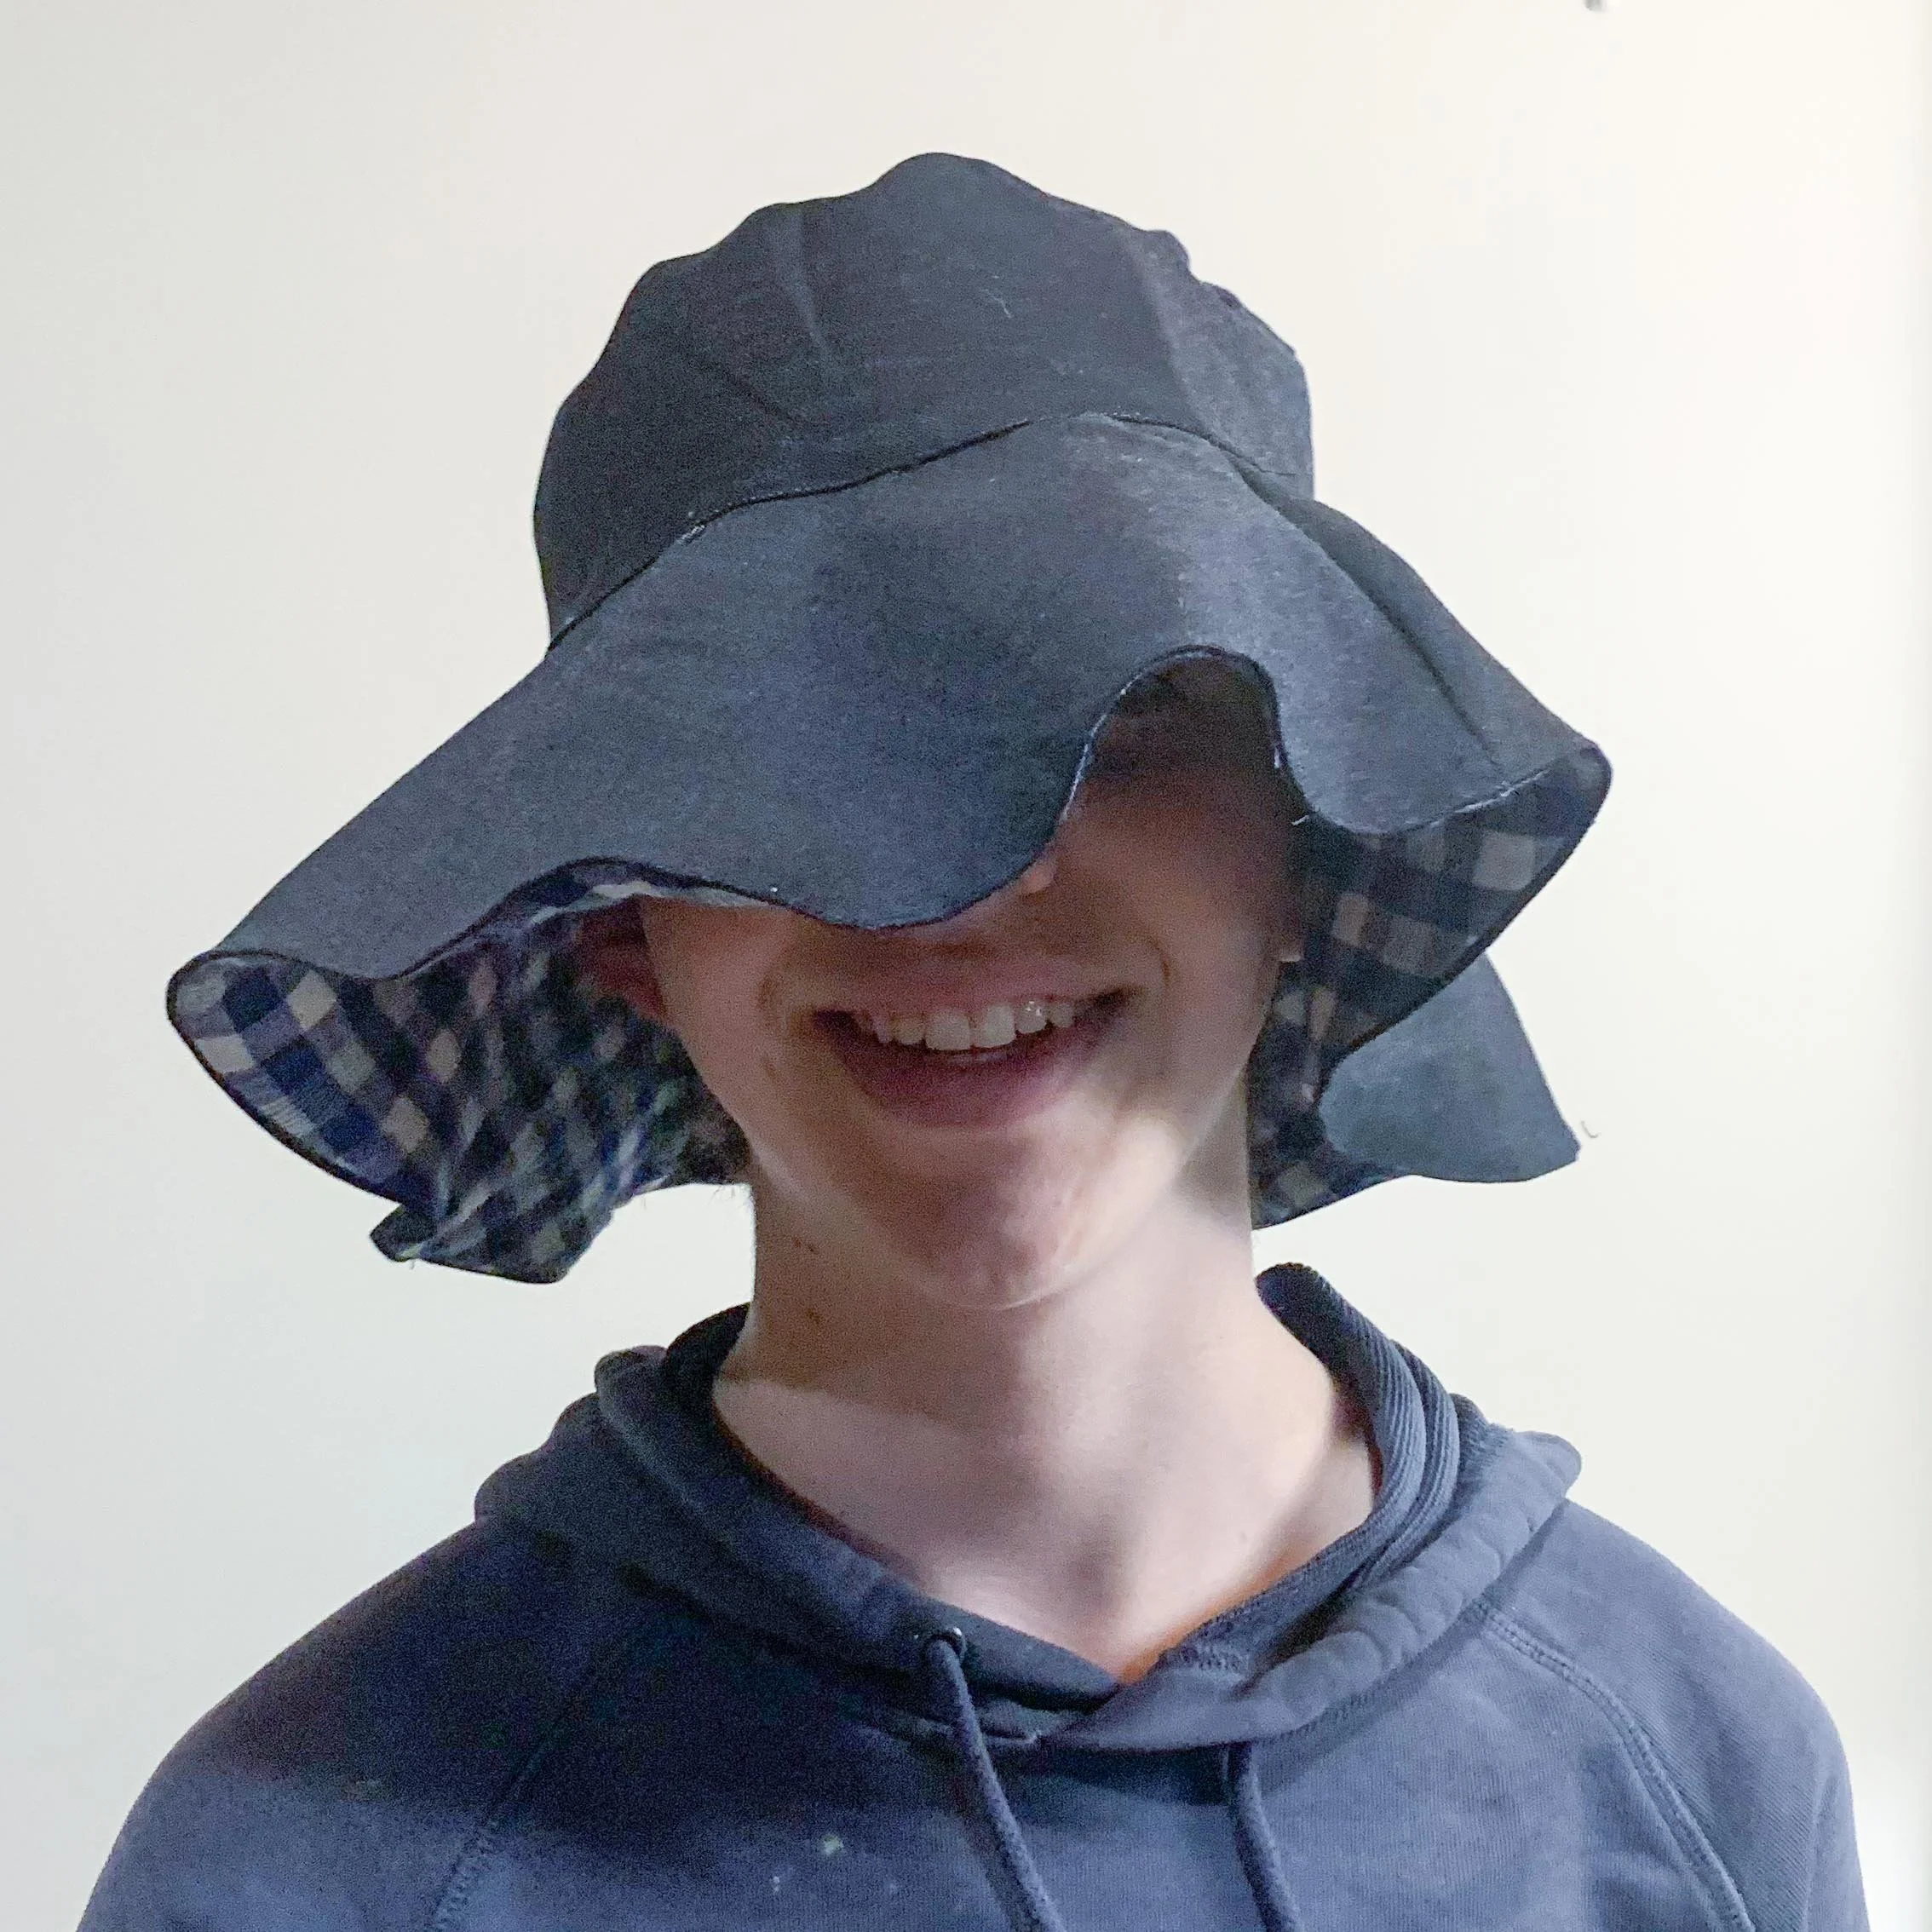
Last week I got to watch the kid in the photo, making a present for his baby sister's birthday. He is 15, and left his present buying till the last minute - and as we were in lockdown last-minute-purchasing wasn't really possible.

And so, he said to me the day before “I'm just gunna make her something. Can you print me out a hat pattern?”.

Now he hasn't touched a machine in 5 years - since the last time he made his sisters skirts for Xmas. And I was a bit hesitant, as I really didn't have time to contribute to the process. But he was determined and all “just print the pattern mama! I've got this.”

He asked a few questions like “hey, what is topstitching?” but other than that he did it by himself. By himself. Skirt making to hat making with a five year gap. Skilling up as he stitched. Engagement is the way?

And he made her a hat. A hat he is proud of. You can see the hat below - the lighting is terrible as he didn't finishing making it till 12.15am. Grr. But anyhoo…

Part of his confidence is, of course, that he is 15. But I hope that most of his confidence is drawn from the fact that his unique cultural context is different to most of us.

He lives in a household where we haven't ever distinguished between the difficulty of the skills you need to make to make a hat AND other skills he has learnt like brushing his teeth or holding a pencil or using a dishwasher or shoelace doing-up. And so he doesn't believe that making is hard.

Years back I wrote a post about how “I think we have lost the belief that we can make. And that all making with our hands is learnable.”

And I stand by this.

So yes confidence - technical, physical and emotional - is something we build over time, step by step.

But I also wonder if our cultural stories about how hard things are aren't sometimes tripping us up. Even those of us that are makers are impacted by a culture that says that making things is really difficult.

Maybe the 15year old wasn't tripped up because he doesn't know about them. And maybe if we thought about what our stories actually are, we could get better at side-stepping them too.

Anyhoo. Just some thoughts. Hope you're getting your 10 minutes (or more) of making today. x

Felicia

In Simple Sewing 101, Thoughts On Craft
1 Comment

Adding A Balloon Sleeve To The Wiksten Shift

July 24, 2020 thecraftsessions
IMG_7609.JPG

This here is a VERY simple modification to add a balloon sleeve to the wonderful Wiksten Shift and if you are happy to break a few rules it is an alteration you can do with VERY little fabric!

Read More
In Simple Sewing 101, How To
2 Comments

Simple Sewing 101 - Creative Cutting

May 31, 2016 thecraftsessions

So it's been a while between Simple Sewing drinks. I haven't been sewing a lot and when that happens I don't end up thinking about things you lot might be interested in....until I do! Last week I started making five winter dresses for the small girls (breaking my normal rule of three at a time :)) and I ran into a few issues in terms of fabric, which lead me to today's post.

So creative cutting? By creative cutting I mean breaking some of the rules around how you "should" cut your patterns out. I do it often, but I know as a newbie it can be confusing so I thought I'd tell you which rules I break and why you might want to....

As always my disclaimer - Simple Sewing 101 techniques are not necessarily proper dressmaking techniques, and as such it is recommended that you use them for everyday sewing as opposed to special sewing using your most favourite fabric ever.

What are the rules?

One of the things that comes up a lot when I'm teaching people to sew is cutting out. And it makes sense. Lots of patterns talk about exactly what you need to do to sew the garment up, but not about what are the rules for cutting?

So first lets talk about the rules - they are pretty simple;

  1. Cut out your pattern pieces making sure that the grainline on the pattern piece is parallel to the grainline of the fabric - which means that the grainline on the pattern piece is parallel to the selvedge of the fabric. The selvedge is the strip that runs along the edge of the fabric.
  2. Don't cut out pattern pieces into the selvedge as it normally has a different stiffer weave to the actual fabric.
  3. Make sure with directional patterns that you cut all your pieces out the right way up.
  4. ....Um. Well. That's pretty much it.

Really you should just read these couple of great articles Colette about the grainline in order to understand grain and why it's important. Essentially it is simply that the direction of the grain in the fabric will affect the drape of your clothing.

Five dresses lined up ready to go.

Five dresses lined up ready to go.


Why would you want to break the rules?

The why is pretty simple. There are two reasons.
1. You have enough fabric, but you want to cut out as efficiently as you can to save fabric. OR
2. You don't have enough fabric and you are trying to get your garment out of what you have.

Saving fabric means you have leftovers. For example by doing some clever cutting of my Annie Dress I had .65m of beautiful linen left over at the end (I had purchased the exact amount specified by the pattern) which means that I now have a Lou Box Top cut out and ready to be sewn up. It will be my reward sewing for getting the five dresses done and dusted.

And the second reason - well for me that often comes down to the fact that I am trying to make dresses for the kids out of scraps or small amounts of fabric. For example girls needed winter dresses and I really wanted to stick with my Stash Less guidelines. My fabric purchasing over the last couple of years has slowed to an absolute trickle, which means that I can no longer just head to my cupboard and be sure there will be something suitable for the project. Exciting, and sometimes annoying.

That said, I still have a truckload of scraps to use. 1/2 a metre of one fabric and 1m of another. As the girls are now enormous (being 5 and 8) then 1m isn't enough to make girl frocks, and so creative cutting is what it's all about.

Don't let this scare you off Stash Less though. While Stash Less has made actual clothes sewing a little trickier, it does however create some wonderful outcomes as discussed in this post on limitations.

For example for one of my five frocks, I'm going to get a wonderful Ace and Jig style girl's dress (shown at the top of the post) because I only had 1.2m of this beautiful Nani Iro Flannel which meant I could get the whole dress cut out except for the front out of the bodice. This is actually one of the least weird places to use a different fabric as it looks like a feature and I think it's going to be even prettier than if I had made it all out of the same fabric.

There was not enough of a scrap to get a front out of this piece of fabric no matter which way I turned it. The solution I came up with is shown below.

There was not enough of a scrap to get a front out of this piece of fabric no matter which way I turned it. The solution I came up with is shown below.


What rules can you break?

Here are my recommendations about how to get creative when fabric is tight and you are trying to squeeze something out OR when you just don't want waste fabric;

1. Don't follow the pattern instruction guide on how to cut out.
These suck. Not because pattern makers don't know what they are doing. They do! But they are restricted in that they have to give a guide using the largest size of pattern while making it super simple to show in a diagram. This is tricky. And it ends up meaning that if you follow the instructions you normally waste a lot of fabric.

The recommendations for the amount of fabric given by a pattern are often a healthy estimate and so you should be able to save some fabric in most circumstances.

Ideally you want to end up with a useable piece of fabric at the end rather than a whole heap of oddly shaped scraps so what to do? I thought I would give you some general rules to try - they won't work everywhere but they are a great place to start.

  1. First, have a go at laying out your pattern pieces so that they are as close to one another as possible. You don't need even a mm between them. Wiggle them around and try a couple of different configurations - making sure your grain line is following the grain. For pieces that are on the fold place them down and then flip them over to make sure you have room. These do not need to be cut from a fold in the middle of the fabric.
  2. Once you have a configuration you are happy with then cut out anything that has to be cut out on the fold. Do this by folding the selvedge towards the other selvedge but only by the amount you need to cut that bit of the pattern out. For example if your pattern piece is 30cm wide from the fold line to the edge then fold the selvedge 33cm over. Measure from the selvedge line to the fold line in a couple of different places to check that your fold follows the grainline. You can see this demonstrated in this Colette post on cutting on the grainline.
  3. Thirdly, cut out all your other pattern pieces, roughly biggest to smallest making sure that you consider smaller pieces as you go to see if they will fit in any oddly shaped offcuts.
A photo of me trying to get all the pattern pieces to fit onto my scraps to make a scrap dress. You can see what the front turned out like below. One sleeve of the frock will be the light pink and the other the dark pink.

A photo of me trying to get all the pattern pieces to fit onto my scraps to make a scrap dress. You can see what the front turned out like below. One sleeve of the frock will be the light pink and the other the dark pink.

2. Cut on the cross grain.  
I do this all the time. For big person garments as well as for kids. I often squeeze a piece of clothing out of scraps and when I do this there is often a tradeoff. In order to be able to use the piece of fabric I sometimes have to cut on the cross rather than the grain. This is not a problem at all for many wovens or even linens.

I was recently speaking to a pattern designer who stated that in her opinion this is totally valid. She pointed to a recently made frock hanging on her door handle where the whole dress was cut on the cross grain.

Sometimes I cut on the cross grain simply to save fabric. You can see this in the beautifully styled photo below.

Both of these pieces should be cut out with the fold line on the grain. This would mean that they were facing the other way.

Both of these pieces should be cut out with the fold line on the grain. This would mean that they were facing the other way.

Please note: Cutting on the cross grain is an issue if you have a directional pattern or a stripe, plaid etc. It is also an issue for knit fabrics as often the stretch runs in one direction more strongly than another. That said, facings and pocket linings can be cut out even if the pattern is directional.

3. Ignore the grainline rules where you need to.
Sometimes you need to take it a step further and cut out on a slight bias or on the cross with a directional fabric. This can be OK too. It's your call!

Just today I totally ignored the grainline of the Liberty cord to cut out the facings. This is not advisable by any stretch of the imagination but it worked fine. Yes, I could have used a different fabric for my facings, but I was up for the challenge of making the whole thing fit and the girls aren't going to care. On two facing pieces I cut them with the cord going horizontal and then for one very last piece I actually cut it slightly on the bias to get it to fit. Now this is NOT ideal as you really want your facings to be stable. That is the whole point of them. However as they were to have fusible interfacing on them and the biasing was slight I decided that I did not care one jot! Play on.

The piece on the left has been cut on a slight bias. The piece on the right has been cut on the cross grain even though it is cord and this is very wrong. Sometimes you have to do what you have to do.Stash Less means my ironing board cover is now el…

The piece on the left has been cut on a slight bias. The piece on the right has been cut on the cross grain even though it is cord and this is very wrong. Sometimes you have to do what you have to do.

Stash Less means my ironing board cover is now elephants :).

3. Use a different fabric for your facings.
I do this all the time. As long as you roll your facings inwards by a mm or so, then noone will ever know. Try to find a fabric that is a similar weight to the fabric you are using.

4. Ignore pattern recommendations about making bias.
Many patterns suggest you to take a big diagonal stripe/hunk out of your fabric for a piece of bias binding. Use a different colour, store bought bias or make some using a continuous bias binding tutorial. There is a good one online from Craftsy.

5. Create your own fabric from scraps.
I did this for the bodice in the picture below. I just didn't have a scrap big enough for the front so I sewed some pieces together (roughly thinking about where they would end up) using french seams and then cut the pattern piece out of the new fabric. Flat-felled seams also would work well if you didn't mind some top stitching. I think I'm going to love this dress.

6. Get dodgy in your seam allowances.
If you are missing a piece of your seam allowance no worries at all. Pin it so that the edges match as if the chunk of seam allowance you are missing was still there and play on.

Sometimes I will also cut a pattern piece with the seam allowance in the selvedge if I know it will sit inside the seam allowance. If it is distorting the fabric I would just trim it back.

You could also make all the seam allowances for your pattern smaller. This is especially helpful if they are 1/2".

I decided this was too far into the selvedge and so actually shuffled this piece around.

I decided this was too far into the selvedge and so actually shuffled this piece around.

I moved this side further over the edge so there was a chunk out of the seam allowance.

I moved this side further over the edge so there was a chunk out of the seam allowance.

7. Alter your pattern.
This last one is if you are desperate and works best for a pattern you have made in the past so you know how much flexibility you have to play around. Take half a cm out of the middle of the bodice or shorten the sleeves, or shorten the bodice. Make the leg of a trouser a little slimmer.... Do what you need to do.

I'm sure I'll think of a few more overnight but I thought I'd open the floor to you. How do you save on fabric when cutting out?

I can't wait to hear your tips and tricks.

Felicia x

In Simple Sewing 101
9 Comments

Me Made May 2016

May 17, 2016 thecraftsessions

Most of you I'm sure know of Me Made May. If you don't then head over here and take a look.

My take on it is that this little handmade community of ours comes together to elevate and celebrate our handmade wardrobes, whether we are just at the start of making our #handmadewardrobe or like me we have been at it for a few years.

I took part last year - but I didn't plan to this year as I'm a little dis-trac-ted! But as I wear handmade nearly every day then I just started taking snaps. Last year I was religious about my photo taking but this year well life isn't working quite like that. And I don't think it matters.

The point is to celebrate what it is that we do. We make stuff! With our hands and our hearts! As a community! It's super.

This last year I have only made a few extra bits and pieces to fill some gaps - like a few Lou Box Tops and my Annie Dress but the consciousness raising that is the month of Me Made May has made realise that there are a few handmade pieces that I do not wear. Like ever. They don't feel like me, even though I love them.

Normally I give those kinds of garments away to my girlfriends, but as this one won't fit any of them due to boob/shoulder size, then if you pop back tomorrow I'll take a photo and give it away to one of you lot. It's pretty special - Nani Iro! :) I just thought it might be a nice way to celebrate Me Made May.

And as an aside if you aren't yet sewing your own clothes but think you might like to then head on over and have a look at our Simple Sewing 101 series. Many a newbie sewer has got started using Simple Sewing and I love watching your tops pop up on Instagram.

Join in over on instagram. I find it truly inspiring every year and often find people and patterns I had never heard of.

Felicia x

PS. If you are interested in popping back in for the top then I have a bust size of about 35/36". You would need to be similar to make use of it.

In Best Of, Around The Traps, I Made This, Inspiration, Simple Sewing 101
2 Comments

Simple Sewing 101 - Smash it out!

October 27, 2015 thecraftsessions
Four pairs of shorts - three made in one go (using dirty blue/grey cotton) and the yellow ones made separately using off-white cotton. Yellow ones obviously only just completed - hence the threads sticking out ;).

Four pairs of shorts - three made in one go (using dirty blue/grey cotton) and the yellow ones made separately using off-white cotton. Yellow ones obviously only just completed - hence the threads sticking out ;).

It's Slow Fashion October so this post could be seen to be badly timed. It's not. But it could be. I'm going to talk about it some more on Friday, but to me Slow Fashion October doesn't necessarily mean that your making needs to be slow. It simply means being considered about what you make. Once you've decided what to make then game on. 

That said, obviously sometimes I love to create in a slow meditative way. Slowing down, using my craft as a way to provide daily nourishment for my soul. Other days I just want/need to get. it. done! I had three kids you see, and they go through (as in wear-out-in-an-unmendable-way) a lot of clothing. 

So this last weekend my oldest kid needed shorts. Lots of shorts. He is an all-year-round short wearer, which when combined with sport and hooning around the playground, means that he is particularly hard on his outfits - as you are when you are small and having fun. Of course that makes me glad, but it often means that he brings me shorts with the bottom part missing totally, or with fabric so thin they are unrepairable. He always believes that I am capable of repairing them - bless! - so I have on occasion, just had to "disappear" them. They do get to a stage where they are best left to RIP.

So I often find myself making in multiples - to fill the need quickly. This weekend past I set the ambitious target of four pairs of shorts, to be made in an hour here and another hour there, and one evening stint that finished just after midnight. As I was making them I realised that when I'm doing this kind of "smash it out" sewing, I actually have a whole heap of techniques that I use to speed up the process, and be more efficient. I know you guys like a bit of a trick, so I thought I'd share. 

Keep in mind that while these techniques work a treat if you are making a single garment, they work even more splendidly if you are making multiples.

Get set up.

  1. Pre-wind your bobbins so they are ready to go. If I am making multiples then I normally wind at least two bobbins, if not four. You can buy extra bobbins at your local sewing shop and they are a great investment. I have about ten for my machine, pre-wound with my "neutral" colours (see below).
     
  2. Change your needle. You need to do this for every 8 hours of sewing but I find that changing at the start of each major project works pretty well for me. Who would actually know what 8 hours looks like? It's worth the expense - the machine will work better. Your stitches will be more even and get tangled less often.
     
  3. Gather your other materials and read through the pattern to mentally combine the steps you can. 
     
  4. Use a water soluble marking pen to mark the right side of your fabric with a big cross. This means that you don't waste minutes of your precious time trying to figure out the right side of your linen. 
Prewound bobbins, thread-snips, bowl for loose cottons and spare thread.  

Prewound bobbins, thread-snips, bowl for loose cottons and spare thread.  

Pre-winding.

Pre-winding.

My favourite water-soluble marker that I use to mark notches and right sides of fabrics.

My favourite water-soluble marker that I use to mark notches and right sides of fabrics.

Texta marks to show the right side of the fabric. 

Texta marks to show the right side of the fabric. 


While you are sewing

  1. Where possible don't pin. Or pin minimally. This you can only learn with practice, but often you only need a pin or two for the seam - one at the start and one towards the end -  rather than 5/10/15 pins. Just hold the edges together as you sew with your right hand and use your fingernails to scratch the fabric into place rather than pinning.*
     
  2. When you need pins, pin perpendicularly to the raw edge of the fabric with the pin head sitting on the outside of the fabric. This means you can take the pins out easily without slowing your sewing down too much. 
     
  3. Minimise interruptions to flow. This one is critical. You want to minimise the number of times you need to get up and down from your sewing machine.

    There are basically three steps to sewing - pinning, sewing and ironing. You want to minimise the number of times you change from one to the other as it interrupts your flow. And flow is what it's about people.

    If there is pinning to do, then pin everything you can (as in the next two or three or even four steps of the pattern where you can) before moving onto the next step of sewing those pinned seams. 

    For example when I was making the aforementioned shorts I sat down and pre-finished all the edges the pattern suggested in one go before then moving on to the first step - which was to sew the pockets to the fronts, which I did without pinning, to save time. I then finished the edges of the pocket seam and only then did I get up from the machine to press them flat. 
     
  4. Always ALWAYS snip your threads as you go. This could change your life. Depends on your life obviously.
     
  5. Chain piece!!!! This is the single biggest thing you can do to improve your speed and output. It's super simple and probably easiest to explain through the diagrams below. 

    What chain-piecing involves is having multiple seams ready to sew, and then you sew them without cutting your threads in between each seam. It doesn't matter if they are the same type of seams or different seams. This is most easily understood by looking at the photos below.

    You still do a back stitch or two at the start and end of each seam where appropriate. But you don't then lift the foot, and pull up the needle, and cut the threads. Instead you sew 1cm without any fabric under the needle, and then guide the next seam you need to sew, into the machine. You do a backstitch so it doesn't come undone and then keep hooning through your seaming. When you are finished as many seams as you can then just snip the threads in between each piece. This is a technique borrowed from the quilting world that works beautifully with garment sewing.

  6.  
A pile of pieces ready to be sewn. In this case they don't need to be pinned as I was finishing the edges with a simple zigzag.

A pile of pieces ready to be sewn. In this case they don't need to be pinned as I was finishing the edges with a simple zigzag.

Backstitch just as you are finishing each piece to secure the thread before leaving a cm of sewing. Then guide in the next piece doing a simple backstitch as the needle hits that piece to ensure the thread doesn't unravel.

Backstitch just as you are finishing each piece to secure the thread before leaving a cm of sewing. Then guide in the next piece doing a simple backstitch as the needle hits that piece to ensure the thread doesn't unravel.

This is the third piece being added to the chain.

This is the third piece being added to the chain.

This is six pockets and six fly pieces all chainstitches together using dirty grey cotton for three different pairs of shorts.

This is six pockets and six fly pieces all chainstitches together using dirty grey cotton for three different pairs of shorts.

Up close showing also the thread between pieces and the  blue water-soluble text mark showing me the right side. 

Up close showing also the thread between pieces and the  blue water-soluble text mark showing me the right side. 

Chain pieced fronts of trousers. 

Chain pieced fronts of trousers. 

Chain-piecing finished the edges after sewing the pockets to the fronts.

Chain-piecing finished the edges after sewing the pockets to the fronts.


Some things about multiples.

If you can make multiples then do. The effort involved in making one of something versus three of something is really similar. At a guess I would say that I can make three pairs of shorts at the same time, in the time it would take me to make one pair, and then make a second.

This only works if;

  1. You choose fabrics that mean that you only use one colour cotton. With the shorts above I chose kinda wisely. For the denim, duck-egg linen and herringbone shorts I used the same dirty blue cotton. For the yellow shorts I used an off white which meant that I needed to sew them separately. ** 
  2. You choose fabrics that are similar in weight so you don't need to change the needle.


A couple of things to note.

*About pins - There are times when you need pins and lots of them. Gathers, bindings, waistbands that need to be spread evenly, set in sleeves AND every time you are matching a seam with another seam. 

** A note about neutral cottons - This is something that I do with all my sewing. I use six colours of thread no matter what the project. I call them my "neutrals", and they are off-white, grey, dirty blue grey, red, navy and black. My two most commonly used colours are off-white and dirty blue grey. They go with nearly everything. The only time I change to a matching colour is when I change the top thread only in order to topstitch a waistband or a hem. I don't change my bobbin colour as it is on the inside. Obviously this is for everyday sewing - special birthday sewing gets matching cotton. Sometimes at least.

All three skirts were made at once with dirty blue grey cotton. Obviously not the ideal choice for the yellow spot skirt, but after over two years of wear I've never had anyone look inside the garment and be appalled by my cotton colour choice. It m…

All three skirts were made at once with dirty blue grey cotton. Obviously not the ideal choice for the yellow spot skirt, but after over two years of wear I've never had anyone look inside the garment and be appalled by my cotton colour choice. It meant I could make all three at once, chain piecing, which is infinitely faster than making things one at a time. I changed the top thread only to topstitch the waistband and the hem of the yellow skirt. Works a treat.


Anything you experienced sewers would add that I've missed? 

Felicia x

In Simple Sewing 101
13 Comments
Older Posts →

Welcome! I'm Felicia - creator of The Craft Sessions and Soul Craft Festival.

This blog aims to celebrate the connection between hand-making and our well-being.
These posts aim to foster a love of hand-making and discuss the ways domestic handcrafts elevate our everyday.

I love the contributions you make to this space via your comments and learn so much from each and every one. x

Thoughts On Craft

Simple Sewing 101

Stash Less

The RetreaT

Featured
Making Fast Fashion: Some More Of The Grey
Apr 19, 2022
Making Fast Fashion: Some More Of The Grey
Apr 19, 2022
Apr 19, 2022
Is My Making Fast Fashion?
Apr 12, 2022
Is My Making Fast Fashion?
Apr 12, 2022
Apr 12, 2022
Why Gauge Matters
Apr 5, 2022
Why Gauge Matters
Apr 5, 2022
Apr 5, 2022
Craft As Simple Mundane Forward Movement
Mar 29, 2022
Craft As Simple Mundane Forward Movement
Mar 29, 2022
Mar 29, 2022
Craft As A Virtuous Cycle*
Mar 22, 2022
Craft As A Virtuous Cycle*
Mar 22, 2022
Mar 22, 2022
Craft & The Slow Nostalgic Finish
Mar 15, 2022
Craft & The Slow Nostalgic Finish
Mar 15, 2022
Mar 15, 2022

popular posts

Craft As A Project V’s Craft As A Practice

Our Fear Of Going Back

Making Is Not Inherently Creative

Why All Crafters Need A Visual Diary

Craft As A Manifestation Of Love And Loss

Moving On From Perfectionism

The Secret To Becoming A Great Knitter!

Simple Sewing 101 - Part 1

Craft In The Middle Of Motherhood

Another #theyearofthescrap #ellenscardigan using some #oldmaidenaunt alpaca silk from many years ago. What I love about this little cardy is it’s simplicity and how little yarn it uses. Perfect for scrap knitting. I now have a little pile of ba
New blog post: Craft as elevating the mundane! I think this idea is so important. 🌿 'Making is about enriching the moments of our lives; it’s about making the mundane (and not the extraordinary) more abundant and that bit more lush…. el
Block 8/12 - I’m so excited to be back making this for my smallest for her 10th birthday. It’s a #stash_less #theyearofthescrap quilt that is based on an incredible #geesbend quilt. And it’s all scraps and precious bits and pieces.
Another #theyearofthescrap #ellenscardigan using some #oldmaidenaunt alpaca silk from many years ago. What I love about this little cardy is it’s simplicity and how little yarn it uses. Perfect for scrap knitting. I now have a little pile of ba New blog post: Craft as elevating the mundane! I think this idea is so important. 🌿 'Making is about enriching the moments of our lives; it’s about making the mundane (and not the extraordinary) more abundant and that bit more lush…. el Block 8/12 - I’m so excited to be back making this for my smallest for her 10th birthday. It’s a #stash_less #theyearofthescrap quilt that is based on an incredible #geesbend quilt. And it’s all scraps and precious bits and pieces.
The Blog Archives!
  • April 2022
  • March 2022
  • February 2022
  • December 2021
  • March 2021
  • February 2021
  • November 2020
  • July 2020
  • June 2020
  • May 2020
  • April 2020
  • March 2020
  • February 2020
  • December 2019
  • March 2019
  • February 2019
  • January 2019
  • December 2018
  • November 2018
  • October 2018
  • August 2018
  • July 2018
  • May 2018
  • April 2018
  • March 2018
  • February 2018
  • January 2018
  • December 2017
  • November 2017
  • October 2017
  • September 2017
  • August 2017
  • July 2017
  • June 2017
  • May 2017
  • April 2017
  • March 2017
  • February 2017
  • January 2017
  • November 2016
  • October 2016
  • September 2016
  • August 2016
  • July 2016
  • June 2016
  • May 2016
  • April 2016
  • March 2016
  • February 2016
  • January 2016
  • December 2015
  • November 2015
  • October 2015
  • September 2015
  • August 2015
  • July 2015
  • June 2015
  • May 2015
  • April 2015
  • March 2015
  • February 2015
  • January 2015
  • December 2014
  • November 2014
  • October 2014
  • September 2014
  • August 2014
  • July 2014
  • June 2014
  • May 2014
  • April 2014
  • March 2014
  • February 2014
  • January 2014
  • December 2013
  • November 2013
  • October 2013
  • September 2013
  • August 2013
  • July 2013
  • June 2013
Featured
Making Fast Fashion: Some More Of The Grey
Apr 19, 2022
Making Fast Fashion: Some More Of The Grey
Apr 19, 2022
Apr 19, 2022
Is My Making Fast Fashion?
Apr 12, 2022
Is My Making Fast Fashion?
Apr 12, 2022
Apr 12, 2022

We Live and work on the traditional lands of the Wurundjeri people of the Kulin nation.
We acknowledge that sovereignty was never ceded and pay our respect to elders past, present and emerging.

Copyright the Craft Sessions 2020

Logo designed by the lovely Mara of Printspace and Girling Design