• The CraftSessions Story
  • Our Past Retreats
  • Blog
  • Newsletter
  • Contact
Menu

The Craft Sessions

Street Address
City, State, Zip
Phone Number

The Craft Sessions

  • About
    • The CraftSessions Story
    • Our Past Retreats
  • Blog
  • Newsletter
  • Contact

The Perfect Beginner Knitting Project - In My Opinion :)

November 7, 2017 thecraftsessions
Steph's gorgeous work - photo by Steph.

Steph's gorgeous work - photo by Steph.

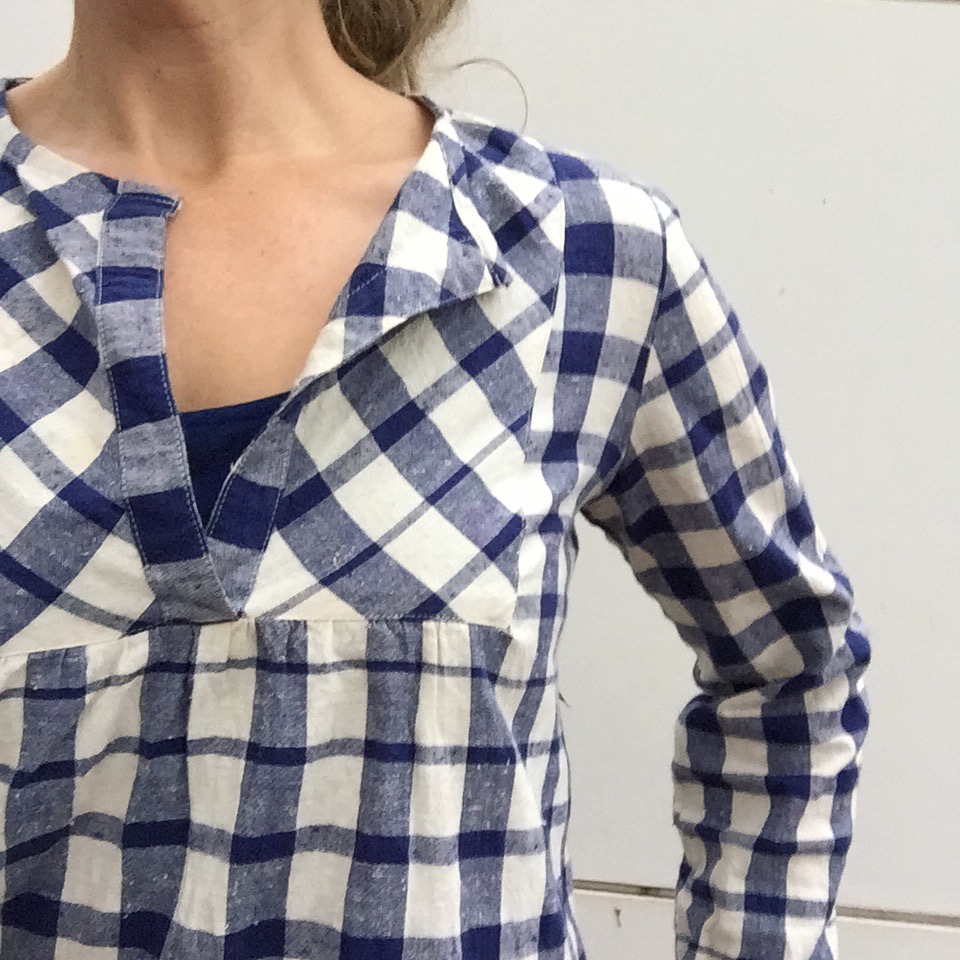
A few months ago I taught my lovely babysitter Steph to knit. She and I had talked about a few times over the years, and when I heard she was jetting off yet again, I finally got organised to get her started.

I went to the store and purchased her three skeins of Woolfolk Luft in the Black L06 colourway and a set of circular 60cm Addi Turbos. I know that sounds a little extravagant for a first project but a. Steph is ace and b. making is a sensual experience. Making something is all about the senses - we feel knitting in our bodies - and if we don't enjoy the sensations of knitting when we begin then why would we continue to knit? I wanted to make her first knitting experience a joyous one - one that would result in a beautiful product, and make her happy - so I purchased some of the most delicious yarn I could find.

I've talked many times about how materials matter and I passionately believe it to be true, especially when you are new to the sport. Now obviously, Woolfolk Luft is taking good materials to the extreme, and not all new knitters need to start with Woolfolk ;), but in this case I wanted to thank her with something special.

So, as Steph was looking after my smalls for one last time, I asked her to come 30min early so I could teach her before we had to head out the door. I'd already got the cowl started for her by casting on, and knitting the first row of the Purl Soho Lovely Ribbed Cowl - which I believe is the perfect newbie project! We had 20 minutes to chat all things knitting.

And here we get to the opinionated point of the blog post!

Teaching Steph to knit reminded me that I have always meant to post about what I believe the perfect project for beginners actually is - in my opinion. And I keep forgetting!

You see, I believe that a lot of beginner knitters start with the wrong type of stitch pattern. And that worries me. It worries me because maybe they won't stick with knitting because they think it is too hard, or maybe they will get confused and think it is stressful. And people need knitting, and the world needs more knitters. Knitting brings so much joy to the universe.

Beginner knitters are often encouraged to start with garter stitch - and they often get flumoxed. Which makes sense - as garter gives you no indication if you are getting your knitting right or wrong as you can't tell. Garter stitch is a red hot mess to look at, especially if you are new and you don't understand how it works. Initially looking at garter is like looking at a plate of spaghetti and trying to find a pattern in it.

If they are lucky, some beginner knitters will be encouraged to start with stockinette stitch - which I still don't like - but it's an improvement on starting with garter.

Stockinette is simpler to look at and understand, which means that some folks will be able to see if they have made a mistake, but it doesn't teach you to recognise the stitch you have on the needles - as you are repeating whole rows of one stitch then the other stitch, paying little attention to what you are doing. Stockinette also feels like a waste of an opportunity to learn about reading your knitting from the very start - especially as you would have needed to learn both a purl stitch and a knit stitch.

My hypothesis: Rib is the perfect stitch pattern to begin your knitting career with, as it teaches you to read your knitting from the start.

I believe that the perfect beginner knitting project is some form of 2x2 or 3x3 rib. Through knitting rib you learn that there is a V at the front of a stitch and a purl bump at the back! It is simple, repetitive and beautiful. And by learning the structure of our knitting from the getgo then we knit with less fear and we are more confident knitters.

A few years ago I wrote a post called The Secret To Becoming A Great Knitter and it was all about learning to read your knitting, about understanding your stitches and what they looked like - for freedom, and for joy. In that post I describe how to understand your stitches and how to read them; what they look like and how to recognise them.

Reading your knitting is something you can learn from the very start of your knitting career, as Steph has just proved.

Steph had her 20 min lesson before she started her evening's babysitting, and then we went out for a couple of hours. She had knitted till we got home, then we talked about where she was at. She did take a little film of me demonstrating a knit stitch and a purl stitch, which she took with her on the plane in case she forgot, but that was her whole lesson. About 30 min total.

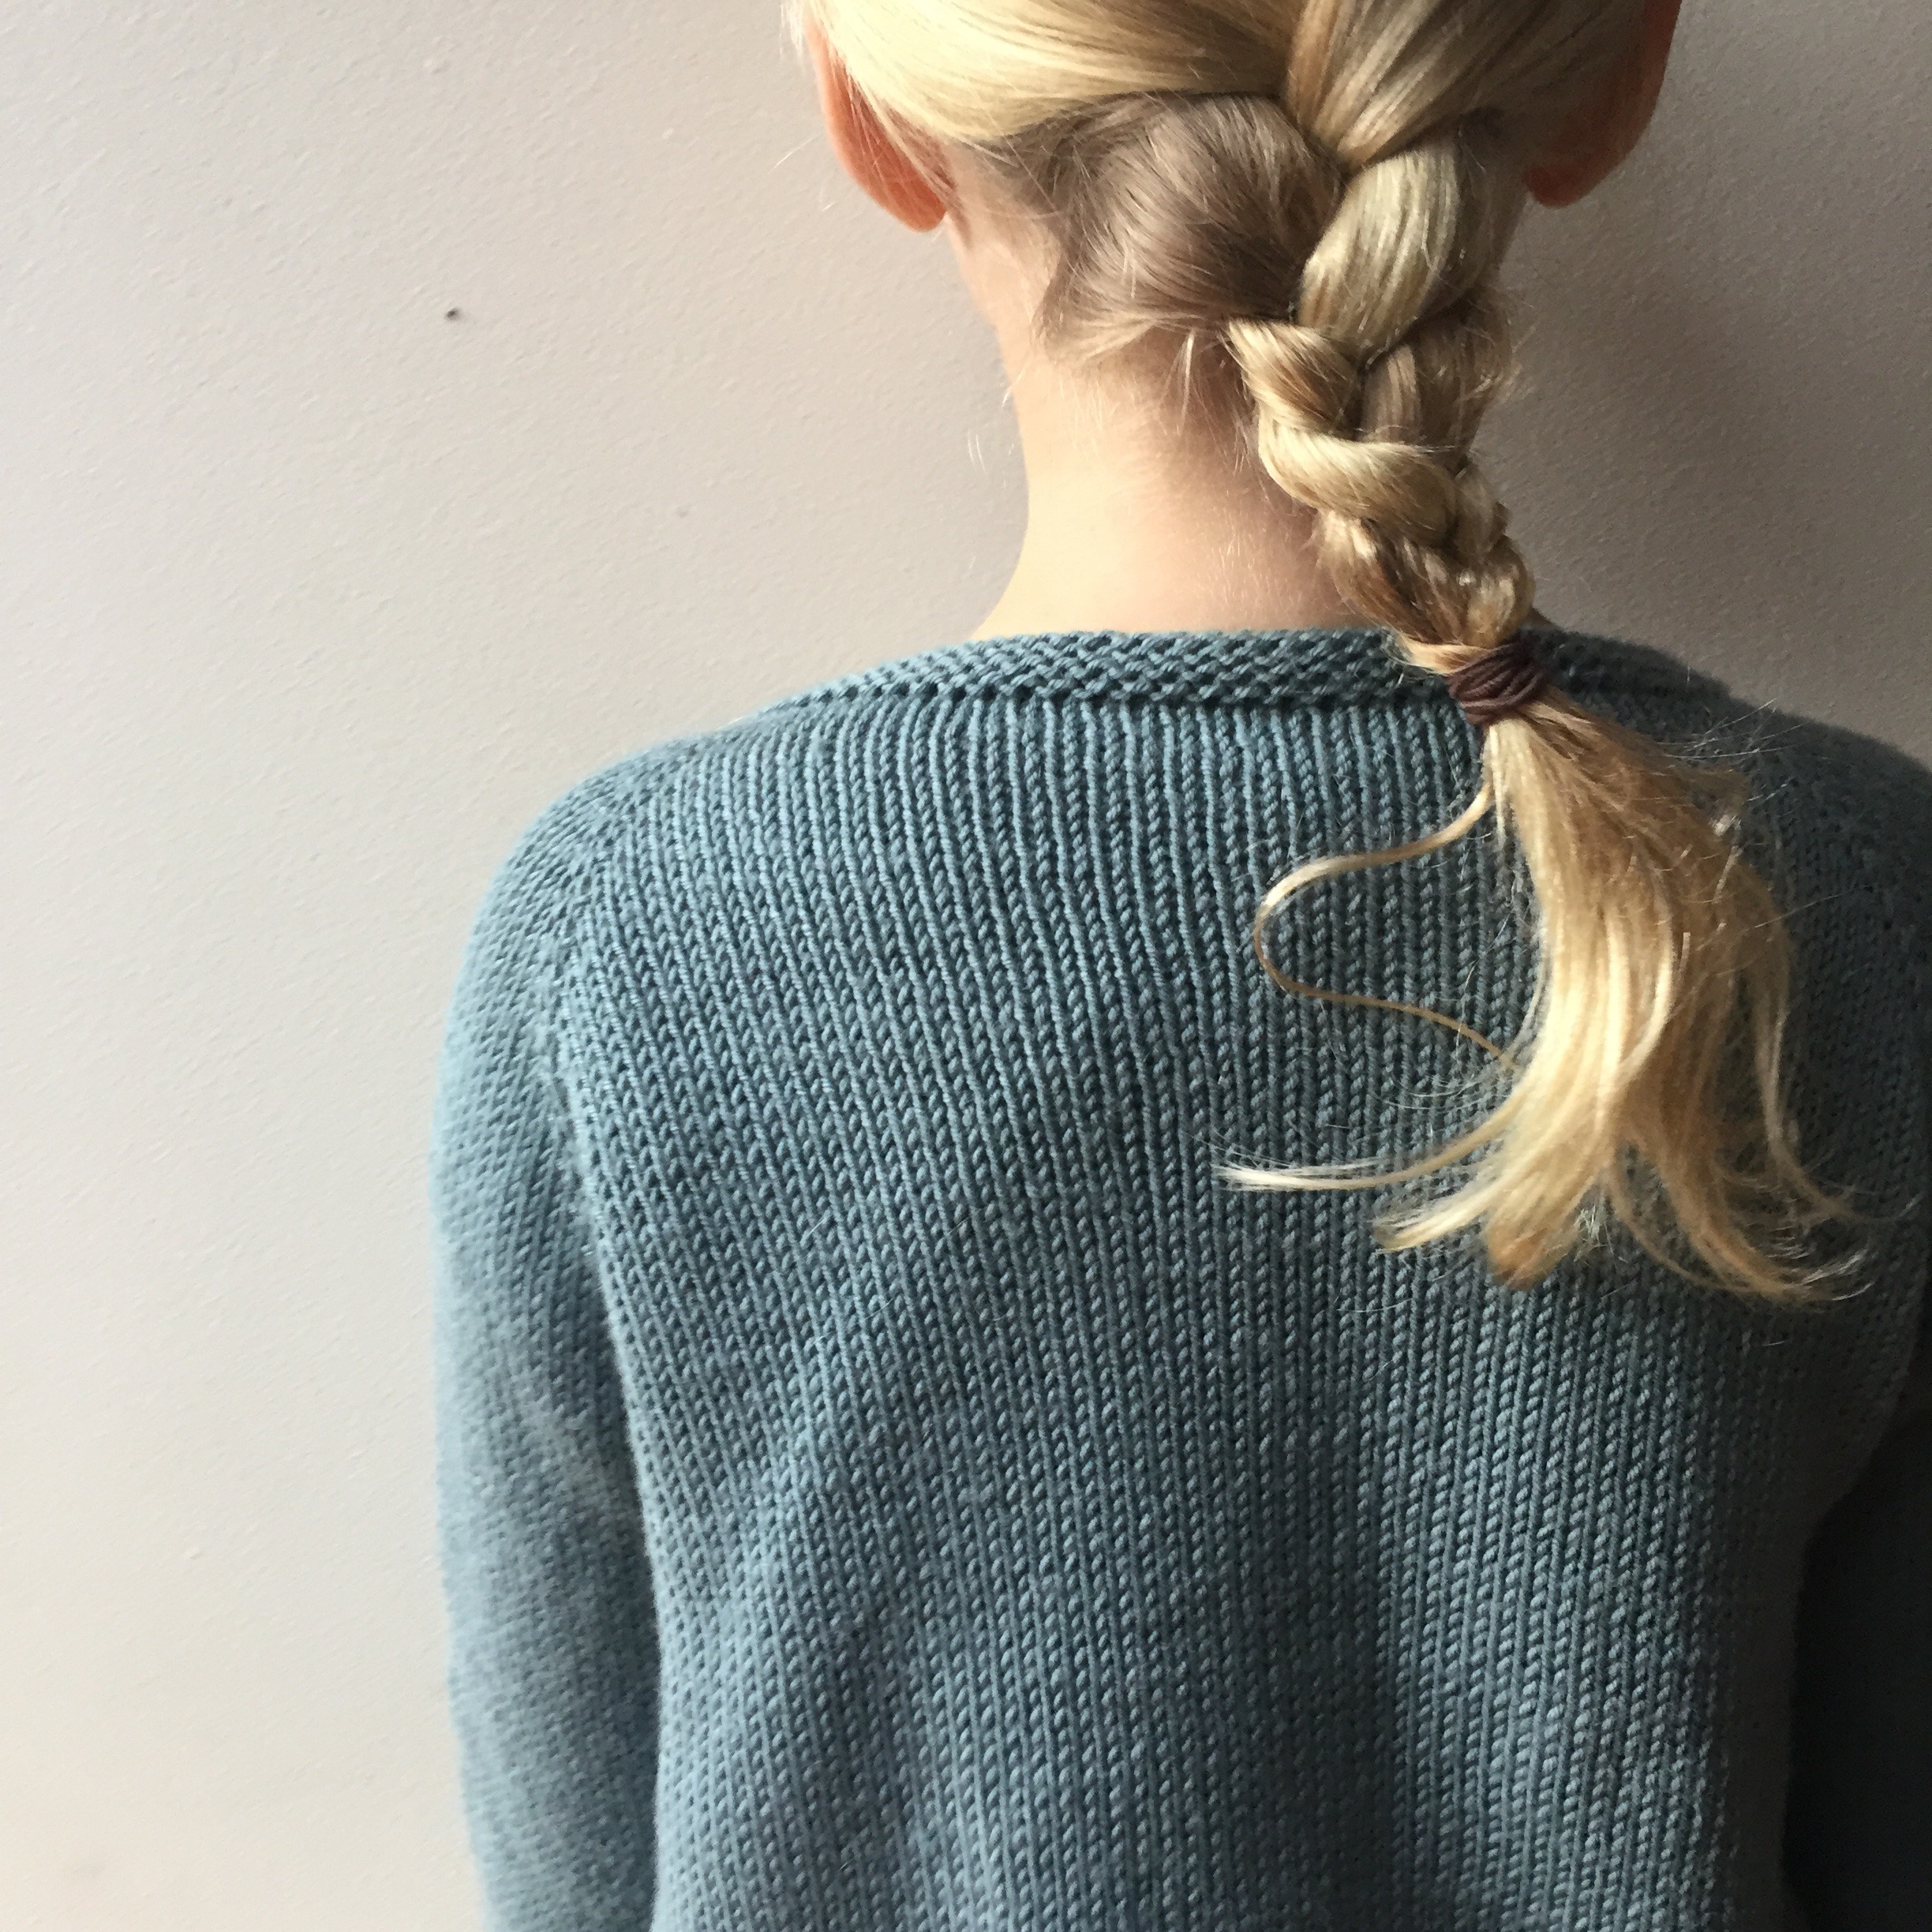
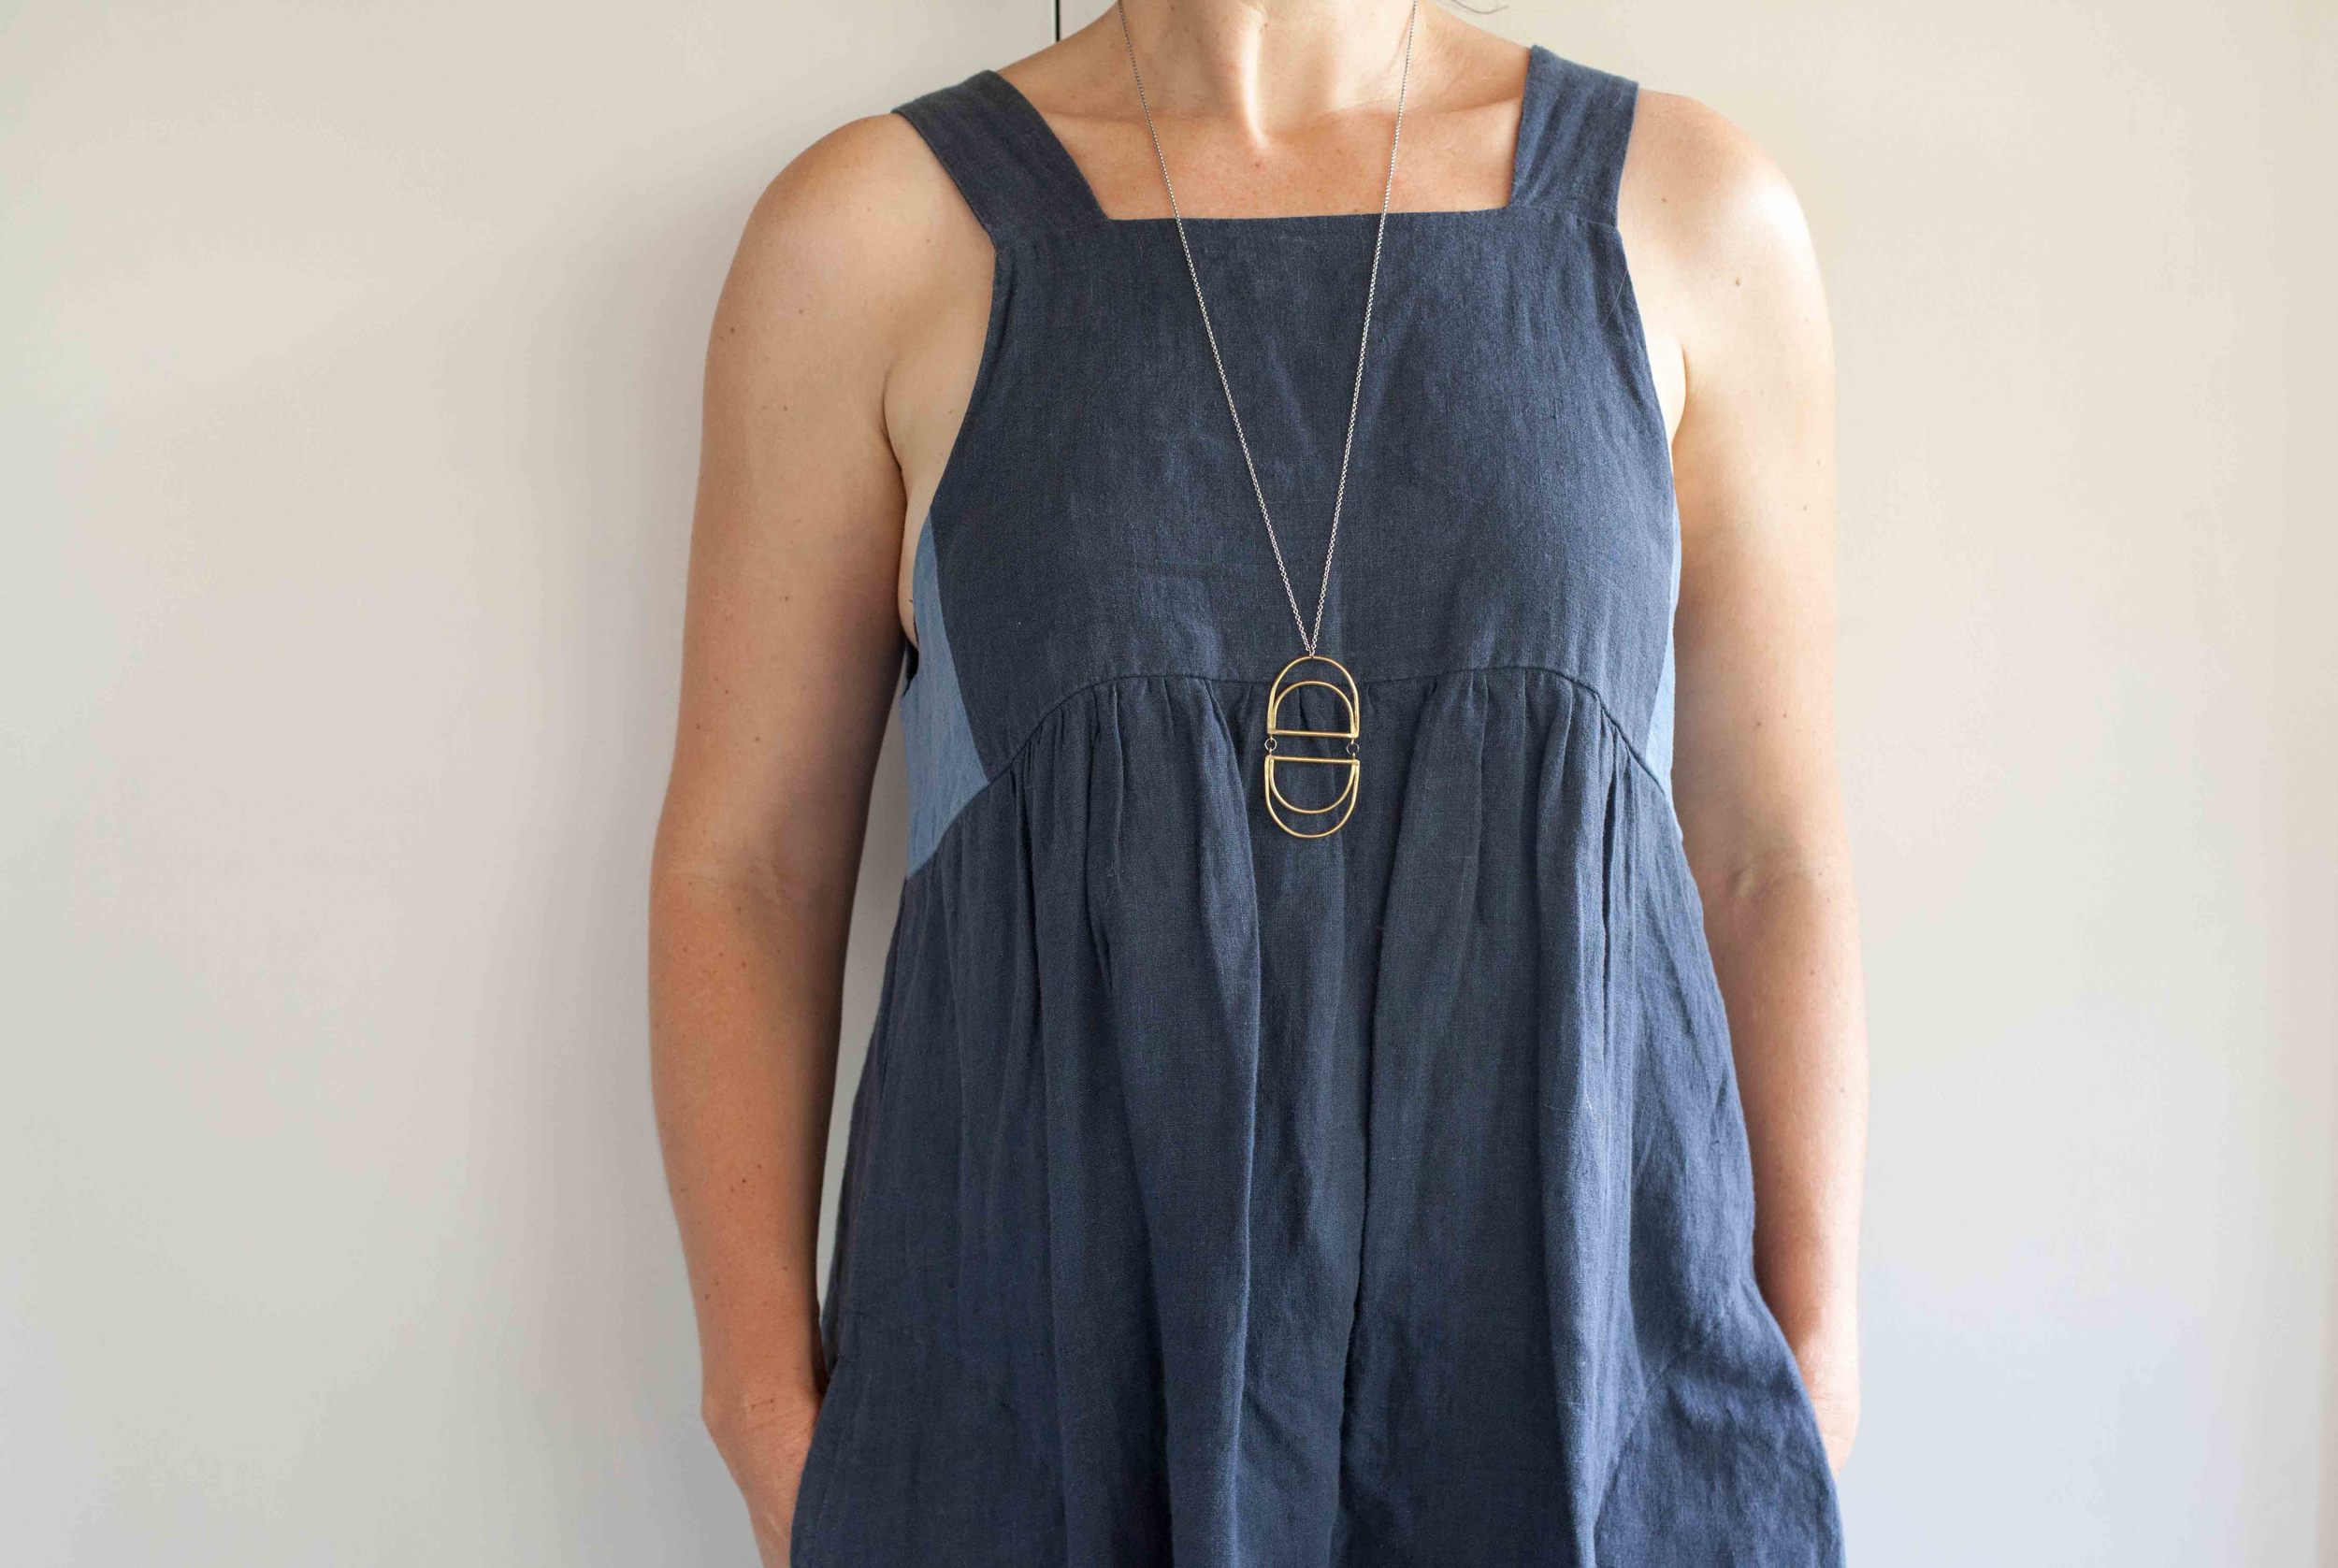
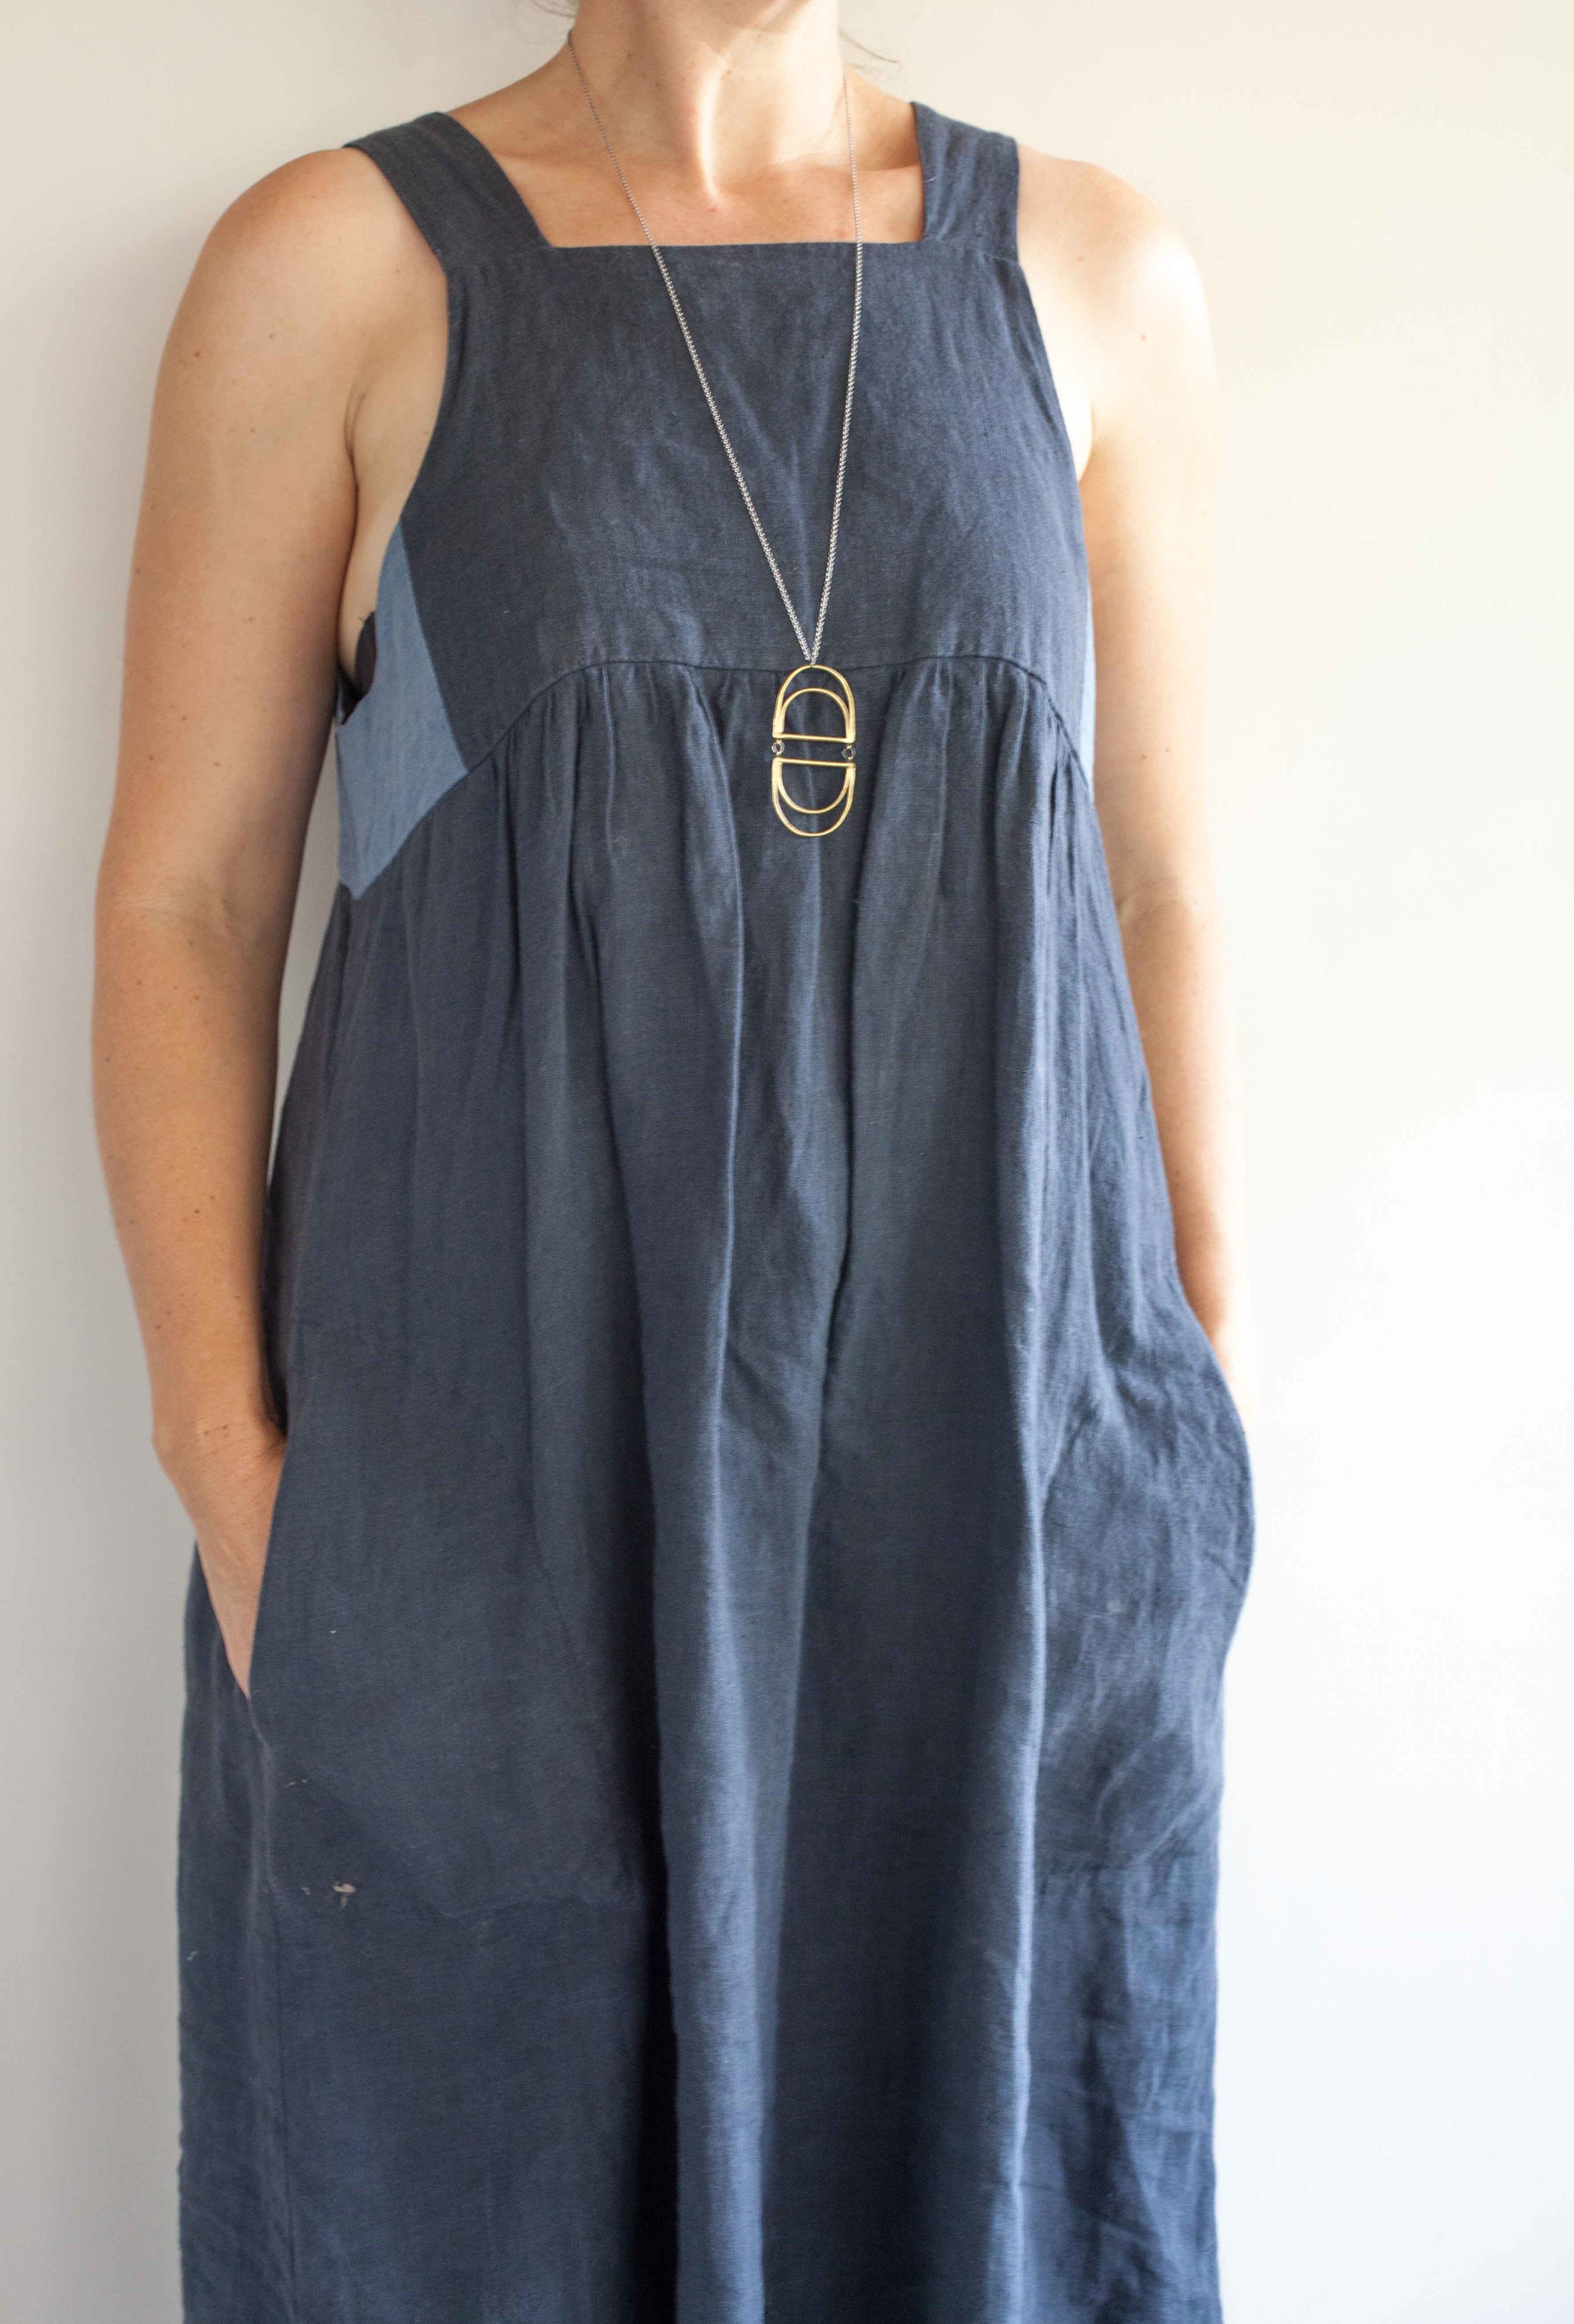
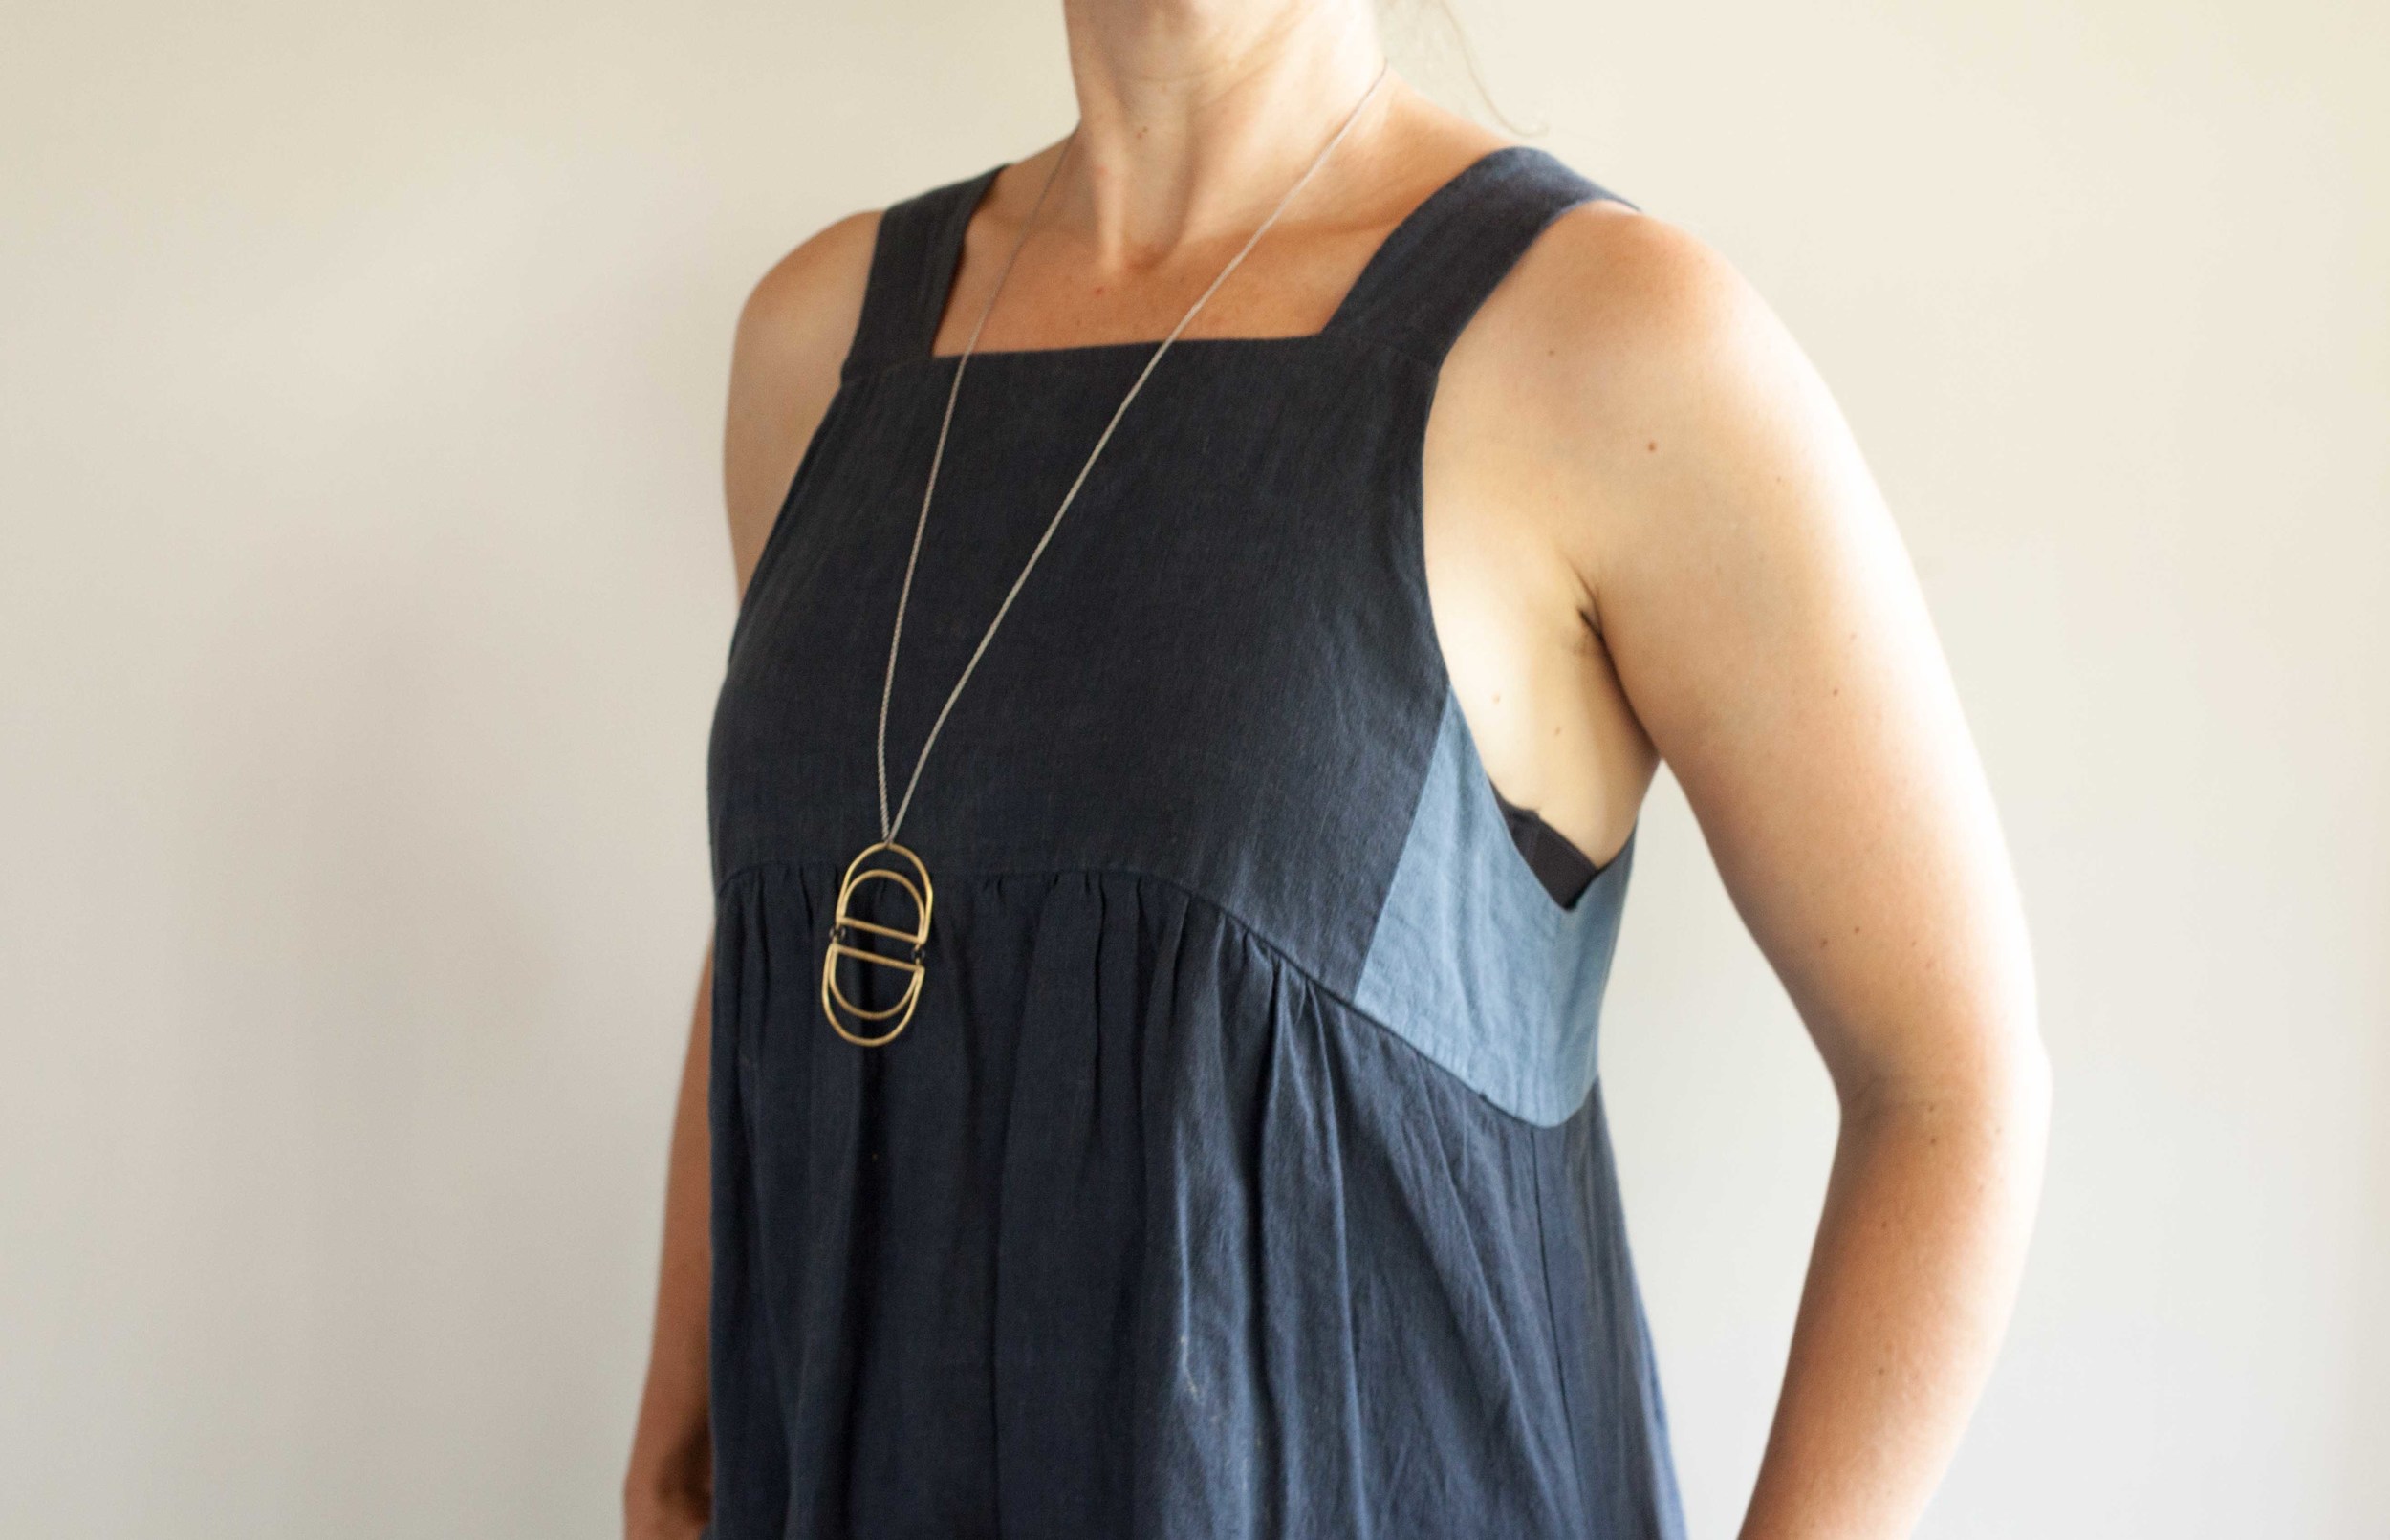
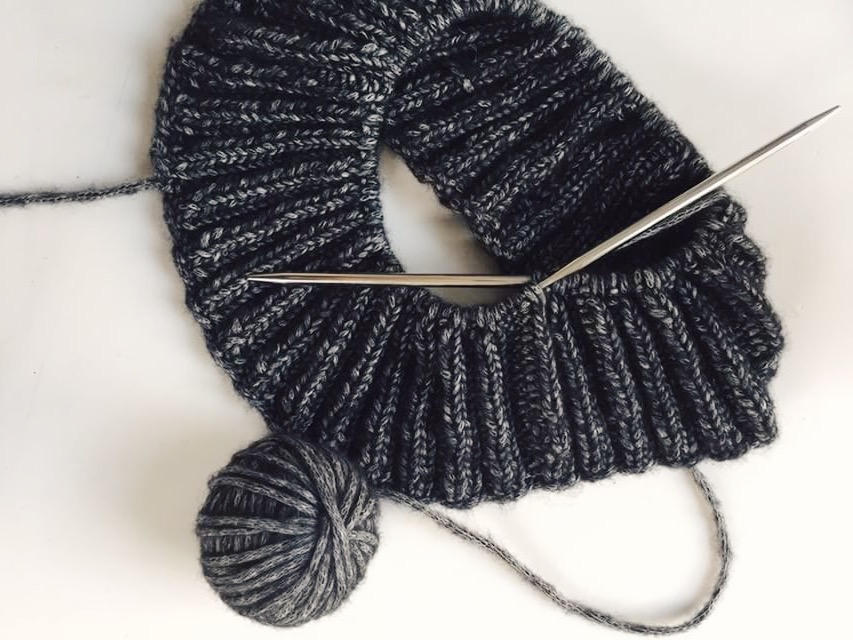
Fast forward a couple of months and she has a cowl. A beautiful usable wearable cowl.

Photo she sent me via an insta story! xx

Photo she sent me via an insta story! xx

This cowl gave Steph repetitive practice of the two basic stitches in knitting. She watched, and tried to learn what they look like, and she was successful. Look at that pretty cowl. No counting, no keeping track.

A simple clean rib shows the newbie knitter what stitch is what. There is a simplicity and grace to it that builds confidence.

People teach garter to newbies as they believe that it's simpler - I believe this is based on the idea that the person only has to learn the knit stitch, and not a purl. Which makes sense, but it is a false economy. Garter is confusing to look at - one row sits on top of the other disguising the stitches. Many experienced knitters can't fix mistakes in garter as it is such a hullabaloo of a stitch pattern.

Yes, learning rib will mean they will have to learn two stitches rather than one, but actually a knit and a purl are incredibly similar in their form, so it's not difficult to learn both. In each case you simply insert the needle tip, you wrap your yarn anti-clockwise through the middle of your two needles, and then you pull your needletip through and pop the stitch off. The only difference between a knit and a purl is whether you insert your needletip from the left or the right. With a bit of practice and concentration it isn't much harder to understand two stitches rather than one*.

If we pay a bit of attention, rib gives us a basic understanding of what a knit stitch looks like on your needles, and what a purl stitch looks like on your needles. By the end of knitting the cowl you know that the front of the stitch looks like (a V) and what the back of the stitch looks like (a bump). Knitting then makes sense, as do the two basic stitches.

This is why I love rib stitch for beginners so much. Steph had so much confidence that she was off to the shop to buy yarn for a TCS Simple Hat. She is almost done already and is waxing lyrical about the joys of knitting. We have another convert!

I'd love to hear about your early knitting experiences and whether this approach would have been helpful?

And if you want to learn to knit, buy some beautiful materials and try this cowl. It is a total winner.

Felicia x

* I have one exception to the rule of teaching rib to newbies and that would be for small people. Small people don't necessarily have the capacity to pay enough attention. Instead with small people, my preference when teaching is to use circular needles and get them to knit a hat in the round..... I'm happy to finish off the top, or instead you can do a square top which kinda make ears. They love the ears.

In Best Of, Thoughts On Craft
18 Comments

A salute to the V

July 19, 2016 thecraftsessions

I realised the other day when I was looking at instagram that one of the cardigans I make most often is a V-neck called Go Buffalo. I rarely mention it because I've been making it so long it's lost the new and exciting feeling that would make me write about it. But that is what is so good about it - it is so simple and so sweet that I make it time and again. Because of it's less distinctive nature (unlike something like Granny's Favourite!) then it doesn't feature as much in photos - but in a way that makes it more wearable. A staple if you will.

So I guess what you need to know is that I love this pattern and I love the resulting cardies. Go Buffalo is simple, sweet, and emphasizes their little shoulders and stick like arms. Basically it's simply a top down raglan with nice proportions. It also lasts each kid for a long time as because it is DK then it is light so when it gets a little smaller and ends up having 3/4 sleeves then it works great over a frock for cool summer nights.

Now I've included quite a few pictures in this post however most of them are quick snaps from instagram. And that is because I don't seem to feel this cardy is as photo worthy as others I make. I couldn't find proper finished photo photos. Crazy because these are some of my all time favourite sweaters my kids own.

Modifications

Of course I modify it every single time. I've never actually made it as written but my modifications are simple. And I'll share them with you now.

1. The neckline.
I like a deeper V - a V that hits at the underarm level - and so instead of what's written I start by doing the neck increases every four rows rather than every two. I don't have a plan I just do them until it looks about right and then I switch to doing them every second row as written in the pattern. This gives a steeper slope initially near the neck, before switching to something closer to a 45degree angle when you get closer to the middle of the chest, about where the first button will go.

How I keep track of how many to increases to do is that I simply count the number of neckline increases in the pattern for the size I'm making and keep increasing until I have that many. As they are a kfb increase then they are easy to read but if you aren't sure then go to this post and it will show you what they look like. Generally I increase until I hit the underarm so that the V is inline with the breastbone. An extra increase or one less increase will not make any difference to your cardy. So don't stress too much.

2. The raglan increases.
Due to the fact that I muck up the row counts with what I do on the neckline then you need to make sure that you do the right number of raglan increases. I generally do this by increasing until I hit the stitch count for the sleeve OR I simply count the number I've done every few rows.

3. Garter Bands.
I love a garter band - especially when comparing it to a horizontal rib band. I think garter bands are tidier. But to make them tidy I decrease my needles size (normally to a 3.5mm from the 4.0mm of the body).

Another thing I do to make the sleeve and the body hem tidy (and sit in nicely) is that I also decrease the number of stitches on my last knit row before I start the garter band. Something like a [k6, k2tog] repeat works well. It doesn't matter whether this repeat fits into the number of stitches you have as noone will know but you. Make something up. 

A word about yarns.

The only other thing I'd say/recommend is that I've often made this out of Rowan Felted Tweed. Not a cool and groovy yarn by any stretch of the imagination but it is one of my all time favourites. It is a light DK which means that it has over 150m per 50g ball rather than the standard 100m per 50 of most DK yarns. This makes a lighter fabric which is nice for kidlets.

Also Felted Tweed seems to wear better than any other yarn I've ever used (I'll put Old Maiden Aunt Alpaca Silk and Shilasdair DK in this camp as well). It doesn't really pill, it survives a mild felting and looks great after years of wear. The other thing I love about it is that due to the tweedy nature of the yarn the fabric darns incredibly well. All of these sweaters have had holes put in them by enthusiastic kids in the playground. They have been repaired again and again without looking any worse for wear. You can't even see the darns and that isn't due to my skill. To be honest, I'm a bit of a slapdash darner.

Alrighty then - there you have it tigers. A great pattern that looks sweet and fits any given kid for years. A big V salute if you will.

Felicia x

In Best Of, Inspiration
3 Comments

Me Made May 2016

May 17, 2016 thecraftsessions

Most of you I'm sure know of Me Made May. If you don't then head over here and take a look.

My take on it is that this little handmade community of ours comes together to elevate and celebrate our handmade wardrobes, whether we are just at the start of making our #handmadewardrobe or like me we have been at it for a few years.

I took part last year - but I didn't plan to this year as I'm a little dis-trac-ted! But as I wear handmade nearly every day then I just started taking snaps. Last year I was religious about my photo taking but this year well life isn't working quite like that. And I don't think it matters.

The point is to celebrate what it is that we do. We make stuff! With our hands and our hearts! As a community! It's super.

This last year I have only made a few extra bits and pieces to fill some gaps - like a few Lou Box Tops and my Annie Dress but the consciousness raising that is the month of Me Made May has made realise that there are a few handmade pieces that I do not wear. Like ever. They don't feel like me, even though I love them.

Normally I give those kinds of garments away to my girlfriends, but as this one won't fit any of them due to boob/shoulder size, then if you pop back tomorrow I'll take a photo and give it away to one of you lot. It's pretty special - Nani Iro! :) I just thought it might be a nice way to celebrate Me Made May.

And as an aside if you aren't yet sewing your own clothes but think you might like to then head on over and have a look at our Simple Sewing 101 series. Many a newbie sewer has got started using Simple Sewing and I love watching your tops pop up on Instagram.

Join in over on instagram. I find it truly inspiring every year and often find people and patterns I had never heard of.

Felicia x

PS. If you are interested in popping back in for the top then I have a bust size of about 35/36". You would need to be similar to make use of it.

In Best Of, Around The Traps, I Made This, Inspiration, Simple Sewing 101
2 Comments

Best Of: Annie Dress

May 3, 2016 thecraftsessions

So I love this dress. I will love it forever. And I think you will to.

But before we start talking about the love, I need to tell you that I screwed it up as I was making it, and so the photos and the dress aren't quite what it should be. I'm going to fix it but I haven't got around to it yet. In the meantime, as I am wearing it all the time regardless, I wanted to share it with you. Me Made May has just begun so I thought some of you in the Northern Hemisphere might be revving up your sewing machines and be looking for inspiration.

I'll tell you more about my howling error in a minute.

So when Tessuti first released the Annie dress/top pattern I wasn't that interested. I had this idea that because Annie was a long dress* and because it had a yoke - which I don't often wear - that it wasn't for me. I thought it would make me look short and like I was wearing a tent. But because of the super clever drafting team at Tessuti it does neither.

You can find many other splendid versions on Instagram here. There are many pretty versions.

The way I found out that it would work for me was by total accident. I popped into Tessuti over the summer and had had a nice chat to the lovely Collette who was wearing one. They had a rack of samples of their patterns and on on a whim I tried the Annie on. And it fitted beautifully. Like it was made for me.

I purchased the pattern and the linen on the spot. A rare thing for me these days but when you know, you know.

Tessuti patterns often do detail in the drafting, beautifully. Where another pattern company might make a line straight because it was simpler, they take the care to curve where they need to curve, even if that curve is very subtle. 

With the Annie Dress it is the subtle line of the yoke, the line of the side panels and the line of the top of the skirt mean that this long gathered skirt actually has shape. The lines of the dress follow the lines of my body and is really flattering, as opposed to swallowing me whole. And then the curve of the straps has it sitting beautifully on the shoulders.

Beautiful non-tent-like line where you can see the pretty curve of the yoke. The odd bit around the armpit is due to my error.

Beautiful non-tent-like line where you can see the pretty curve of the yoke. The odd bit around the armpit is due to my error.

There is an issue though! The issue is that if you don't get the strap length right - as everyone has different shoulders, then you could end up as I did, with straps that are too long. You might do this by accident as you might not know to check. I did it through stupidity.

As I was in Tessuti trying on the sample, Collette was fiddling with the straps. She said in a clear and cheerful voice "You would need to make the straps about an inch shorter". Just like that, she said it, plain and simple.

However, when it actually came to making Annie I thought I knew better. The straps looked super short and so I ignored her knowledge and her advice, and lo and behold the straps are way too long. And the dress shows the side of my bra**, hangs a bit funny, and I need to fix it. It will look much better as it has weirdly odd draping going on in the side panel. You can kind of see the odd draping above and how the side yoke is way too low in the photo below.

It is not easy to fix the length of the straps once you have finished Annie, as the beautiful finishing means that they are fully enclosed. I will be doing some professional hacking to fix it in the next week or so, and I'll post some photos when I'm done.

But as you haven't started yet, how could you get around it, and get the strap length right?

I suggest you try the top on when you first sew the straps on to the yoke. Assess the straps while remembering that the skirt pulls the yoke down and think about whether you will need to make them shorter. A simple step that I should have taken.

Annie's insides are as beautiful as her outsides, especially if you were to take the time to handstitch the inner yoke. I didn't but you could. She also has pockets and is magnificent to wear. She is swishy! People keep asking about her.

While she is clearly a summer frock I plan on wearing her all winter under sweaters or with long-sleeved merino tops underneath. I'm as surprised by this as you are. Not my normal style and yet feels just like me.

You can find the Annie pattern here .

Enjoy x

Felicia.

*She can also be a top.

**Newly purchased strapless bra for this dress. Strapless bras have come a long way in my 20 years without one. This one has some silicon stuff that actually means it stays up for a couple of hours without hitching. It also needs to put on with some thought and not thrown on for a quick photo..... so please excuse the weird side boob.

In Best Of
3 Comments

Favourite Books - Penguins By Anna Maltz

March 25, 2016 thecraftsessions

Two things are happening on this here blog today that aren't normal. Firstly we are talking penguins because Anna Maltz has written a knitting book about penguins! And secondly, and for once, I have the slightest conflict of interest :)!  And that is that I've met Anna and think she is magic, so I am possibly slightly biased, but in a good way. Meeting her made me appreciate her work more as I got to put her amazing work in context and talk knitting philosophy, which you all know I love.

But that isn't why I love this book or why I'm telling you about it. This book stands on it's own two feet as one of the most interesting and innovative knitting books I've seen in a long while. Because it isn't just a knitting book. It is a book that has context and stories and information and lovely illustrations .... as well as beautiful patterns, joyful photos and really interesting (new!) knitting techniques.

Some of you may know Anna from Instagram (@sweaterspotter) and I've featured some of her magic on this here website before in our I Made This series where she talks about her amazing dress. She is an artist and a writer and a knitwear designer. She is interested and interesting; I love that in a human.. She makes patterns that look uniquely like her patterns. That is a quality shared by only a handful of other designers I can think of*. How Anna combines stitch patterns and techniques in new and interesting ways that mean the projects in this book have me looking, and looking again.

FeliciaSemple-1.jpg
Marlisle! And Anna's shiny happy face.

Marlisle! And Anna's shiny happy face.

One of the things I love about this book - as a seasoned and experienced knitter - is that Anna comes up with her own ways of doing things that keep it interesting. Interesting ways of creating and knitting that lead to beautiful results and fun, like Marlisle, a new technique she introduces in a pattern in the book. She says it best in her quote below, that comes from a great interview she did with Tom of Holland on his blog.

“......being able to reimagine the skills you have at hand, rather than believe you have to make a huge leap into taking on a whole new set”
— Anna Maltz - interview with Tom of Holland

I think the first thing I am going to attempt is the shawl. I love the Rockhopper shawl. Clever construction, and with more subtle colour blocking, it will be right up my alley. Perfect on-the-go school concert knitting or school holiday park visiting knitting. Interesting and boring (in the way only garter stitch can be), at the same time.

The interesting Rockhopper shawl

The interesting Rockhopper shawl

It's super fun and interesting construction.

It's super fun and interesting construction.

Pinglewin.

Pinglewin.

Except that maybe I may have to first make a penguin. My kid's have been totally obsessed with this book, with a good but very simple reason. And that is Pinglewin. He is an all white bird with his own black onesie that goes over the top, and makes him into a Penguin. Ingenious. So ingenious that even my oldest says he needs one for his birthday.

Sadly for me they all want their own version. I don't do soft toys very often but when they beg you with their big hopeful eyes ....well I'm a sucker for the eyes. Three penguins it is.

If I've sparked your interest then you can buy it direct from Anna here and you can see the projects on Ravelry here. Penguins is a real knitter's book for knitters who love something new, and really who doesn't love a penguin?

Felicia x

*Maybe Westknits and Norah Gaughan and the lovely Kirsten Johnstone and Helga Isager

In Best Of
Comment
Older Posts →

Welcome! I'm Felicia - creator of The Craft Sessions and Soul Craft Festival.

This blog aims to celebrate the connection between hand-making and our well-being.
These posts aim to foster a love of hand-making and discuss the ways domestic handcrafts elevate our everyday.

I love the contributions you make to this space via your comments and learn so much from each and every one. x

Thoughts On Craft

Simple Sewing 101

Stash Less

The RetreaT

Featured
Making Fast Fashion: Some More Of The Grey
Apr 19, 2022
Making Fast Fashion: Some More Of The Grey
Apr 19, 2022
Apr 19, 2022
Is My Making Fast Fashion?
Apr 12, 2022
Is My Making Fast Fashion?
Apr 12, 2022
Apr 12, 2022
Why Gauge Matters
Apr 5, 2022
Why Gauge Matters
Apr 5, 2022
Apr 5, 2022
Craft As Simple Mundane Forward Movement
Mar 29, 2022
Craft As Simple Mundane Forward Movement
Mar 29, 2022
Mar 29, 2022
Craft As A Virtuous Cycle*
Mar 22, 2022
Craft As A Virtuous Cycle*
Mar 22, 2022
Mar 22, 2022
Craft & The Slow Nostalgic Finish
Mar 15, 2022
Craft & The Slow Nostalgic Finish
Mar 15, 2022
Mar 15, 2022

popular posts

Craft As A Project V’s Craft As A Practice

Our Fear Of Going Back

Making Is Not Inherently Creative

Why All Crafters Need A Visual Diary

Craft As A Manifestation Of Love And Loss

Moving On From Perfectionism

The Secret To Becoming A Great Knitter!

Simple Sewing 101 - Part 1

Craft In The Middle Of Motherhood

Another #theyearofthescrap #ellenscardigan using some #oldmaidenaunt alpaca silk from many years ago. What I love about this little cardy is it’s simplicity and how little yarn it uses. Perfect for scrap knitting. I now have a little pile of ba
New blog post: Craft as elevating the mundane! I think this idea is so important. 🌿 'Making is about enriching the moments of our lives; it’s about making the mundane (and not the extraordinary) more abundant and that bit more lush…. el
Block 8/12 - I’m so excited to be back making this for my smallest for her 10th birthday. It’s a #stash_less #theyearofthescrap quilt that is based on an incredible #geesbend quilt. And it’s all scraps and precious bits and pieces.
Another #theyearofthescrap #ellenscardigan using some #oldmaidenaunt alpaca silk from many years ago. What I love about this little cardy is it’s simplicity and how little yarn it uses. Perfect for scrap knitting. I now have a little pile of ba New blog post: Craft as elevating the mundane! I think this idea is so important. 🌿 'Making is about enriching the moments of our lives; it’s about making the mundane (and not the extraordinary) more abundant and that bit more lush…. el Block 8/12 - I’m so excited to be back making this for my smallest for her 10th birthday. It’s a #stash_less #theyearofthescrap quilt that is based on an incredible #geesbend quilt. And it’s all scraps and precious bits and pieces.
The Blog Archives!
  • April 2022
  • March 2022
  • February 2022
  • December 2021
  • March 2021
  • February 2021
  • November 2020
  • July 2020
  • June 2020
  • May 2020
  • April 2020
  • March 2020
  • February 2020
  • December 2019
  • March 2019
  • February 2019
  • January 2019
  • December 2018
  • November 2018
  • October 2018
  • August 2018
  • July 2018
  • May 2018
  • April 2018
  • March 2018
  • February 2018
  • January 2018
  • December 2017
  • November 2017
  • October 2017
  • September 2017
  • August 2017
  • July 2017
  • June 2017
  • May 2017
  • April 2017
  • March 2017
  • February 2017
  • January 2017
  • November 2016
  • October 2016
  • September 2016
  • August 2016
  • July 2016
  • June 2016
  • May 2016
  • April 2016
  • March 2016
  • February 2016
  • January 2016
  • December 2015
  • November 2015
  • October 2015
  • September 2015
  • August 2015
  • July 2015
  • June 2015
  • May 2015
  • April 2015
  • March 2015
  • February 2015
  • January 2015
  • December 2014
  • November 2014
  • October 2014
  • September 2014
  • August 2014
  • July 2014
  • June 2014
  • May 2014
  • April 2014
  • March 2014
  • February 2014
  • January 2014
  • December 2013
  • November 2013
  • October 2013
  • September 2013
  • August 2013
  • July 2013
  • June 2013
Featured
Making Fast Fashion: Some More Of The Grey
Apr 19, 2022
Making Fast Fashion: Some More Of The Grey
Apr 19, 2022
Apr 19, 2022
Is My Making Fast Fashion?
Apr 12, 2022
Is My Making Fast Fashion?
Apr 12, 2022
Apr 12, 2022

We Live and work on the traditional lands of the Wurundjeri people of the Kulin nation.
We acknowledge that sovereignty was never ceded and pay our respect to elders past, present and emerging.

Copyright the Craft Sessions 2020

Logo designed by the lovely Mara of Printspace and Girling Design