The thing is that I'm not kidding with my heading. There is a secret....and I have no idea why it is a secret. Nor do I have any idea why noone talks about it or writes about it. Drives me a little nuts. So this is the post my friends when all is revealed. This is the post I have been meaning to write since the blog began.
See if any of this describes you. You might be an OK knitter. You might be a good knitter. You have been knitting for a few years (1 or 3 or 10 or even 40). You might be able to increase and decrease and have the skills to do an icord or a cable or a X or a Y or a Z. You have some skills. Whatever it is that you can do, means that you make pretty things - that people compliment you on. You like knitting. You may LOVE knitting!
BUT one of these things other things is also true. While you are knitting you lack a bit of confidence. You worry about dropping stitches or misreading instructions. You worry about loosing count. You worry that you will lose your place. You worry that when you make a mistake you won't understand it well enough to fix it. You are scared to rip the knitting off the needles, so you tink back row after row, just to fix a one stitch mistake. You think that when you lose your place there is no way of figuring out where you are at, so you just need to fake it and maybe measure it with a tape measure, and guess a bit. You really want to try that lace pattern but don't have the headspace for all the counting at the moment. I could go on but I think you get it.
You have some fear. You have some tension in your body, and possibly in your heart as you knit. And you definitely have some worry. Knitting doesn't feel glorious and free and meditative all the time. It often feels a bit stressful and causes angst.
The thing is - you should never have to count your rows or your stitches* - except to do the odd stitch count to make sure you are on track. You should never knit with fear in your heart. You should be able to knit something in pattern without having to worry about finishing at a particular point so you don't get lost. You should be able to put something down for a year and pick it up and figure out where you are up to by looking at the knitting - not the pattern!!
So let's get to the secret because this answer will truly set you free - free from all the grief and angst and pain.....

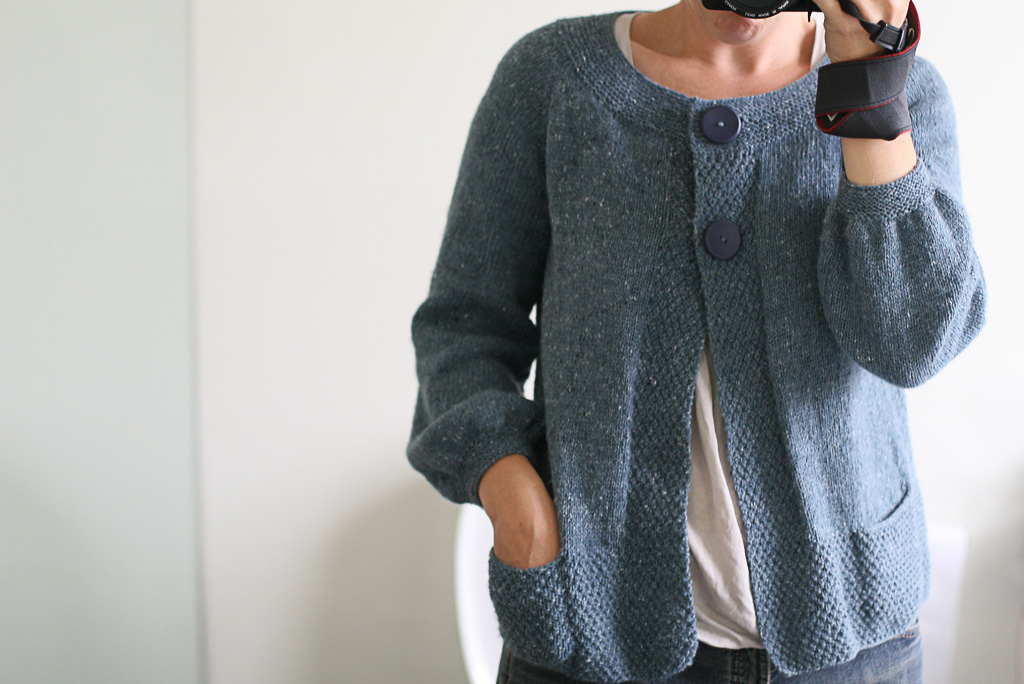
A favourite knit - Immie Tee by Carrie from Madder Made.
You need to .............
Learn to read your knitting!
This post is the start of a little mini series called - Learn To Read Your Knitting - where I tell you all I have learned over the last 10 or so years about the structure of knitting and why you should care.
So what does that even mean in reality?? And why is learning to read your knitting such a big deal?
Learning to read your knitting means that you will understand the structure of the piece you are working on. And structure is the key to becoming great at knitting - taking your knitting to the next level so to speak. You will be able to see if you have made a mistake and you will be able to see where the mistake was. And what it was. You will be able to fix things. You will rarely need to count in your head (except for the odd stitch count here and there), or tick off the number of increases you have done on the pattern. You will be able to alter your garments because you understand the structure of what you are making. You will be able to recover a garment that got left in your bag, slipped off the needles and then was chewed on by a toddler/dog.
Knitting will just be about joy **! You will be free!
Now this will take some time - it has taken me a few years! It will take some thought. And it will take some practice. I'm going to try to help - but really you can do this yourself. You really can. It is something you learn bit by bit. You will learn through your mistakes. You will learn through practice.
You can do this from wherever you are in your knitting career - complete beginner or capable knitter. You should only attempt to do it when you are knitting with light- or mid-coloured not-super-fluffy yarn, and this is a no-alcohol, no-exhaustion type situation. It calls for a clear head!
Today's post will be obvious to some of you, but I know there are others of you who still see it as a bit of a mystery. Hopefully this helps. Don't expect that it will all make sense after reading through this once. Just start taking notice and it will make sense in time.
Also when you are starting to read your knitting ignore garter stitch. I know it is a recommended stitch for beginners, and you can still knit it, but don't attempt to understand it till you have got the basics. (In my opinion a much better starting project for beginners is a 3 x 3 or 4 x 4 rib cowl or hat or scarf because you can see whether you need to do a purl or a knit stitch next and start understanding structure from day 1.)

The beautiful Clara - an all time favourite.
I am going to start writing about it using a yarn I had to hand - not perfect because it does have a little twist in it - and if I had time I would redo the photos and use a different colour for the yarn for the row just knitted....next post I promise - the photos will be better! We are starting with stocking stitch - the most basic knit fabric.
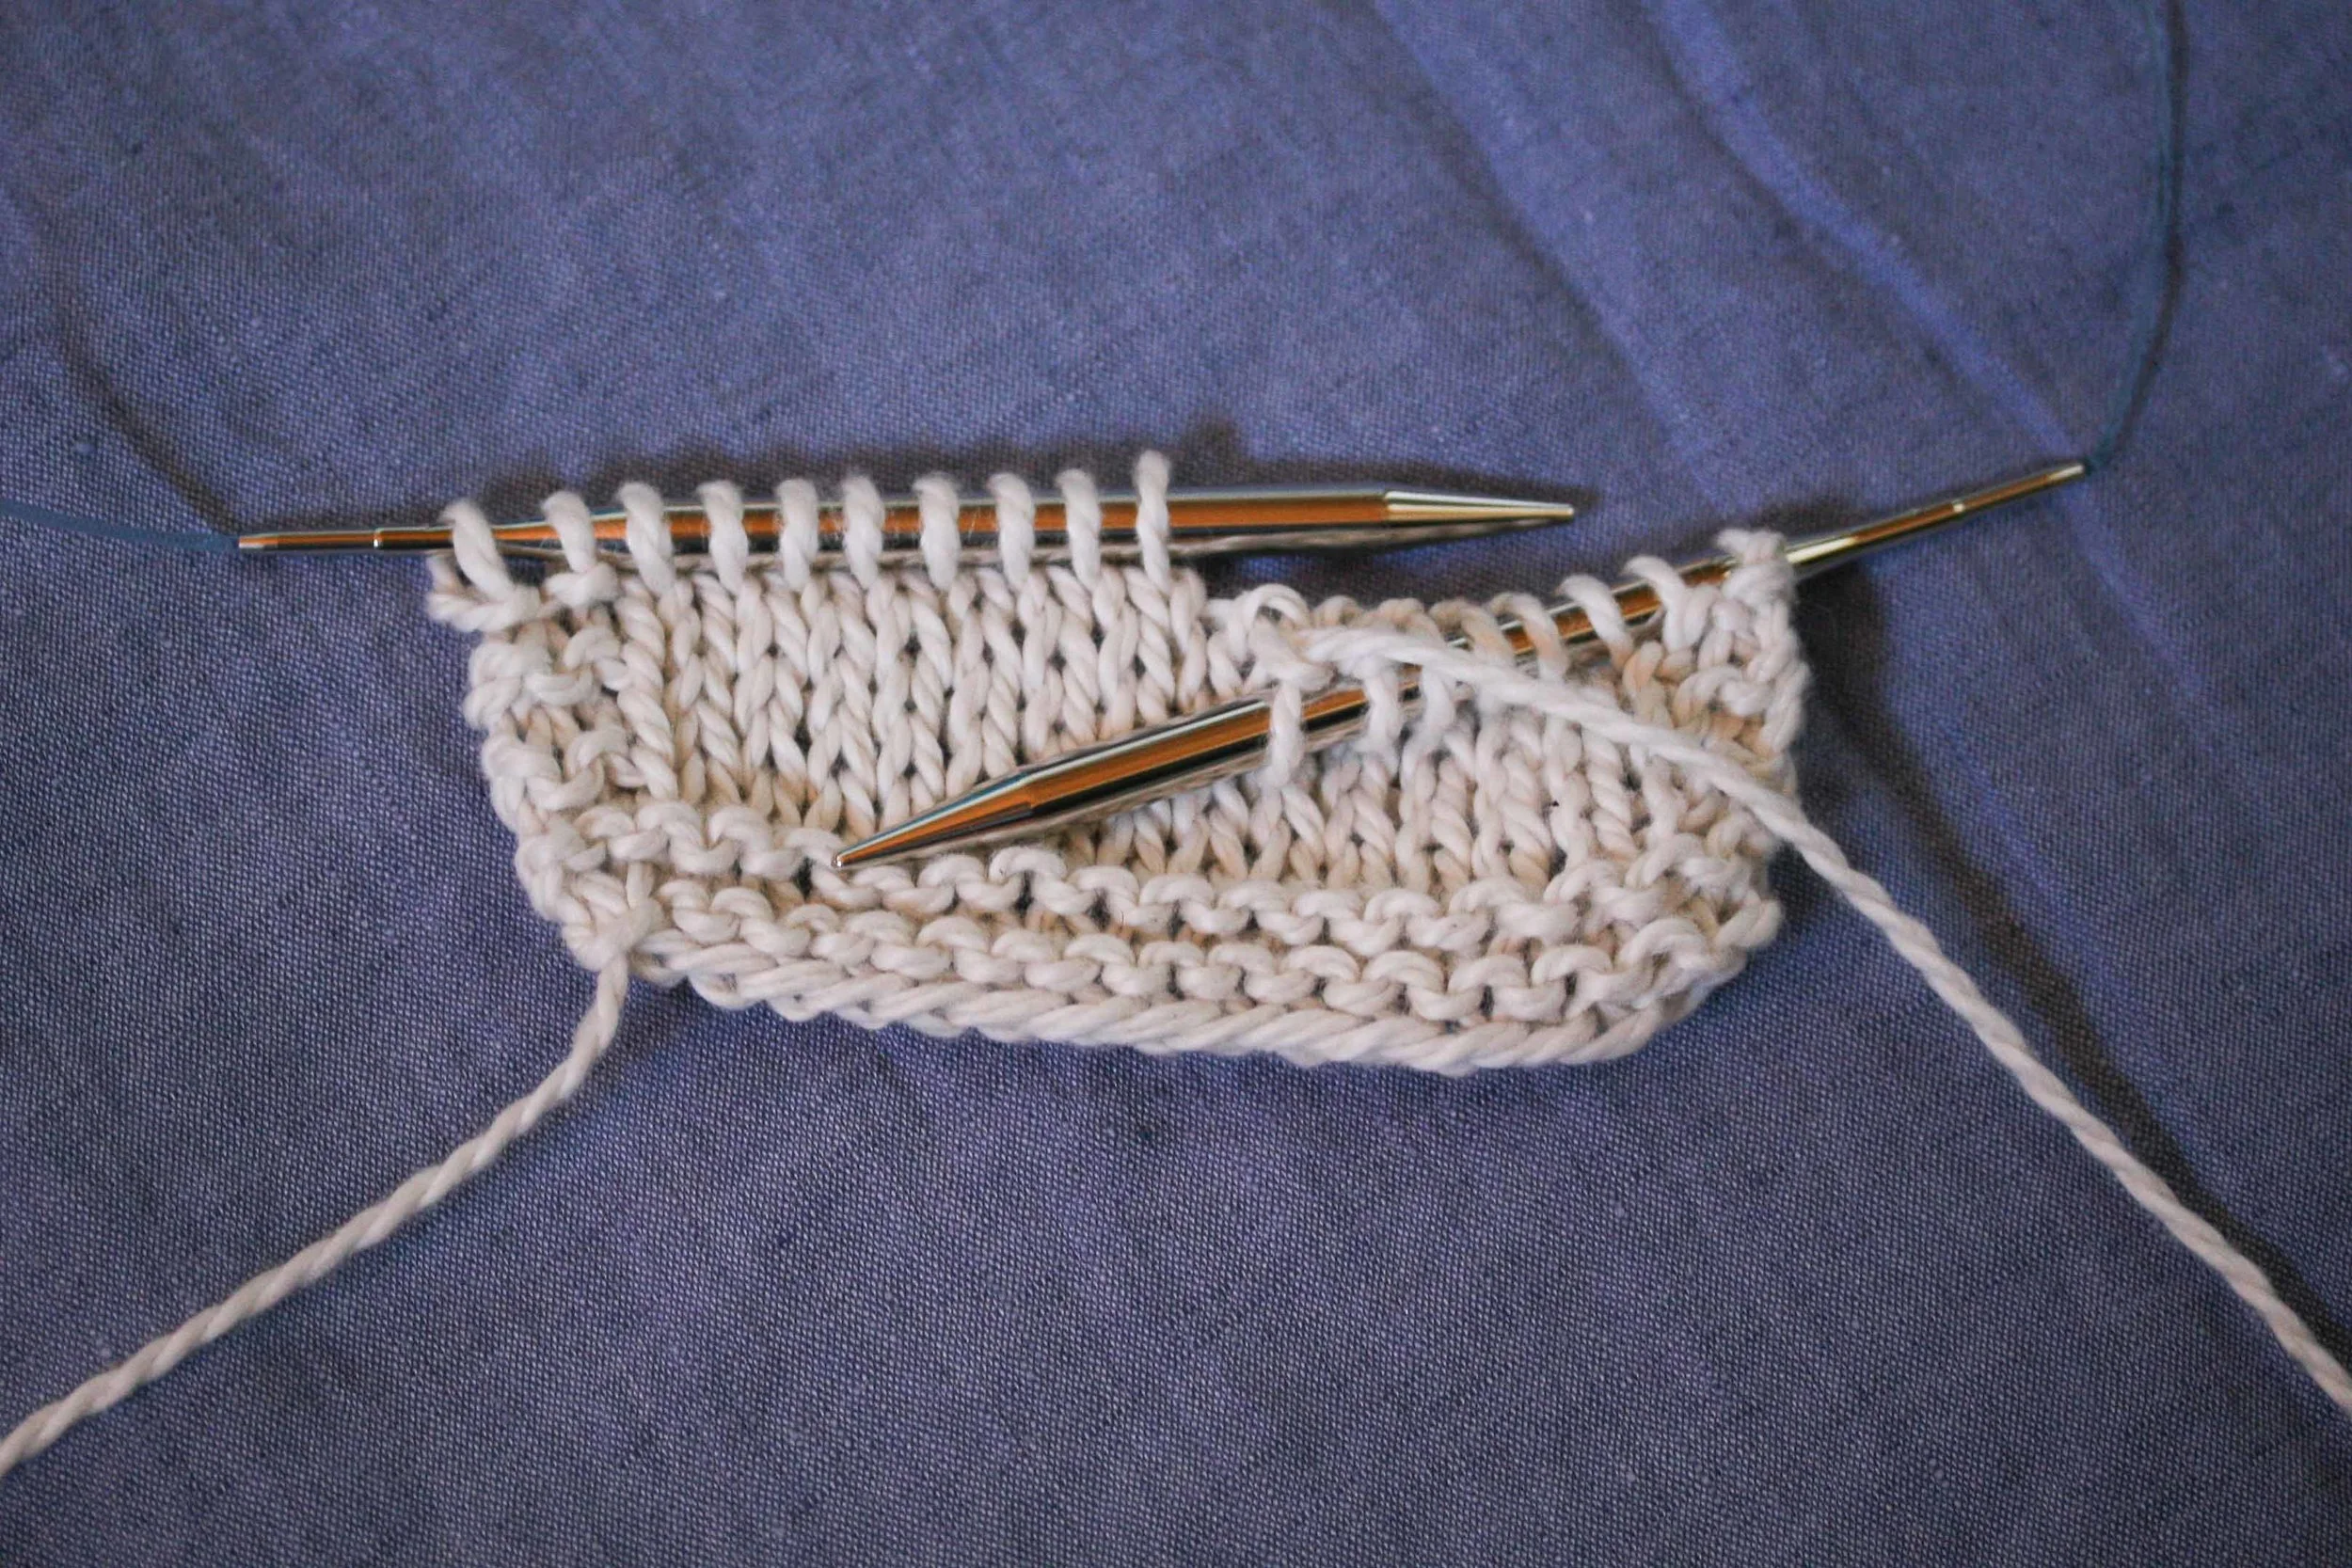
Our sample is knitted at a loose gauge on needles that are too big so we can really see the structure!
Read Your Knitting - Part 1
1. The basic structure of knitted fabric.
The first thing you need to learn is the simplest and most important lesson. Everything hangs on this - the structure of knitting is really just a loop (from the current row) pulled through a loop (of the row below) pulled through a loop (of the row below that) pulled through a loop (of the row below that!). The way in which the loop is pulled through the loop means that you get either a knit or a purl stitch. If you pull the loop from the back through to the front you get a knit stitch. If you pull the exact same loop from the front to the back you will get a purl stitch.

A loop pulled through a loop pulled through a loop. The loop shown is a knit stitch BECAUSE it was pulled from the back through to the front - see how it pokes forward/up.
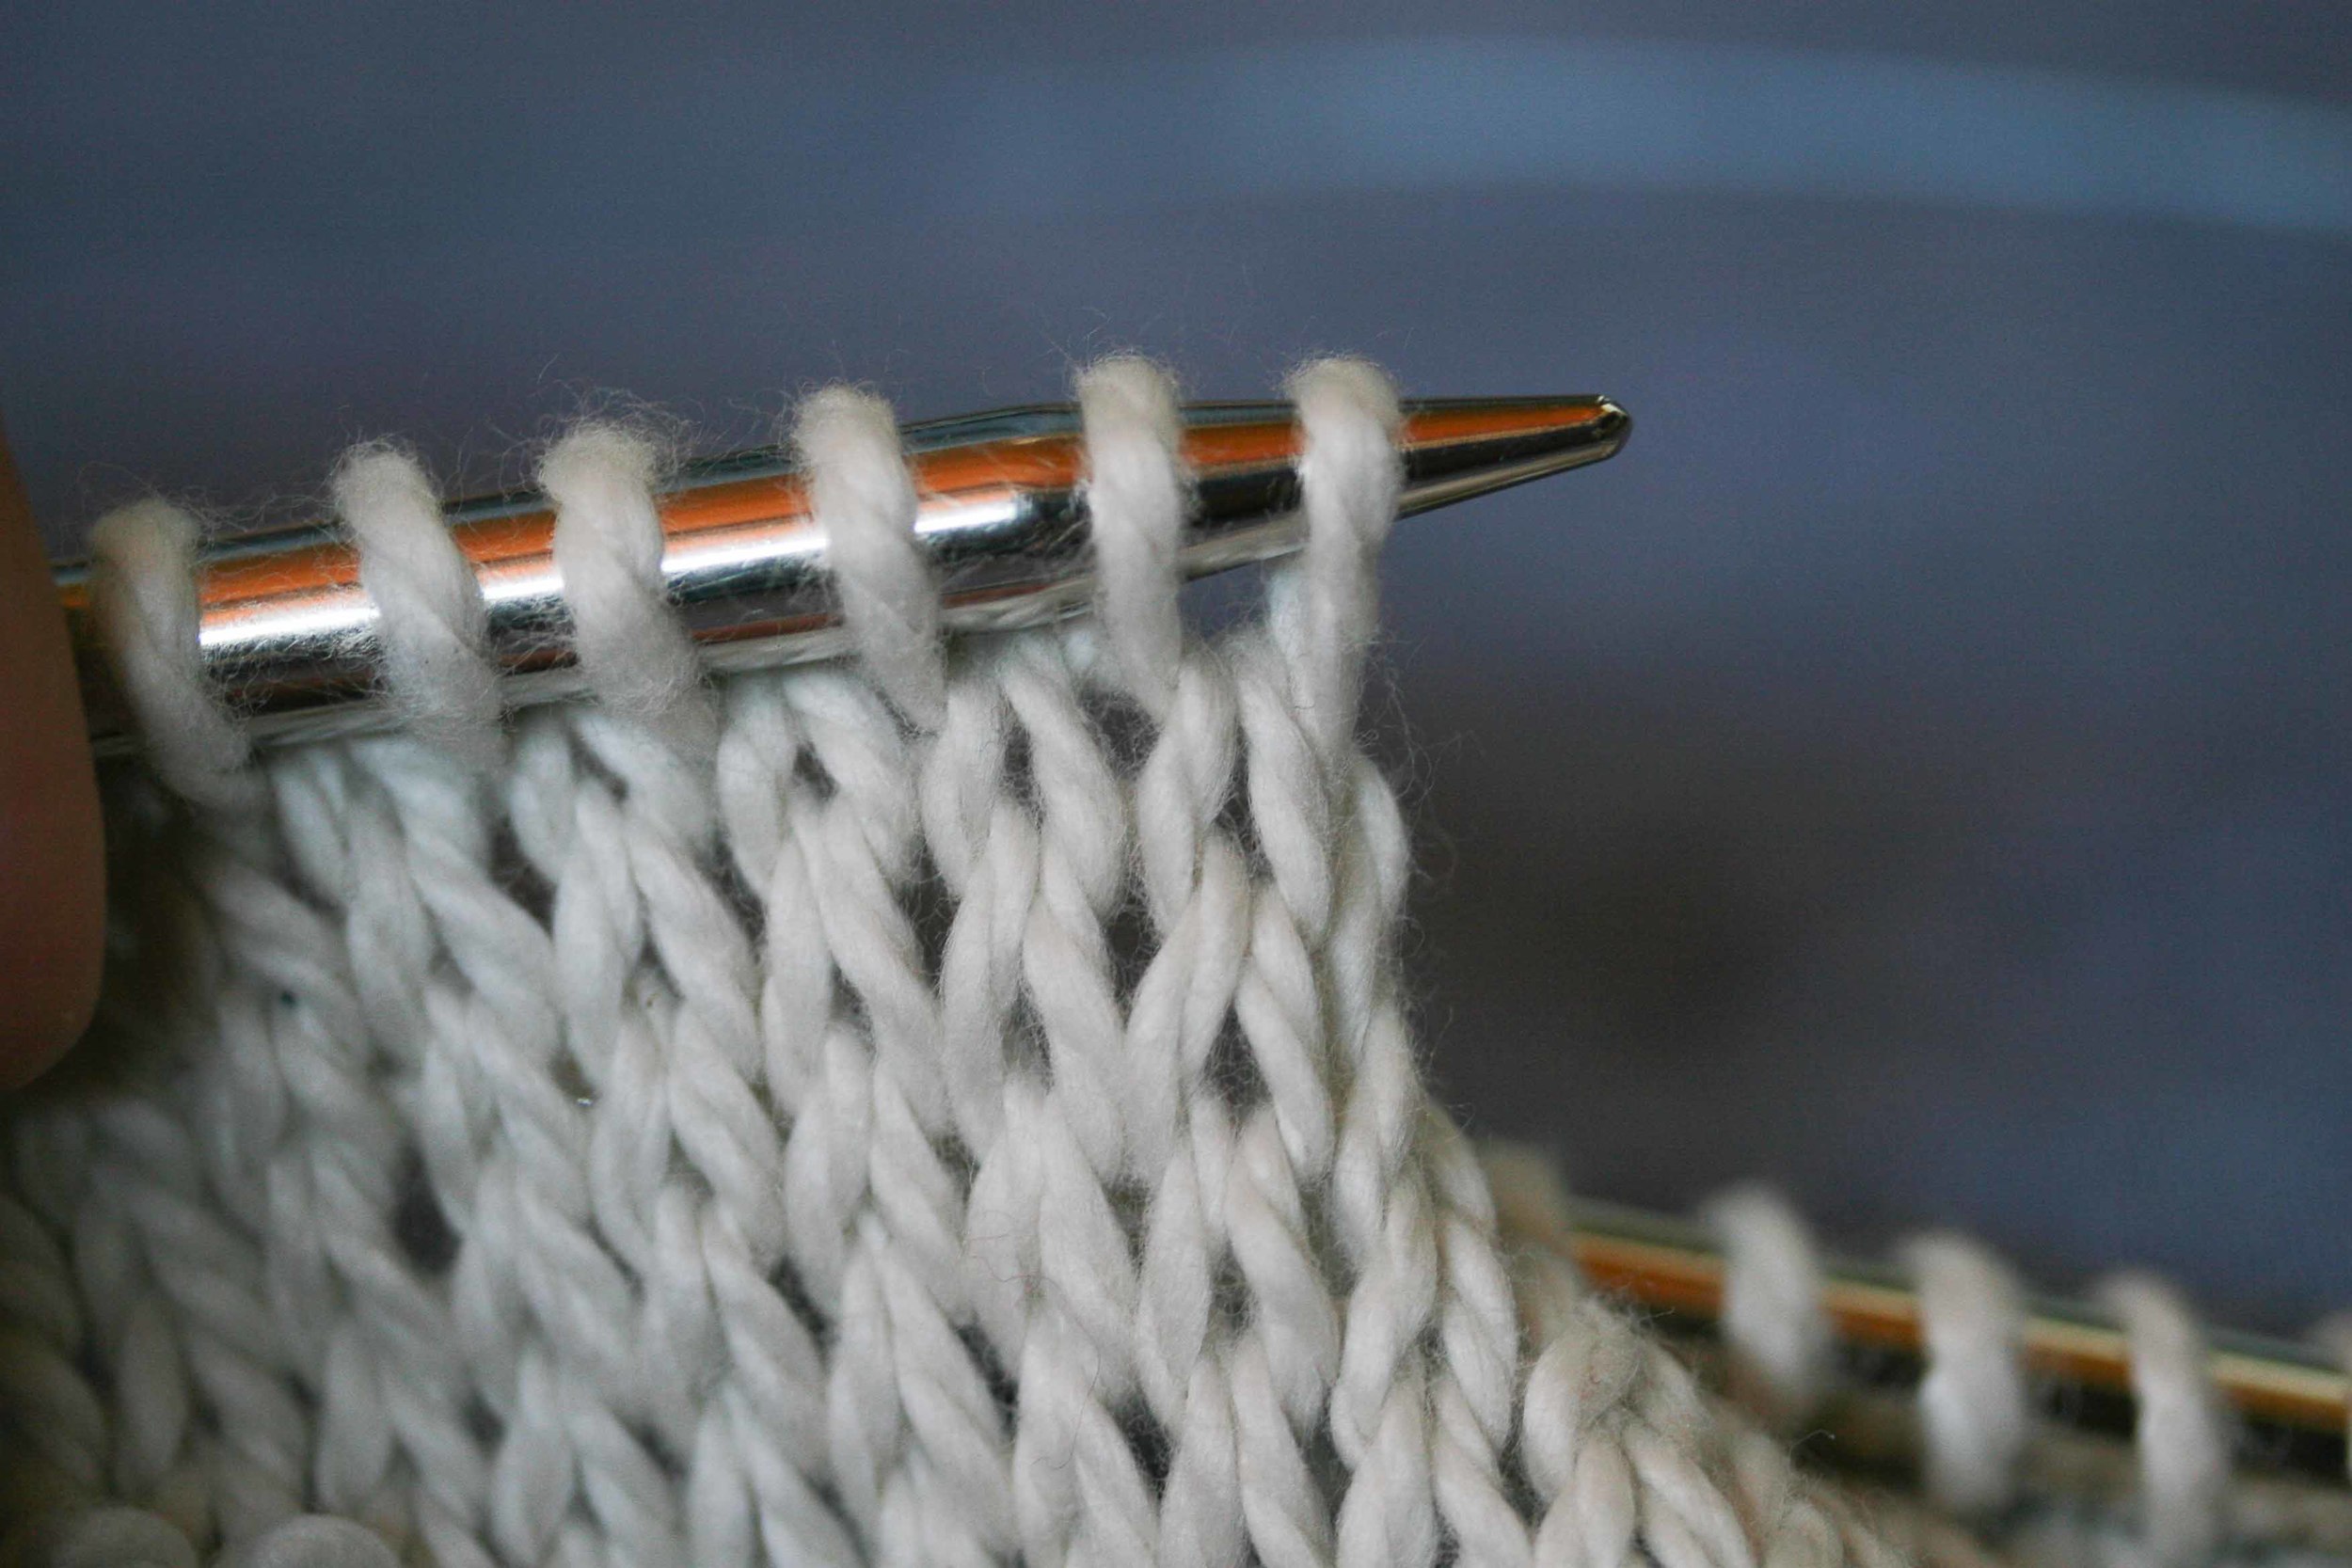
2. How the stitch sits on the needle.
Start by noticing that when you have stitches on the left needle, that the right-hand side of the stitch is on the front of the needle. This is super important to get. To really get this, have a look at the next stitch on the left needle. The right-hand side of the stitch will be on the front of the needle. If you now grab the right needle tip and poke it into the front of the stitch on the left needle (as if to knit) but then stretch the two needle tips a few mm apart, you can see that there is no twist in the stitch.

The right hand side of the stitch is on the front of the needle.
The right-hand side of the stitch travels down into the right-hand side of the hole of the stitch in the row below. The left-hand side of the stitch which is was on the back of the needle, travels into the left hand side of hole of the stitch below.
Learning this means that you can put stitches back on the needle without twisting any. Right hand side on the front of the needle - simple.
3. The knit stitch
Look at the structure of the knit stitch. Use stocking stitch!! (not garter or you will confuse the beegeezus out of yourself). It simply is a loop of yarn pulled up through a loop of yarn pulled up through a loop of yarn. This is the basic reason why the fabric created by knitting is so awesome. It allows you to ladder a stitch back to where a mistake was way down below and fix it. It also allows a whole heap of other stuff that I won't confuse you with just yet.
You can see the V by looking at the row just below the stitches that are on the needle.
So just look at what it is. Really look! Have a look at how each stitch creates a V at the bottom and then has a loop at the top that travels behind the stitch directly above it in the next row - kind of hooking it in place.
Notice that the back of the knit stitch (so on the wrong-side (WS) of your work) is the top of the loop - and that loop is kind of hooked around the stitch that is pulled through it to make the row above.
4. The purl stitch
Next look at what a purl stitch is doing! The reason you do a purl stitch in stocking stitch is so that all of your stitches face the right side of the fabric which gives you the nice flat fabric. So you need to change from a knit to a purl stitch on the WS of your fabric. This means you are pulling the loop from the WS through to the right-side (RS) or in other words from the front-facing-you to the back-which-is-the-right-side.
Confused yet? Reread it and better yet try it on some light coloured knitting you have lying around.

The loops seen from the purl side. You can also see how the stitch below holds the new loop in place.
5. Take notice
The last point for this week is just to take notice when you do something. Of what any stitch looks like - just before you knit it, straight afterwards, on the next row and the one after that. When you decrease, look at how the stitch looks from the front on the row that you are knitting. Have a look at the same stitch after you have done the next row. If you need to then you can grab a safety pin and thread it around the stitch you made. This will make it easier to see what it looks like on the next row. This will take time but really learn what it looks like.
Practice this and all the good stuff will come. Over time it will make sense. Maybe not on day 1 or 2 or 10 but it will come.
As always I'd love to hear your thoughts - good, bad, whatever. Tell me if my pictures aren't clear. I have no idea how to write on an image so as soon as I figure this out it will be a little easier. Are you up for more posts like this?
Felicia x
UPDATE: I'll keep linking here as I create more.
Learn to Read Your Knitting - Part 2 - Decreases is up!
Learn to Read Your Knitting - Part 3 - Increases is up!
*there are rare occasions but they should be rare!
**obviously this is a small exaggeration because of the pain inherent in any creative pursuit ;)