• The CraftSessions Story
  • Our Past Retreats
  • Blog
  • Newsletter
  • Contact
Menu

The Craft Sessions

Street Address
City, State, Zip
Phone Number

The Craft Sessions

  • About
    • The CraftSessions Story
    • Our Past Retreats
  • Blog
  • Newsletter
  • Contact

Part 2 - Knitting Tips and Tricks - Sleeves and Yarn

November 12, 2014 thecraftsessions

So this really should be an Around the Traps style post as I am just pointing you to resources by other smart people. However, many moons ago before I went travelling and broke my camera, I started this series with a Part 1 - Knitting Tips and Tricks and thought I should continue in that vein. 

And do I have tips and tricks for you. I LOVE these. You must go and check them out.

Sleeves

I often get asked about sleeves, along the lines of "what is the best way to knit them"? I want to give you an answer but the answer may be a little unsatisfying - and that is "whatever way you choose" or "whatever way is comfortable for you". You really do need to try them all out and your choice may change over time or depending on the project.

The main methods for sleeve knitting are

  • double pointed needles
  • knitting them flat and seaming them
  • magic loop
  • small circulars or little needles
  • knitting with two circulars 


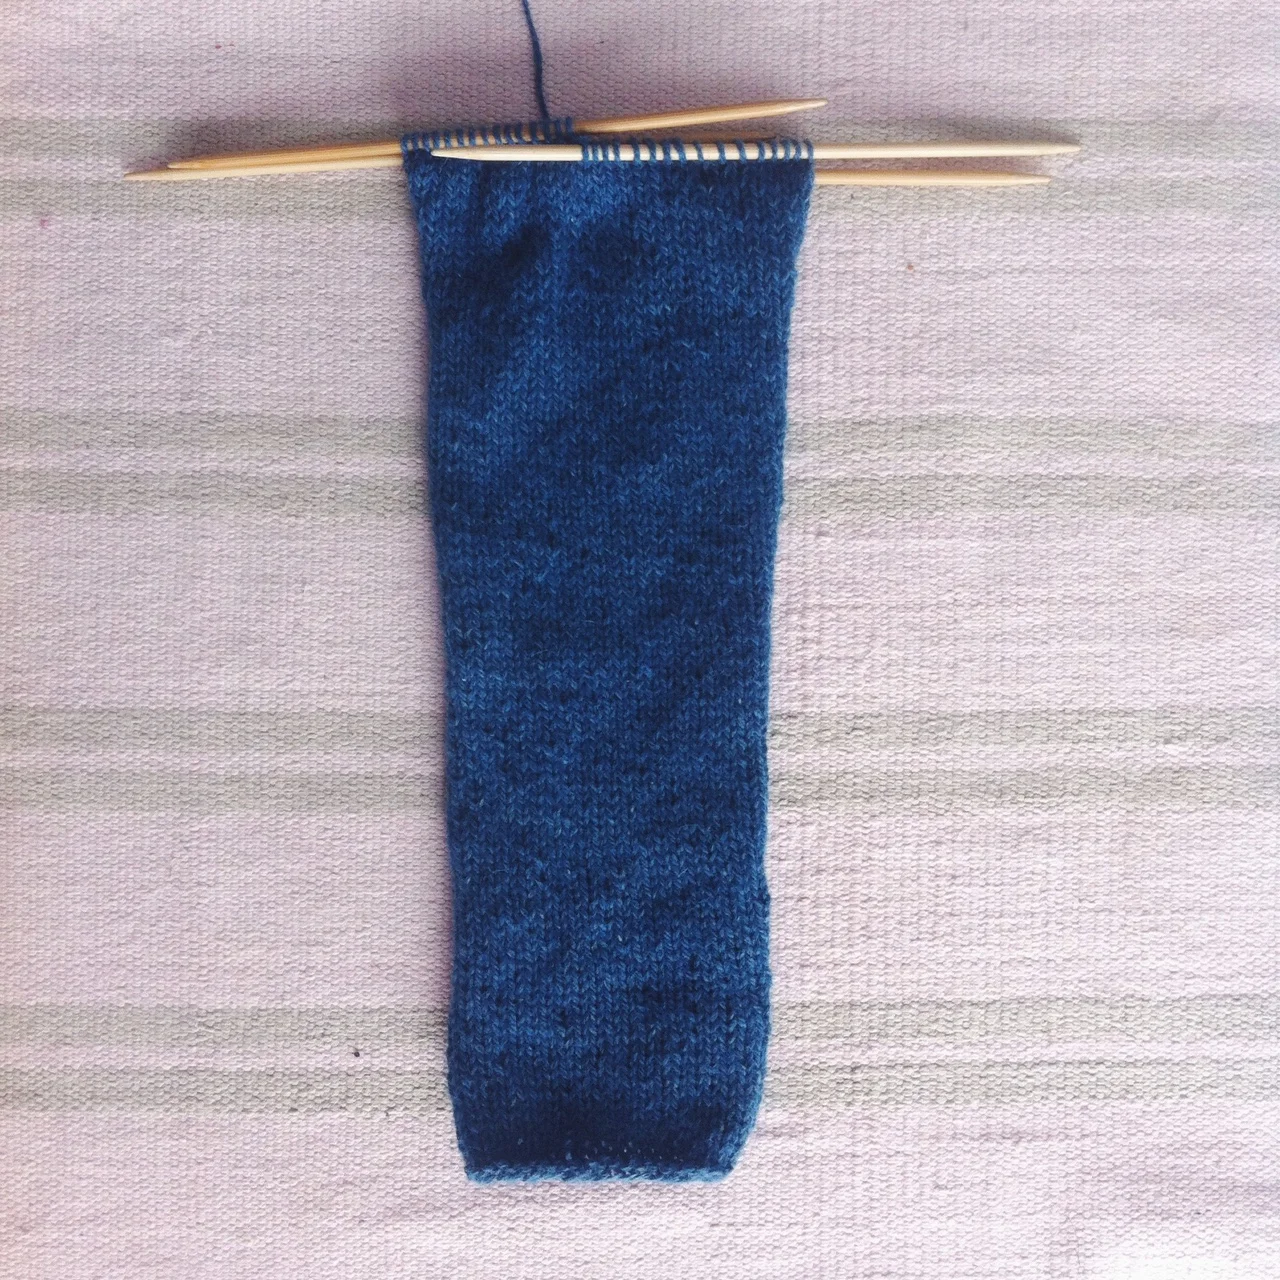
In the past I have altered nearly every single pattern to be able to knit sleeves how I want. Traditionally for me that meant knitting sleeves flat and seaming them, even with a seamless garment. I didn't like knitting little tubes. But then I met Georgie and she quietly (in that lovely way of hers) convinced me to give small circular needles another try.

Small circular needles are small 30cm circulars (or sometimes even smaller) with bent tips. I use the Addi ones. I did hate them but have come to see that actually, with a little practice, they are actually very speedy. I ALWAY need to go up a needle size with little needles though as my gauge tends to get tighter - which makes sense if you think about how they are knit. Because the stitches are held in a small tube rather than stretched a bit on normal needles, the yarn between stitches is pulled a little tighter, and this leads to tighter knitting. 

When choosing the method to suit you, consider that everybody has their own knitting quirks; different styles, different hands, different levels of finger flexibility. So what you might find comfortable and comforting I might not. You really do need to try all styles - and try them more than once. It takes a little while to get used to and comfortable with a new style. 

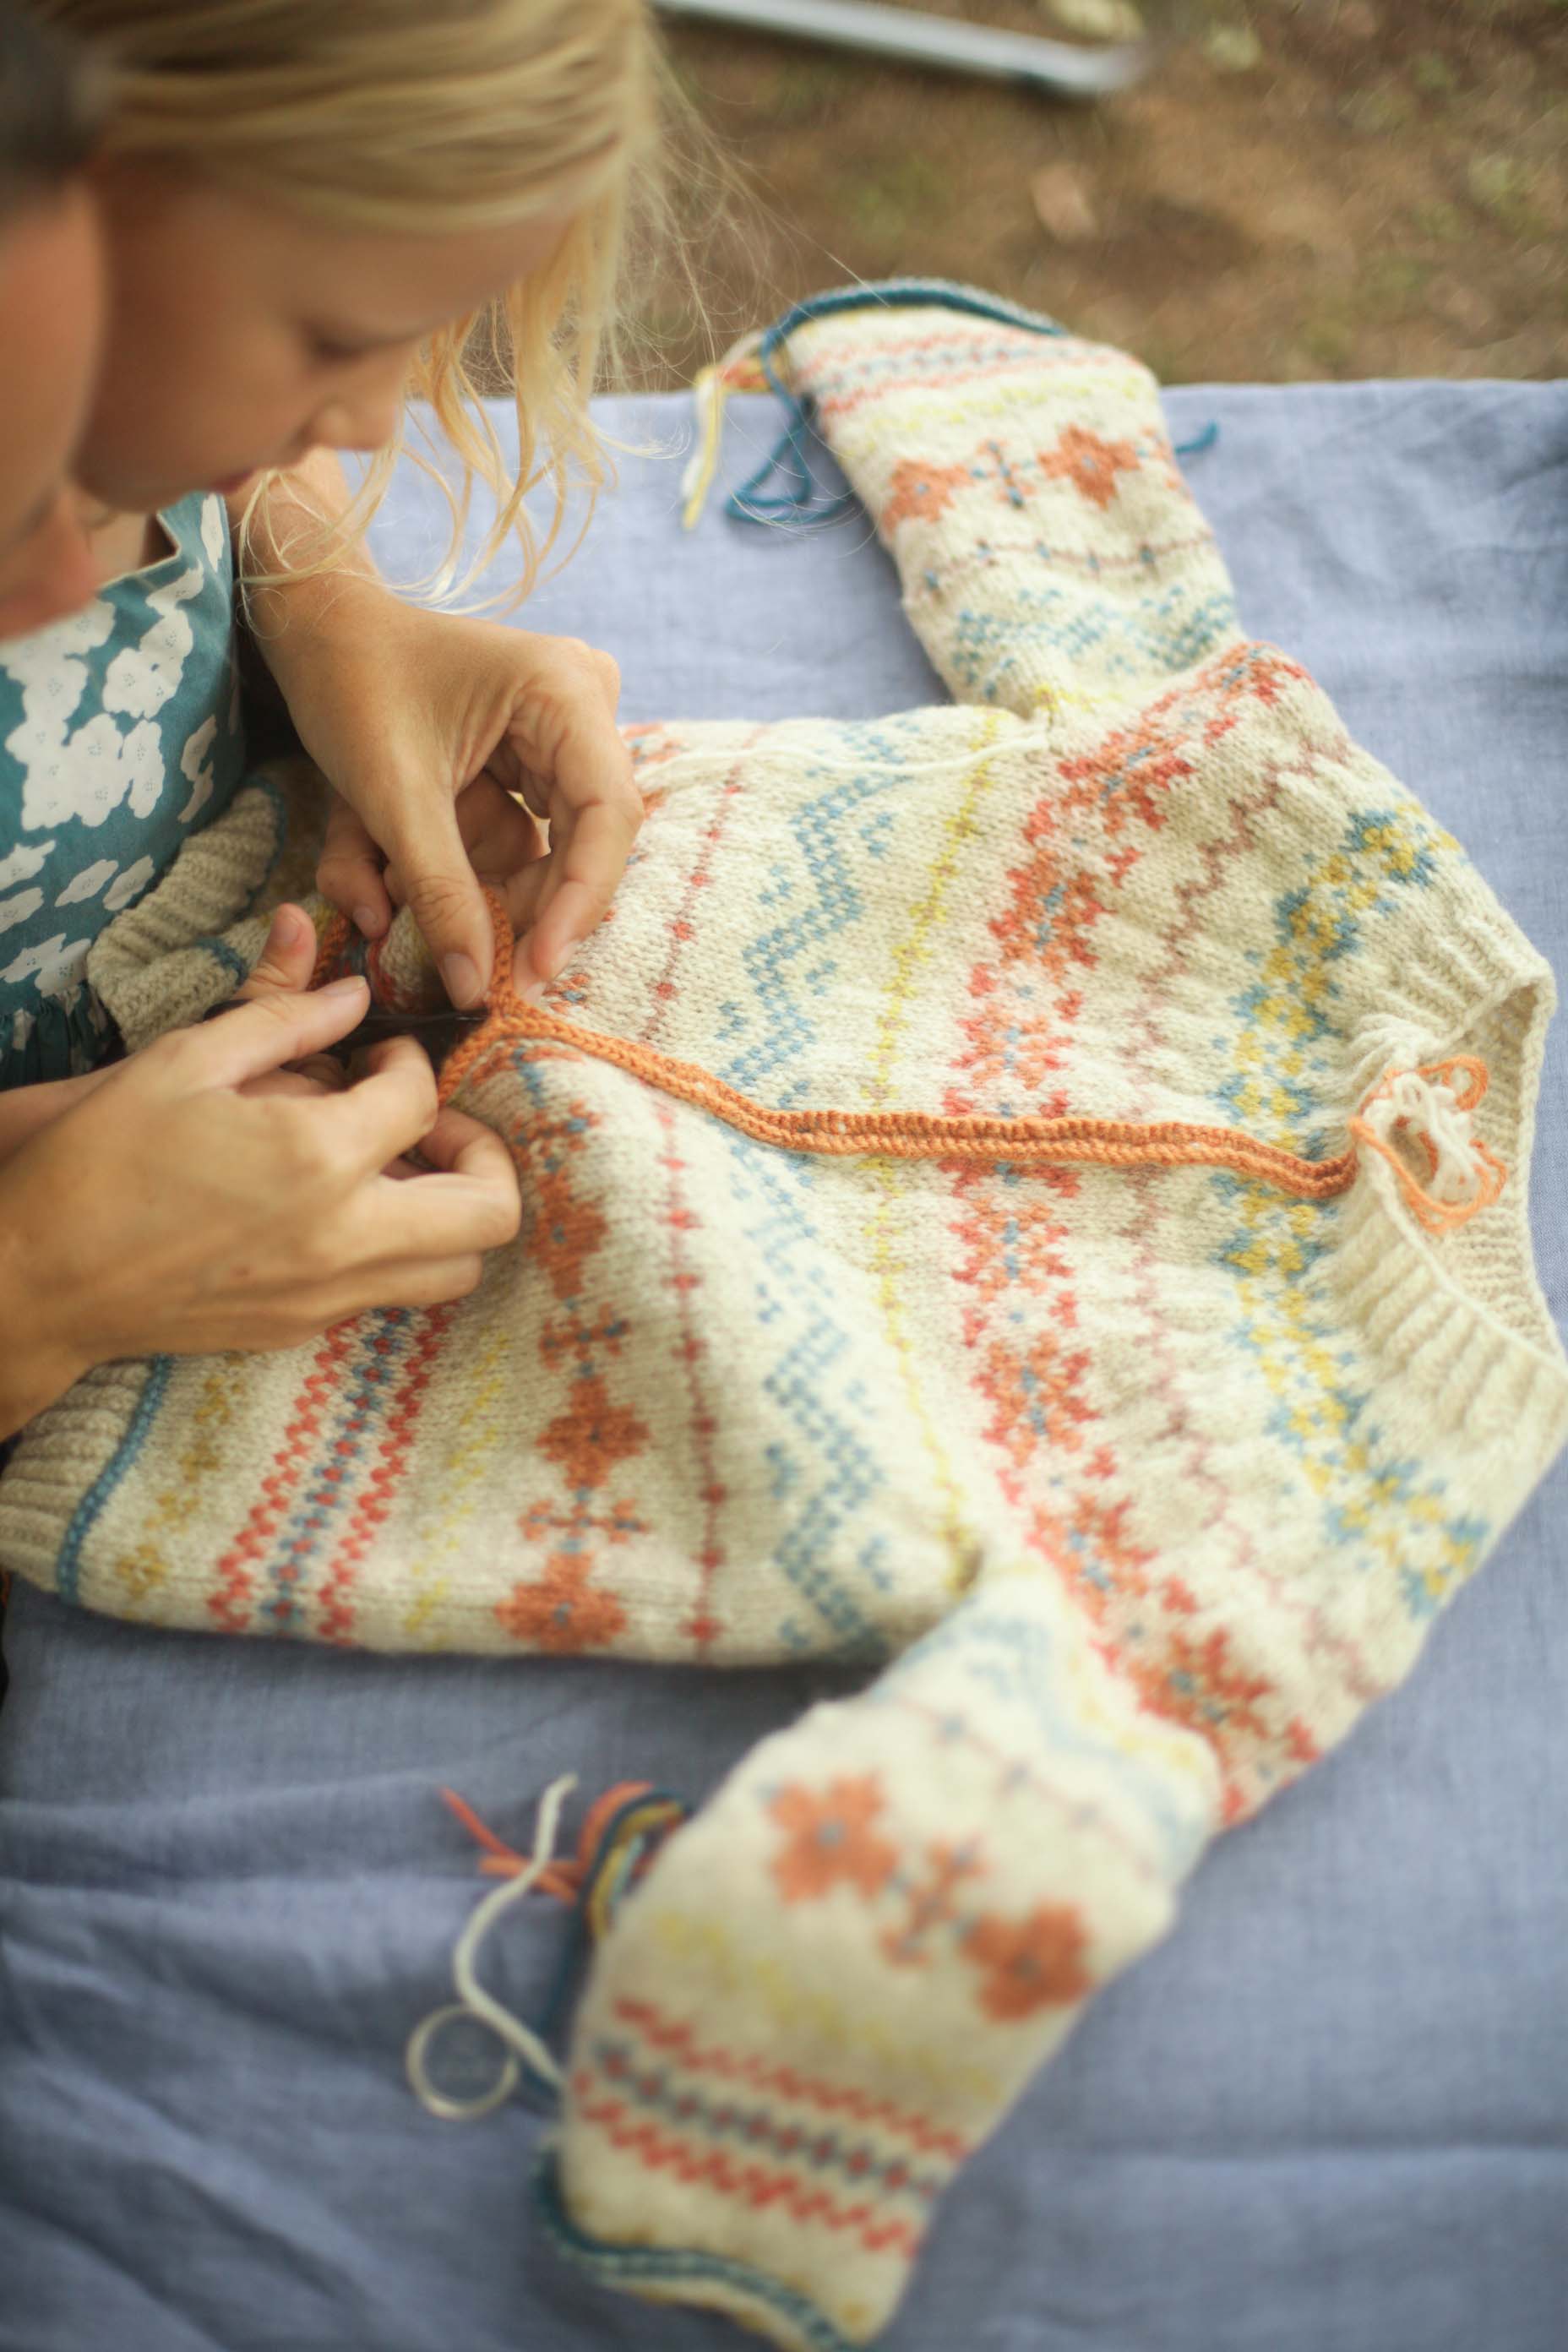
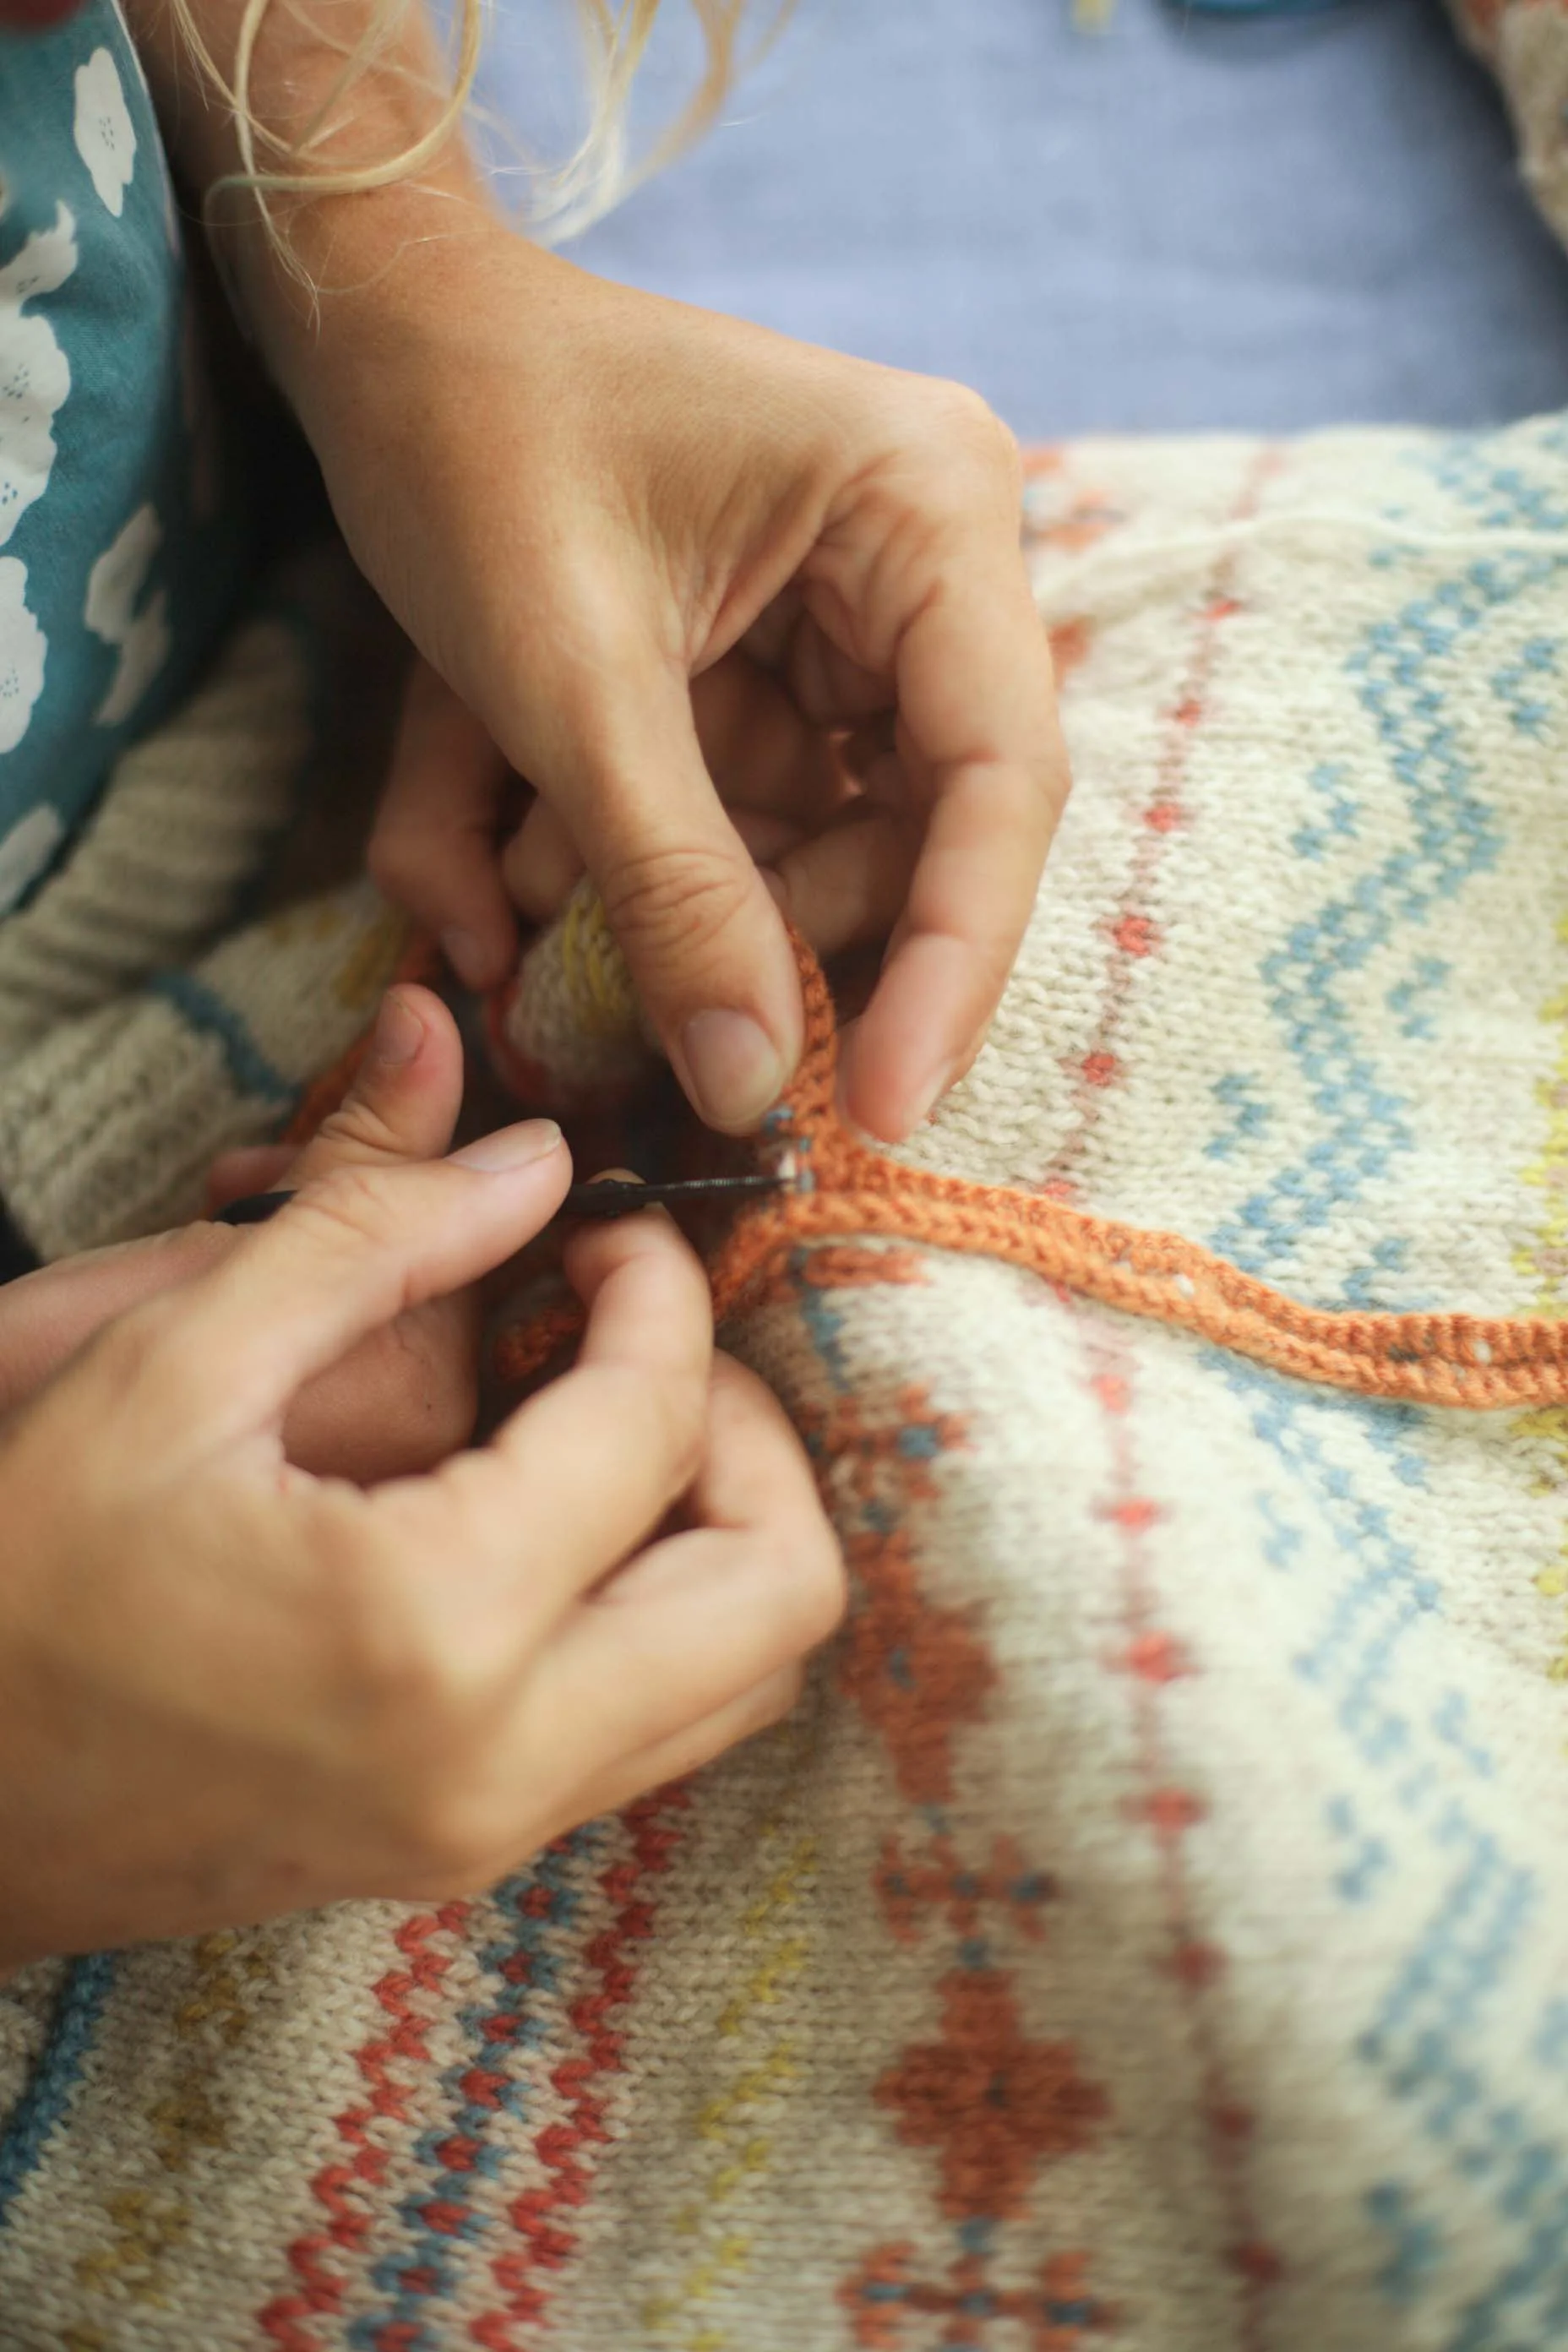
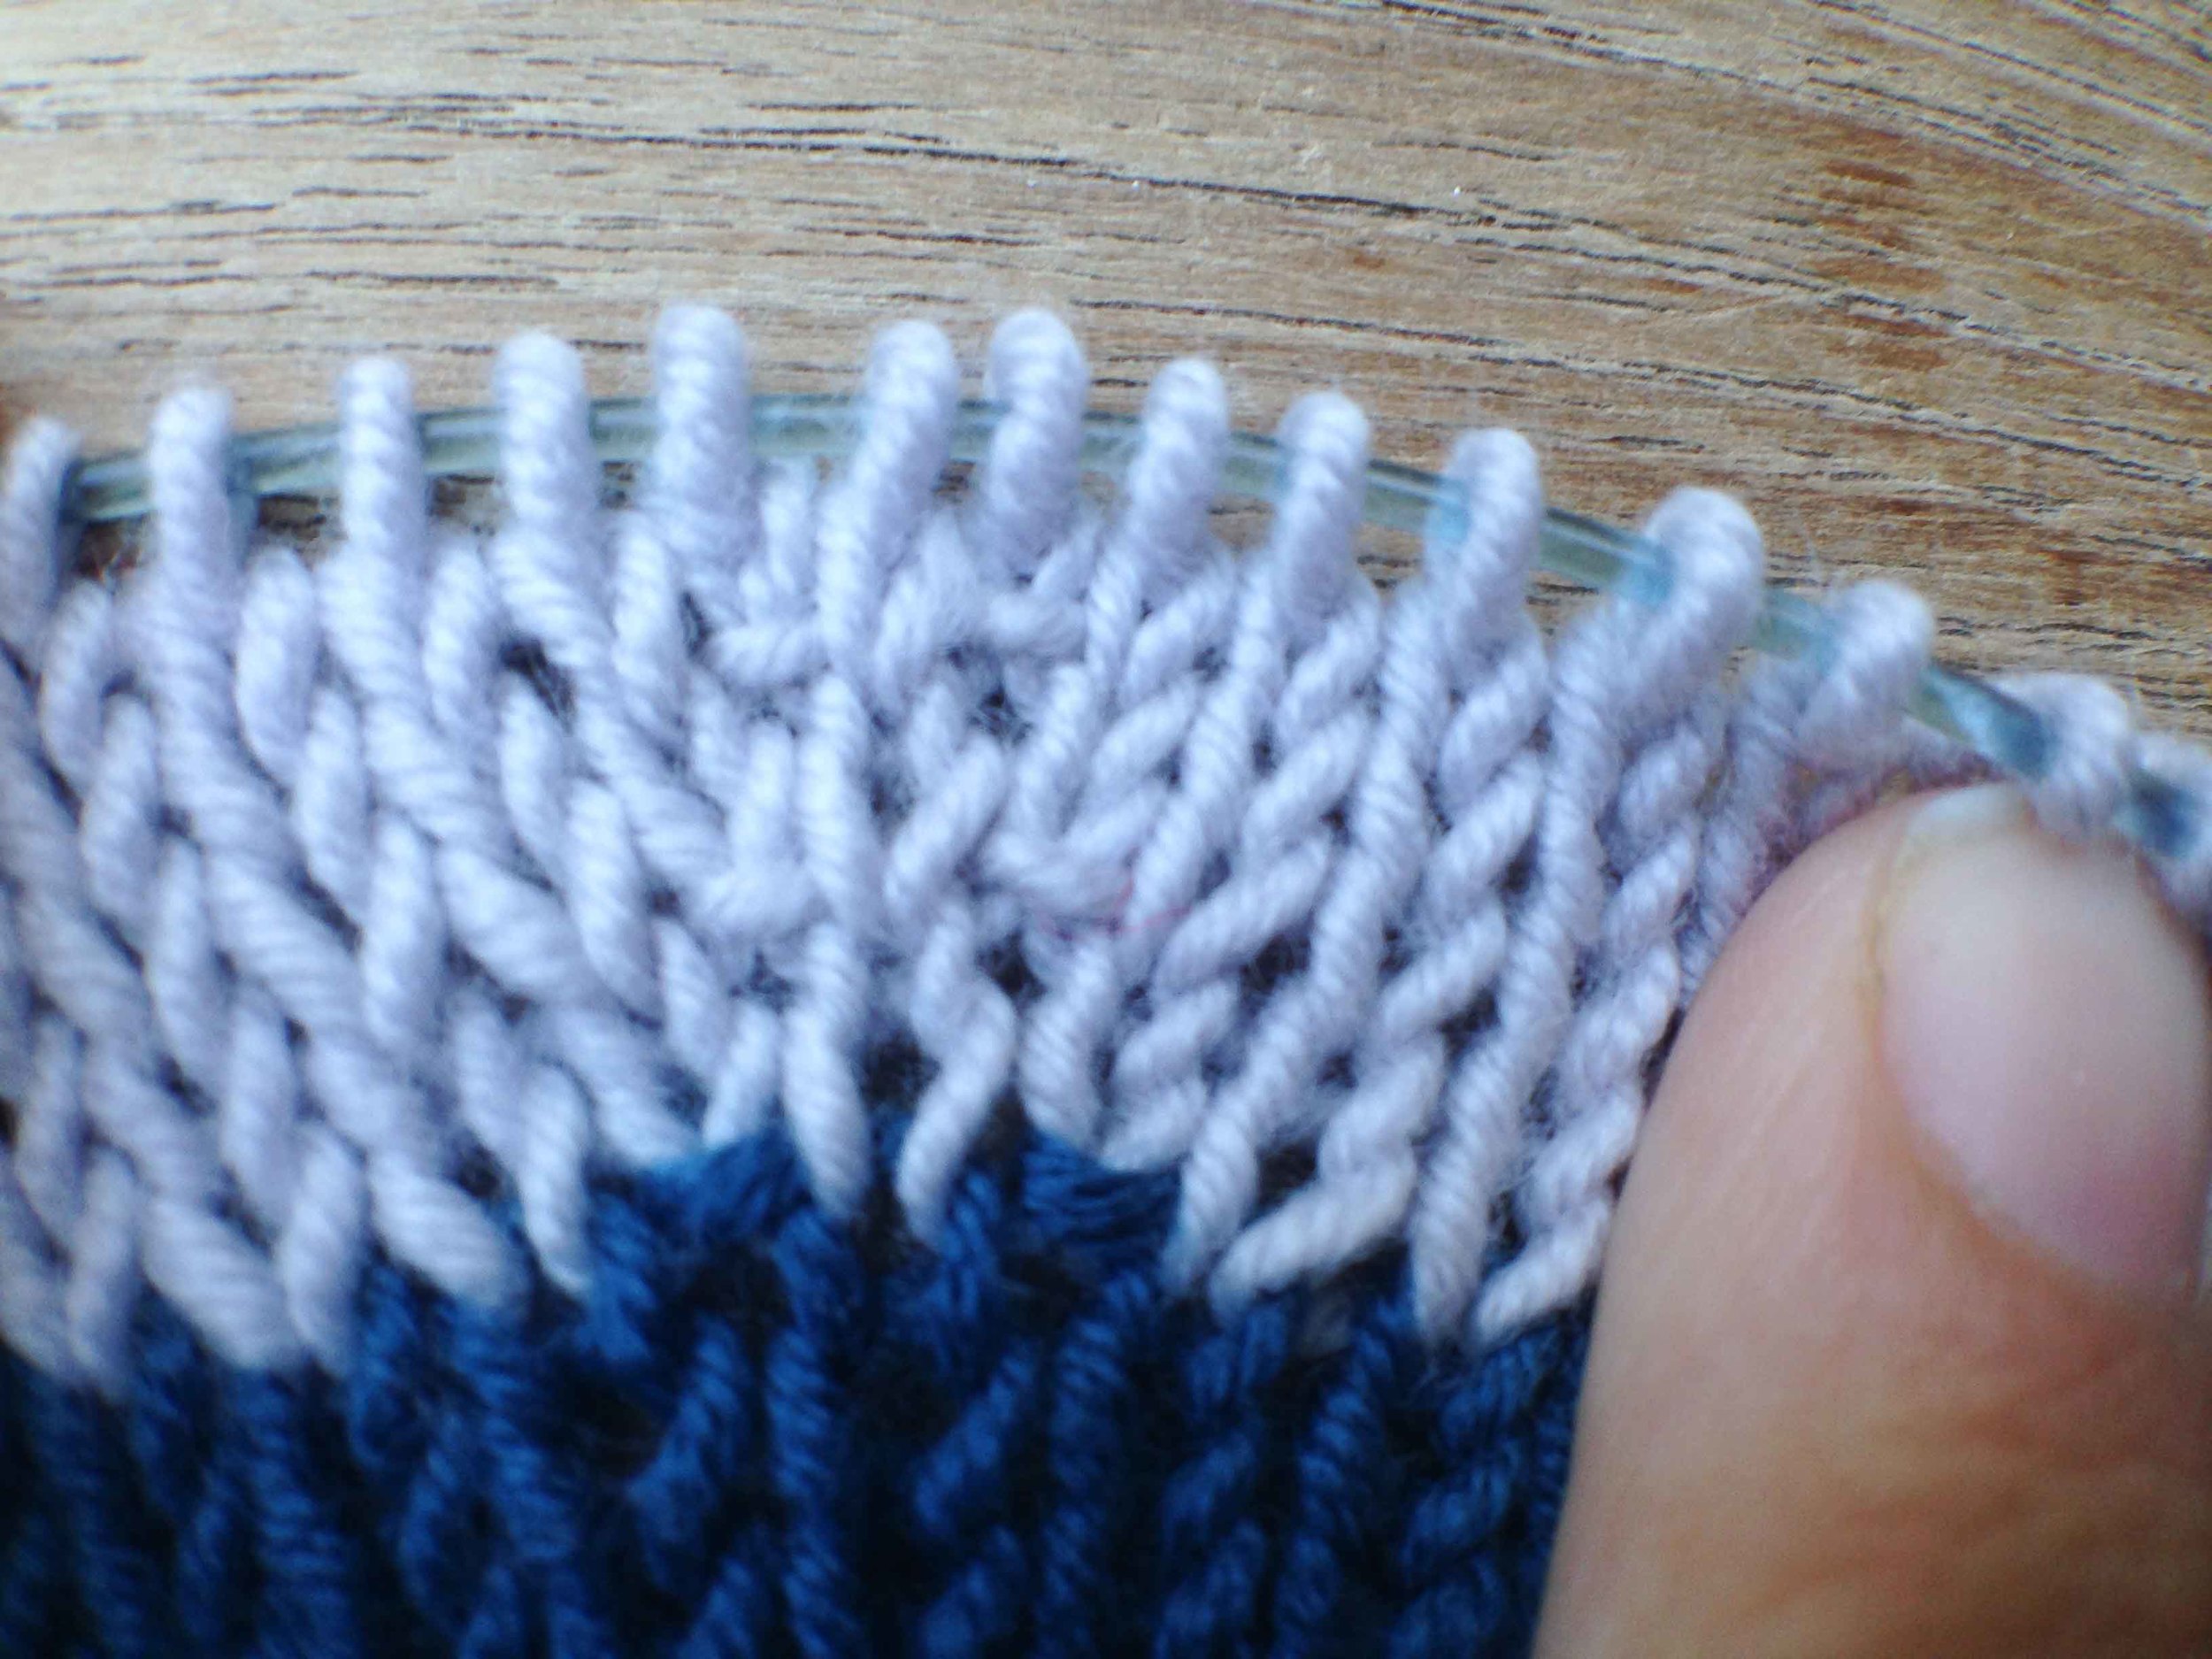
Georgie talks about options for different ways to knit sleeves in this post. She also gives her amazing way for picking up underarm stitches in this other post.

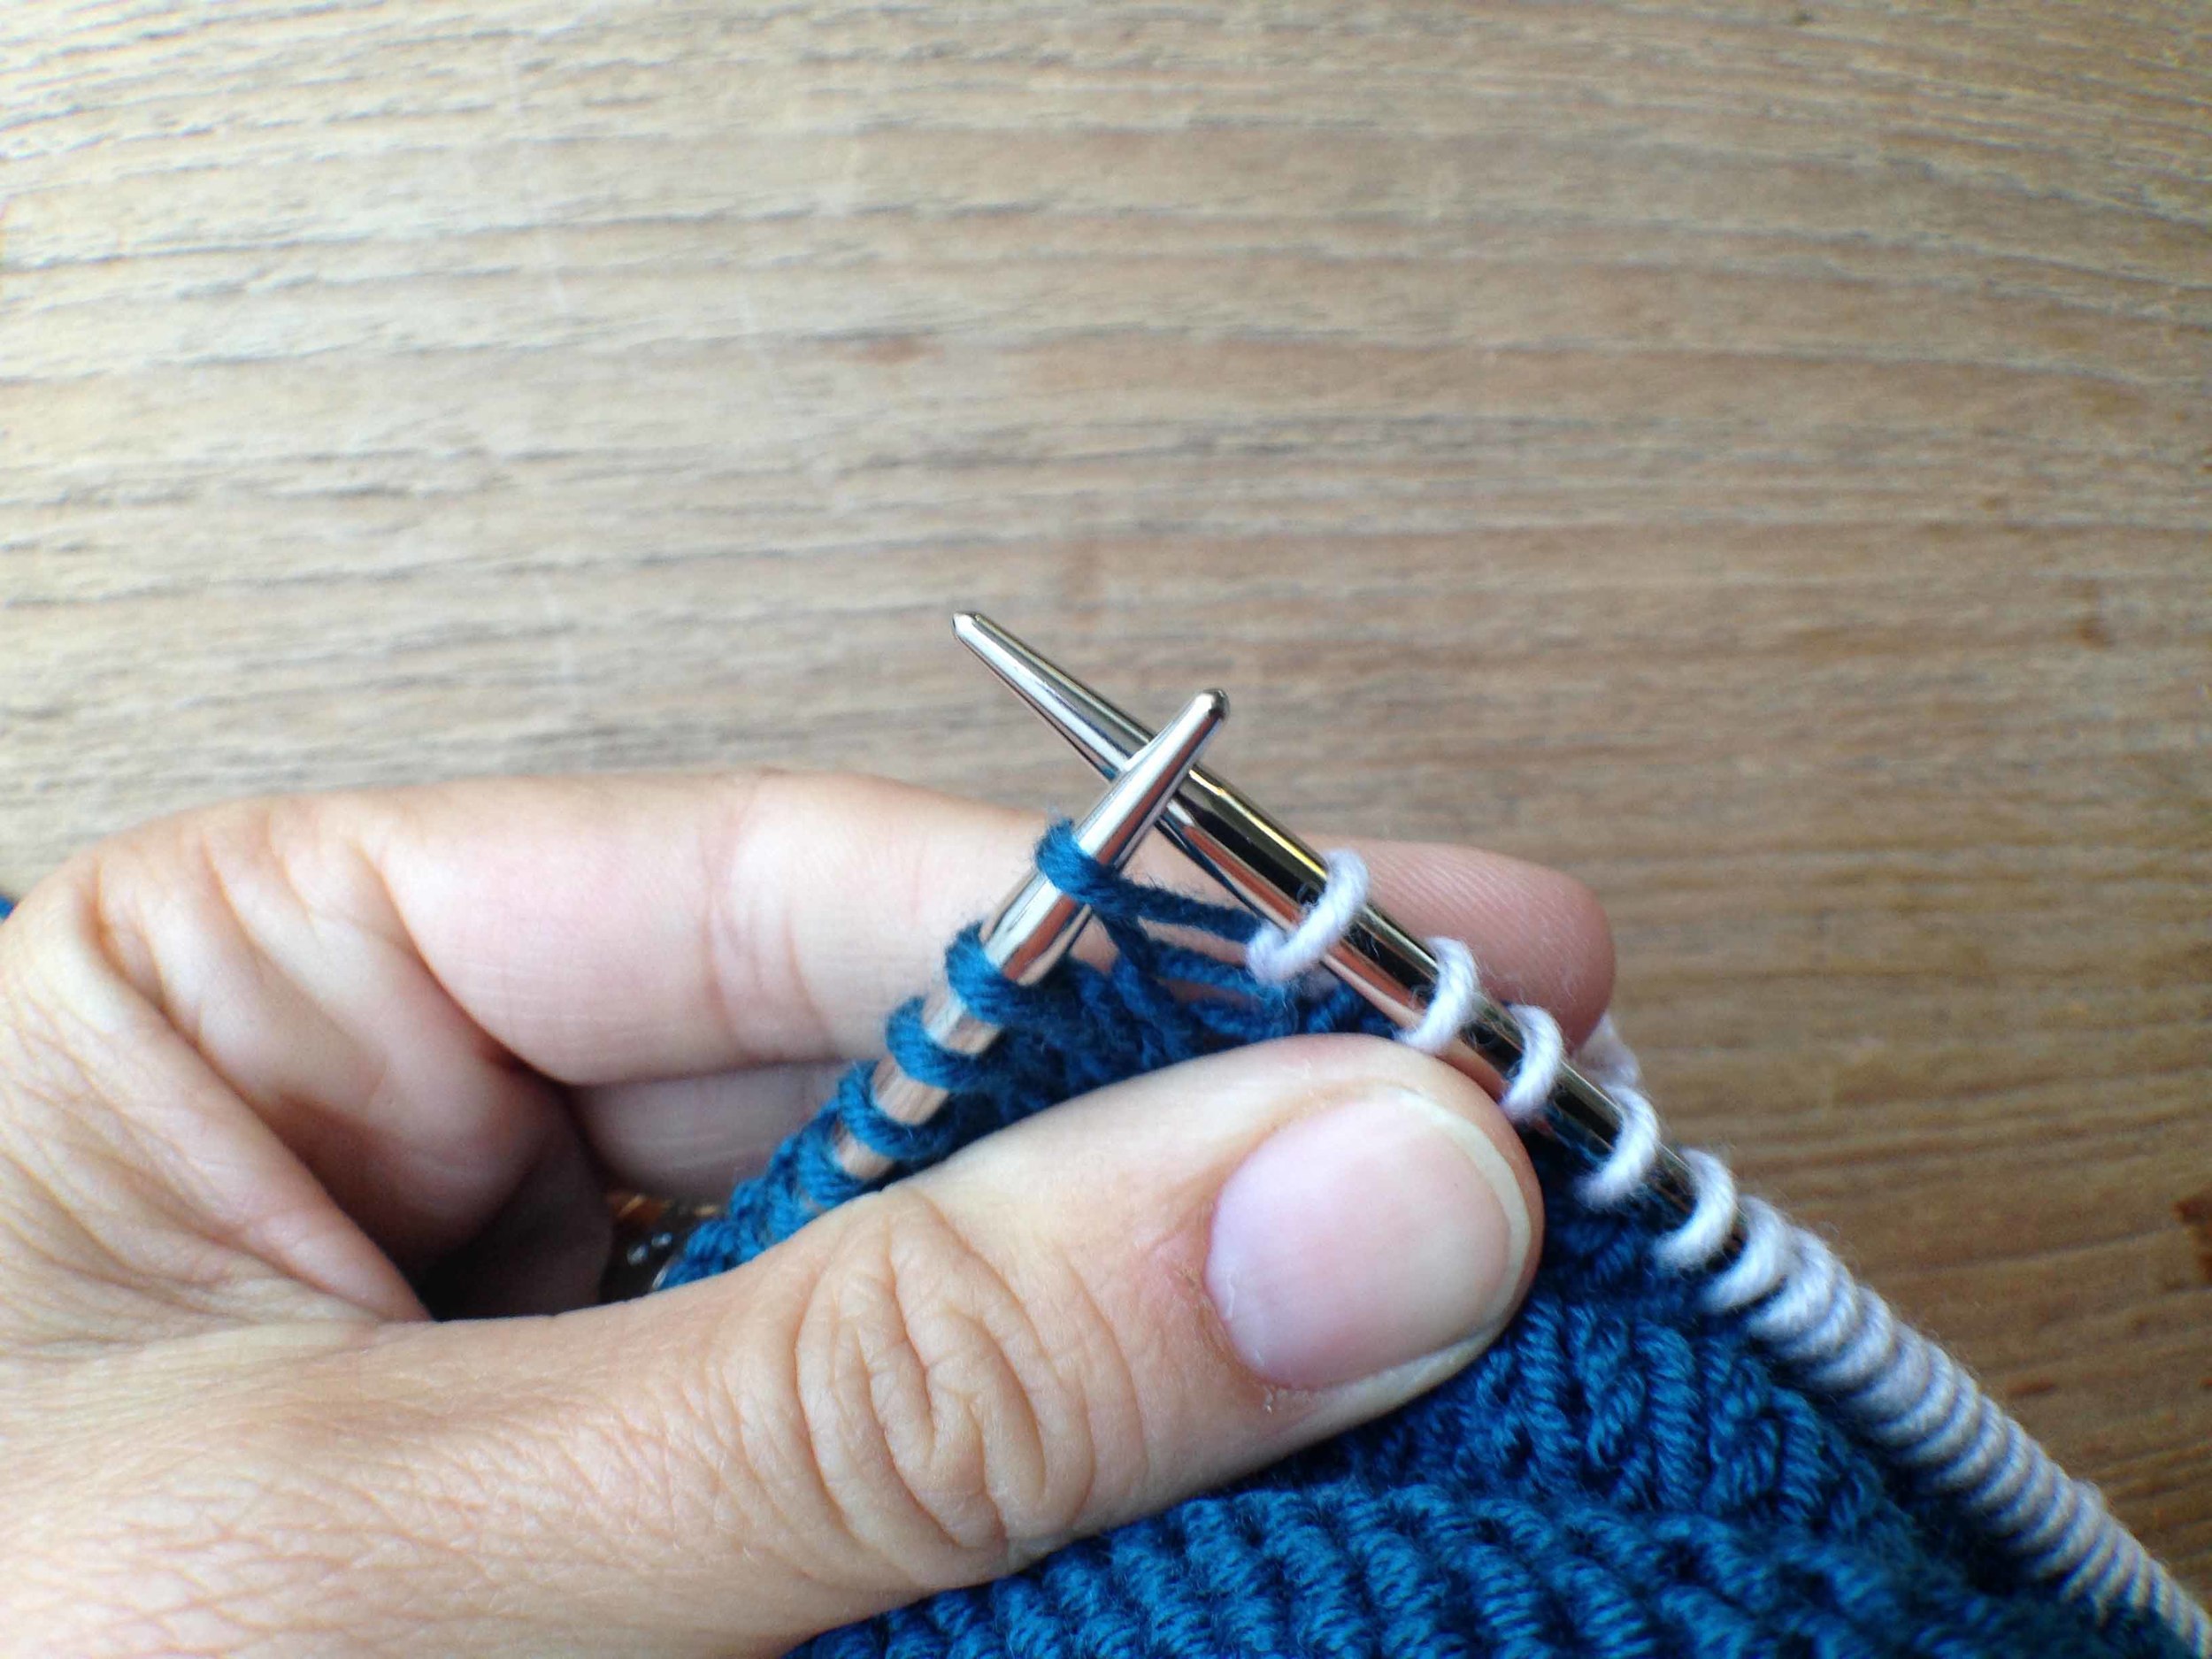
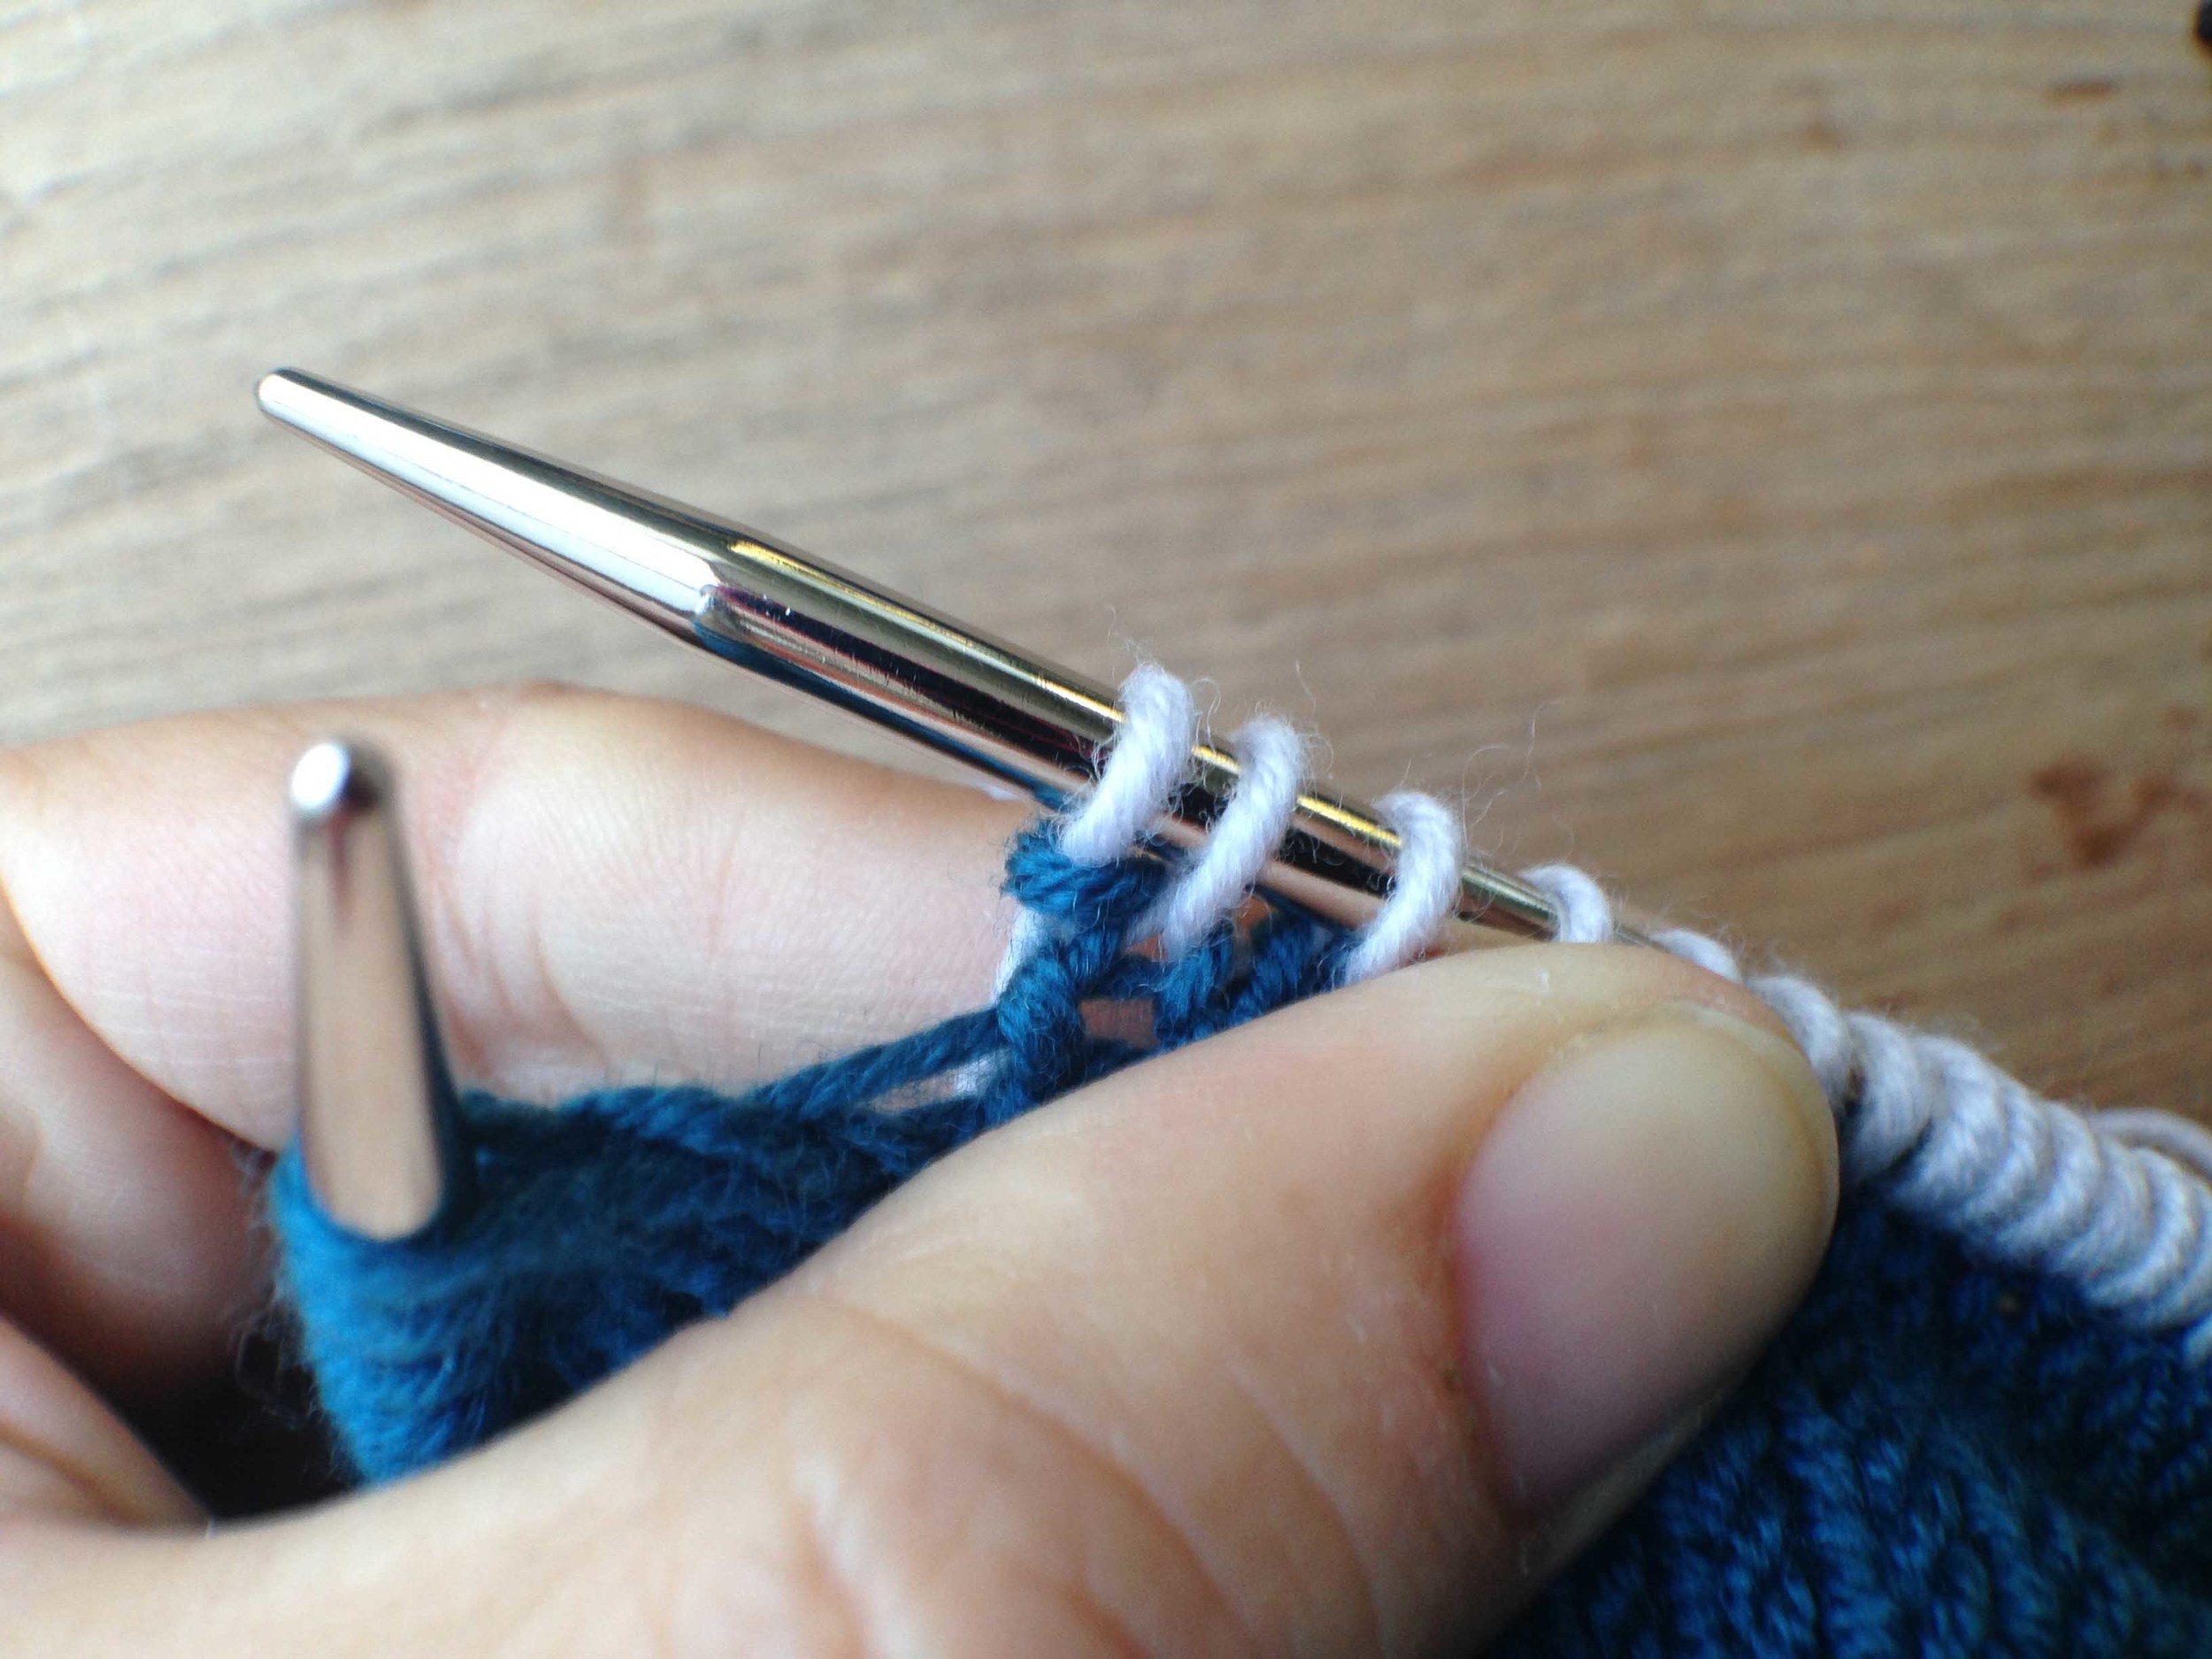
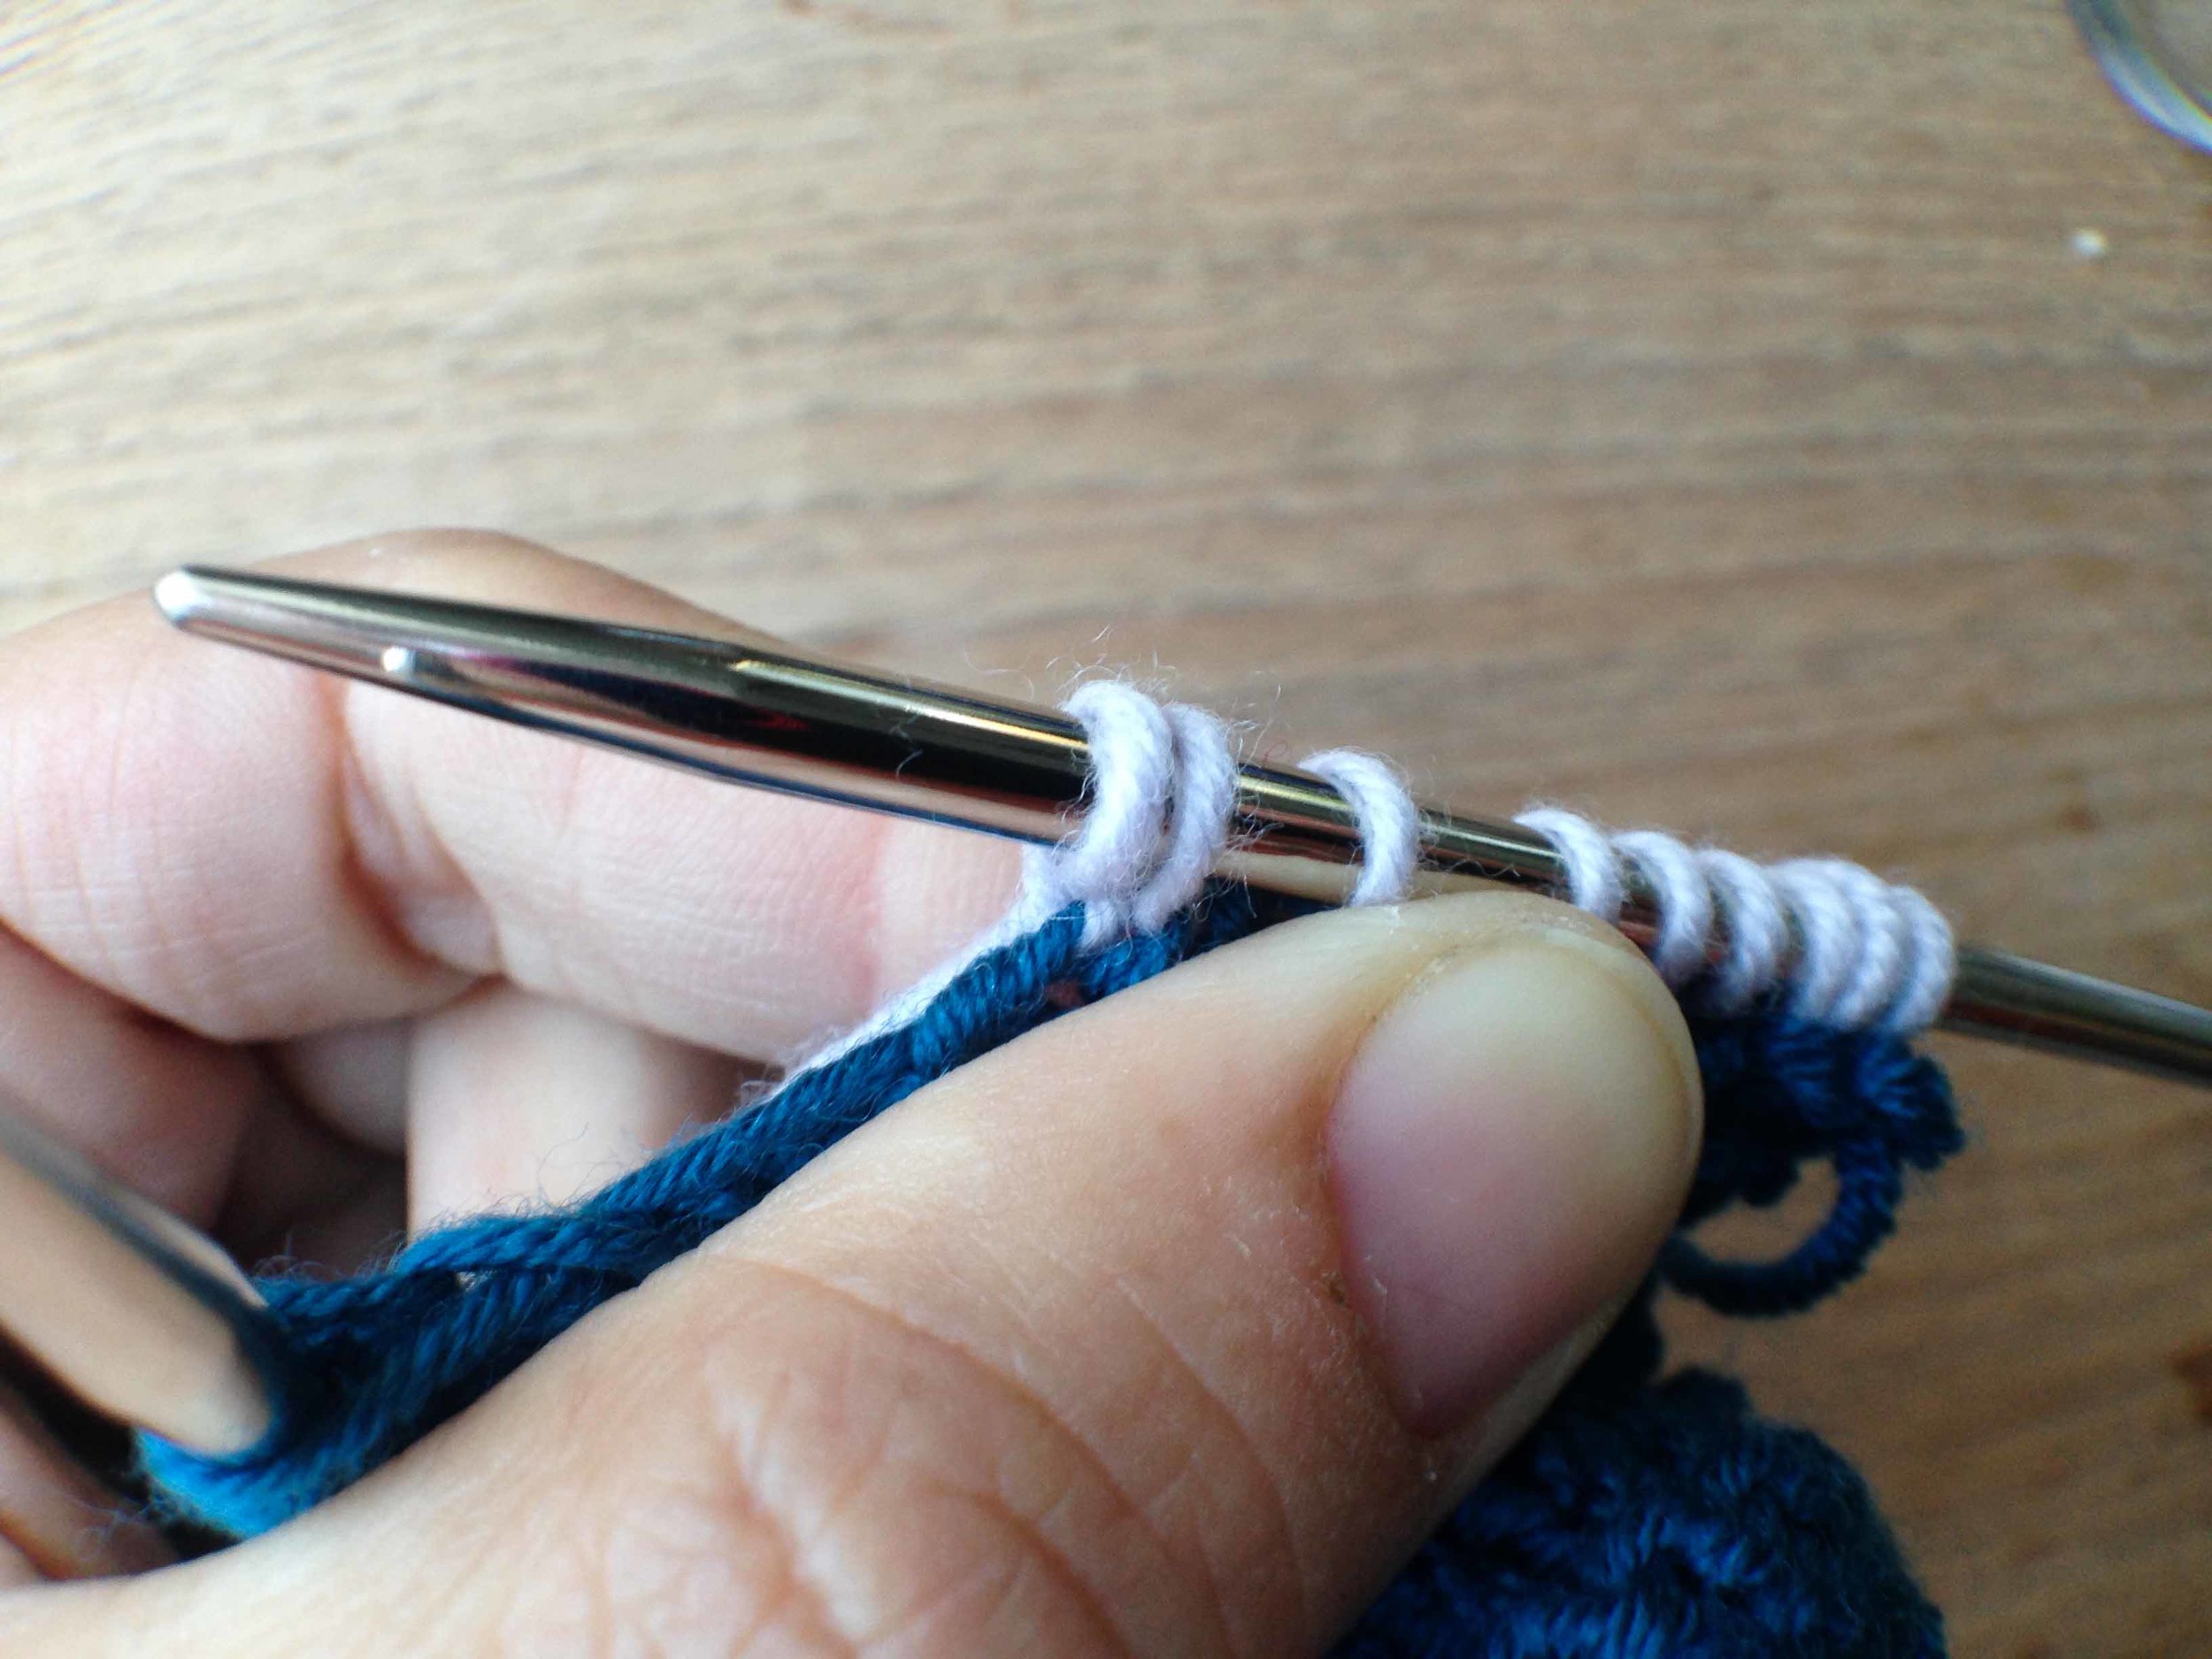
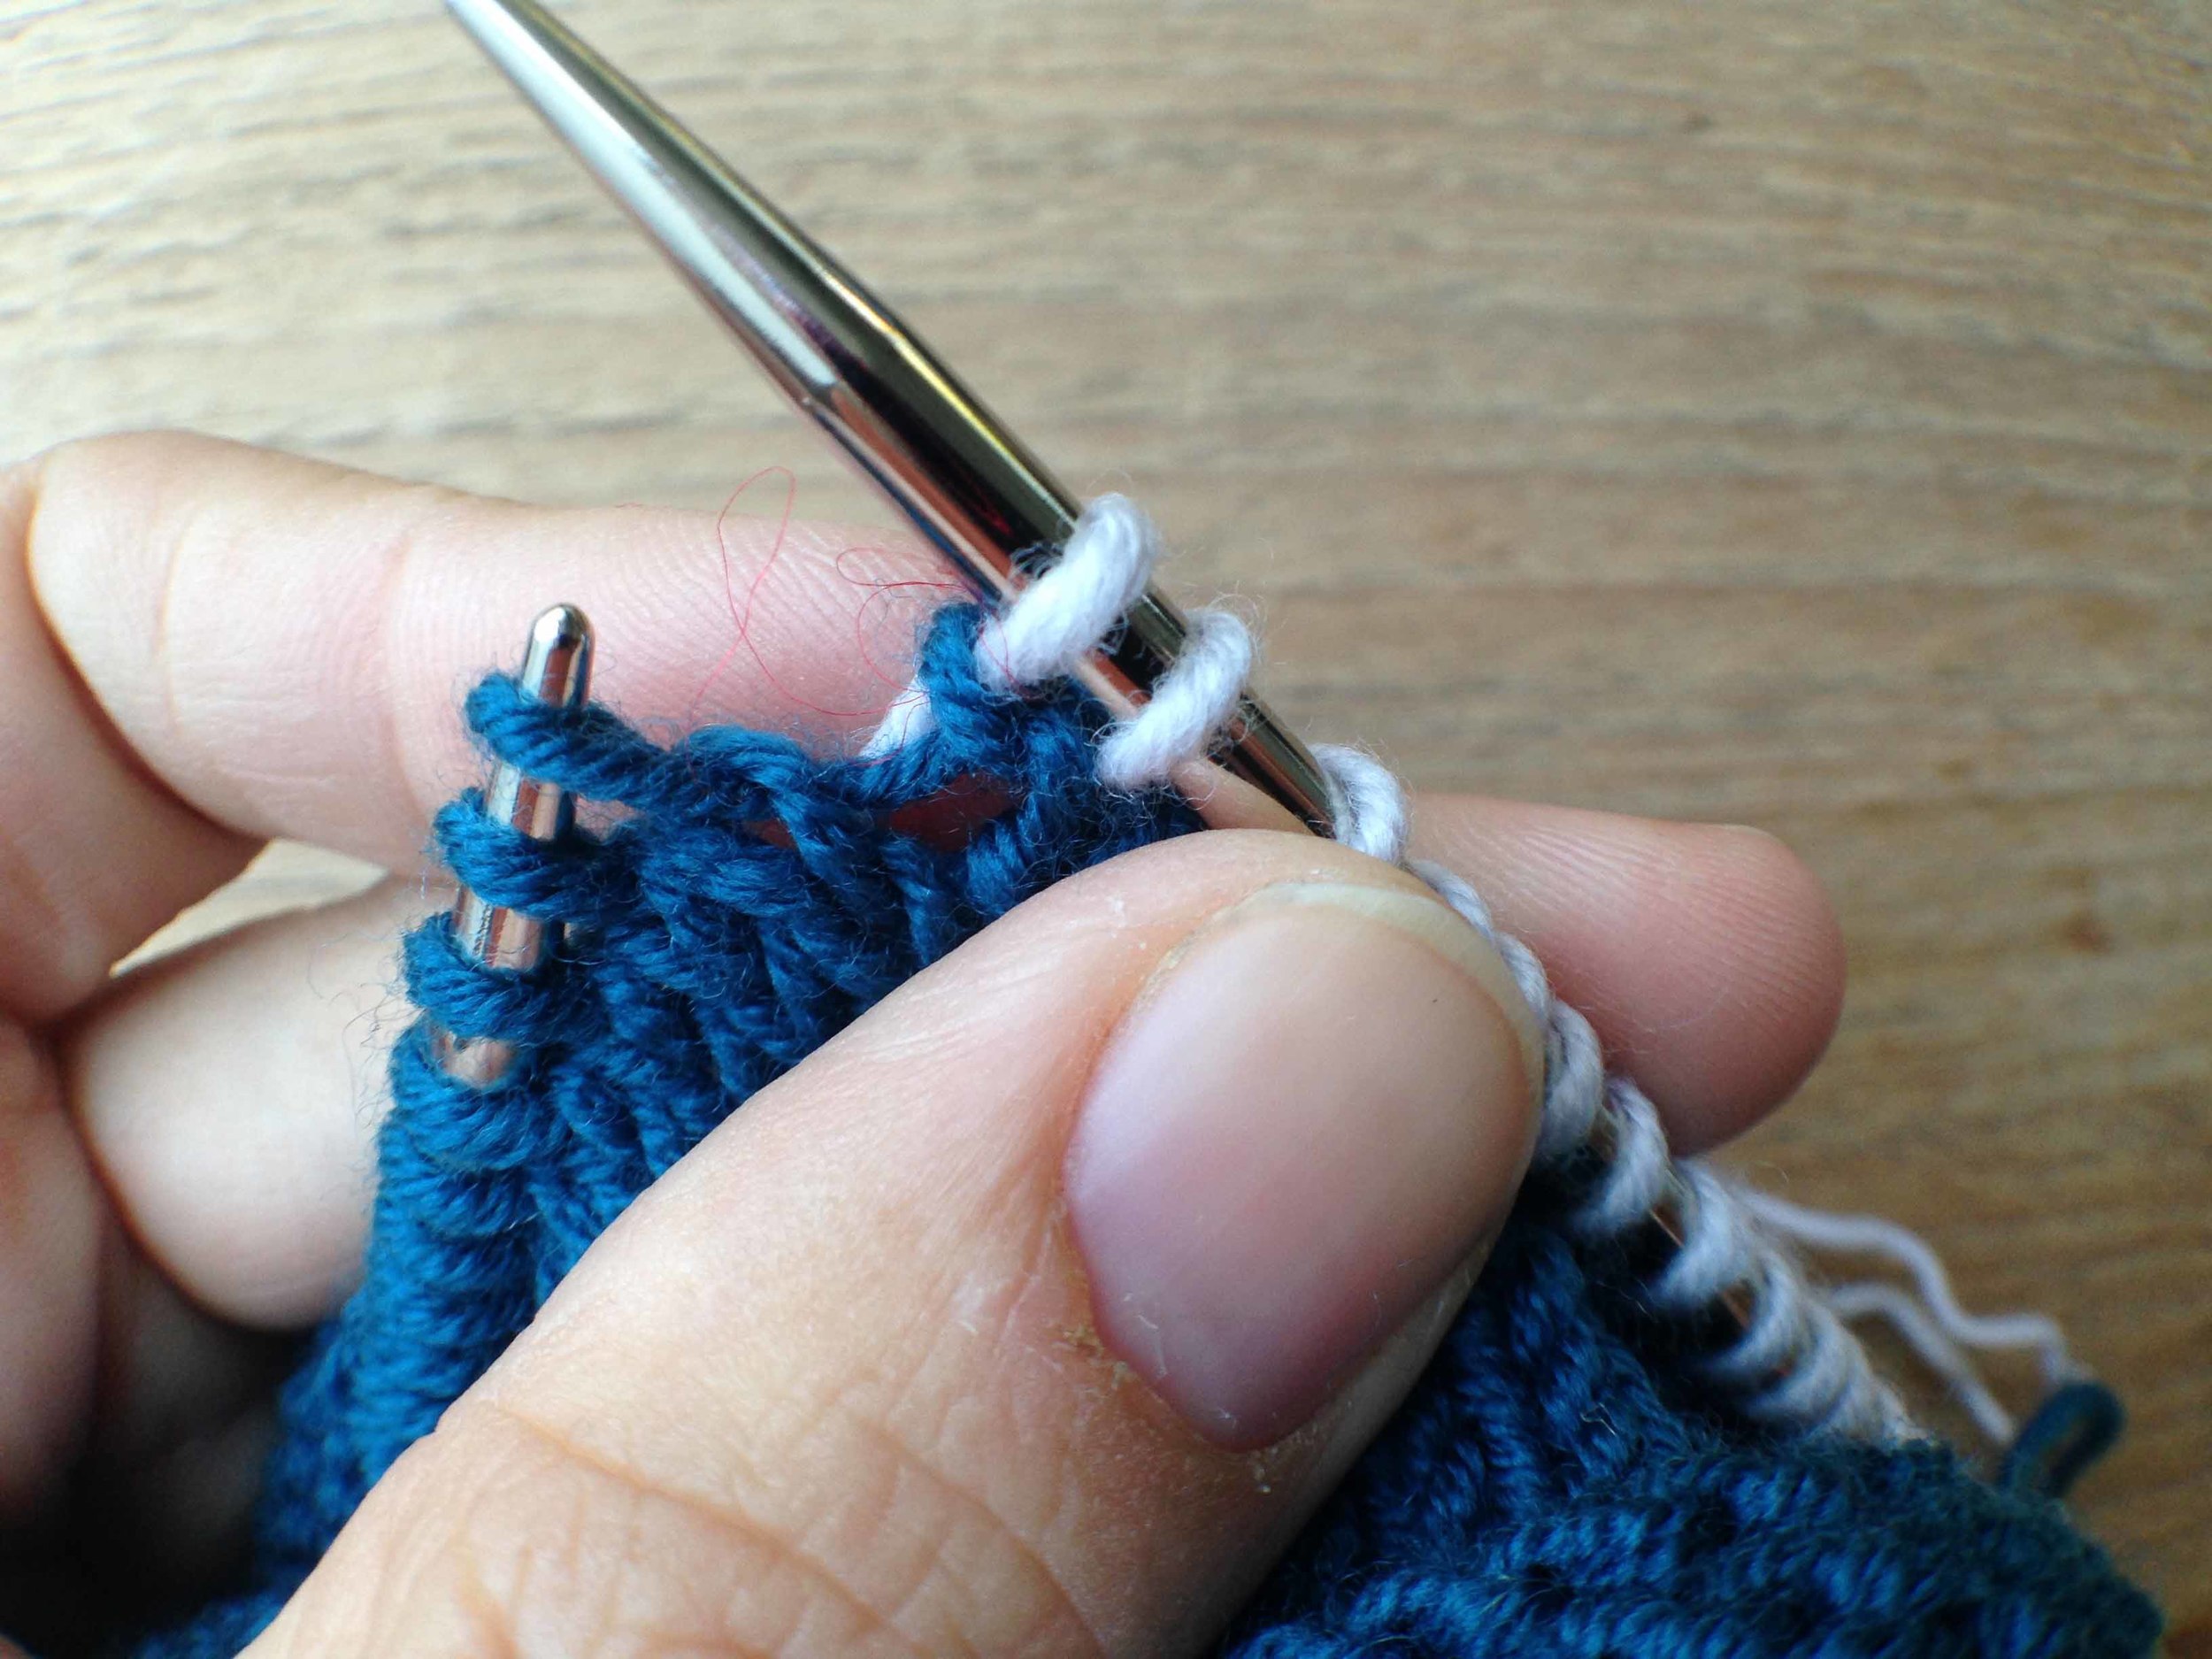
Towards the bottom of the post Georgie mentions that in the very next round, after the round where you have picked up your stitches, you need to do a ssk and a k2tog. You do these at the join between the new underarm stitches and the existing sleeve stitches, to close the gap. You do a ssk when you get to the end of your existing sleeve stitches, knitting one of the sleeve stitches you were holding on waste yarn together with one of the new underarm stitches. You follow that up with a k2tog when you get to the last of the new underarm stitches, which closes the gap between the underarm stitches and the existing sleeve stitches. 

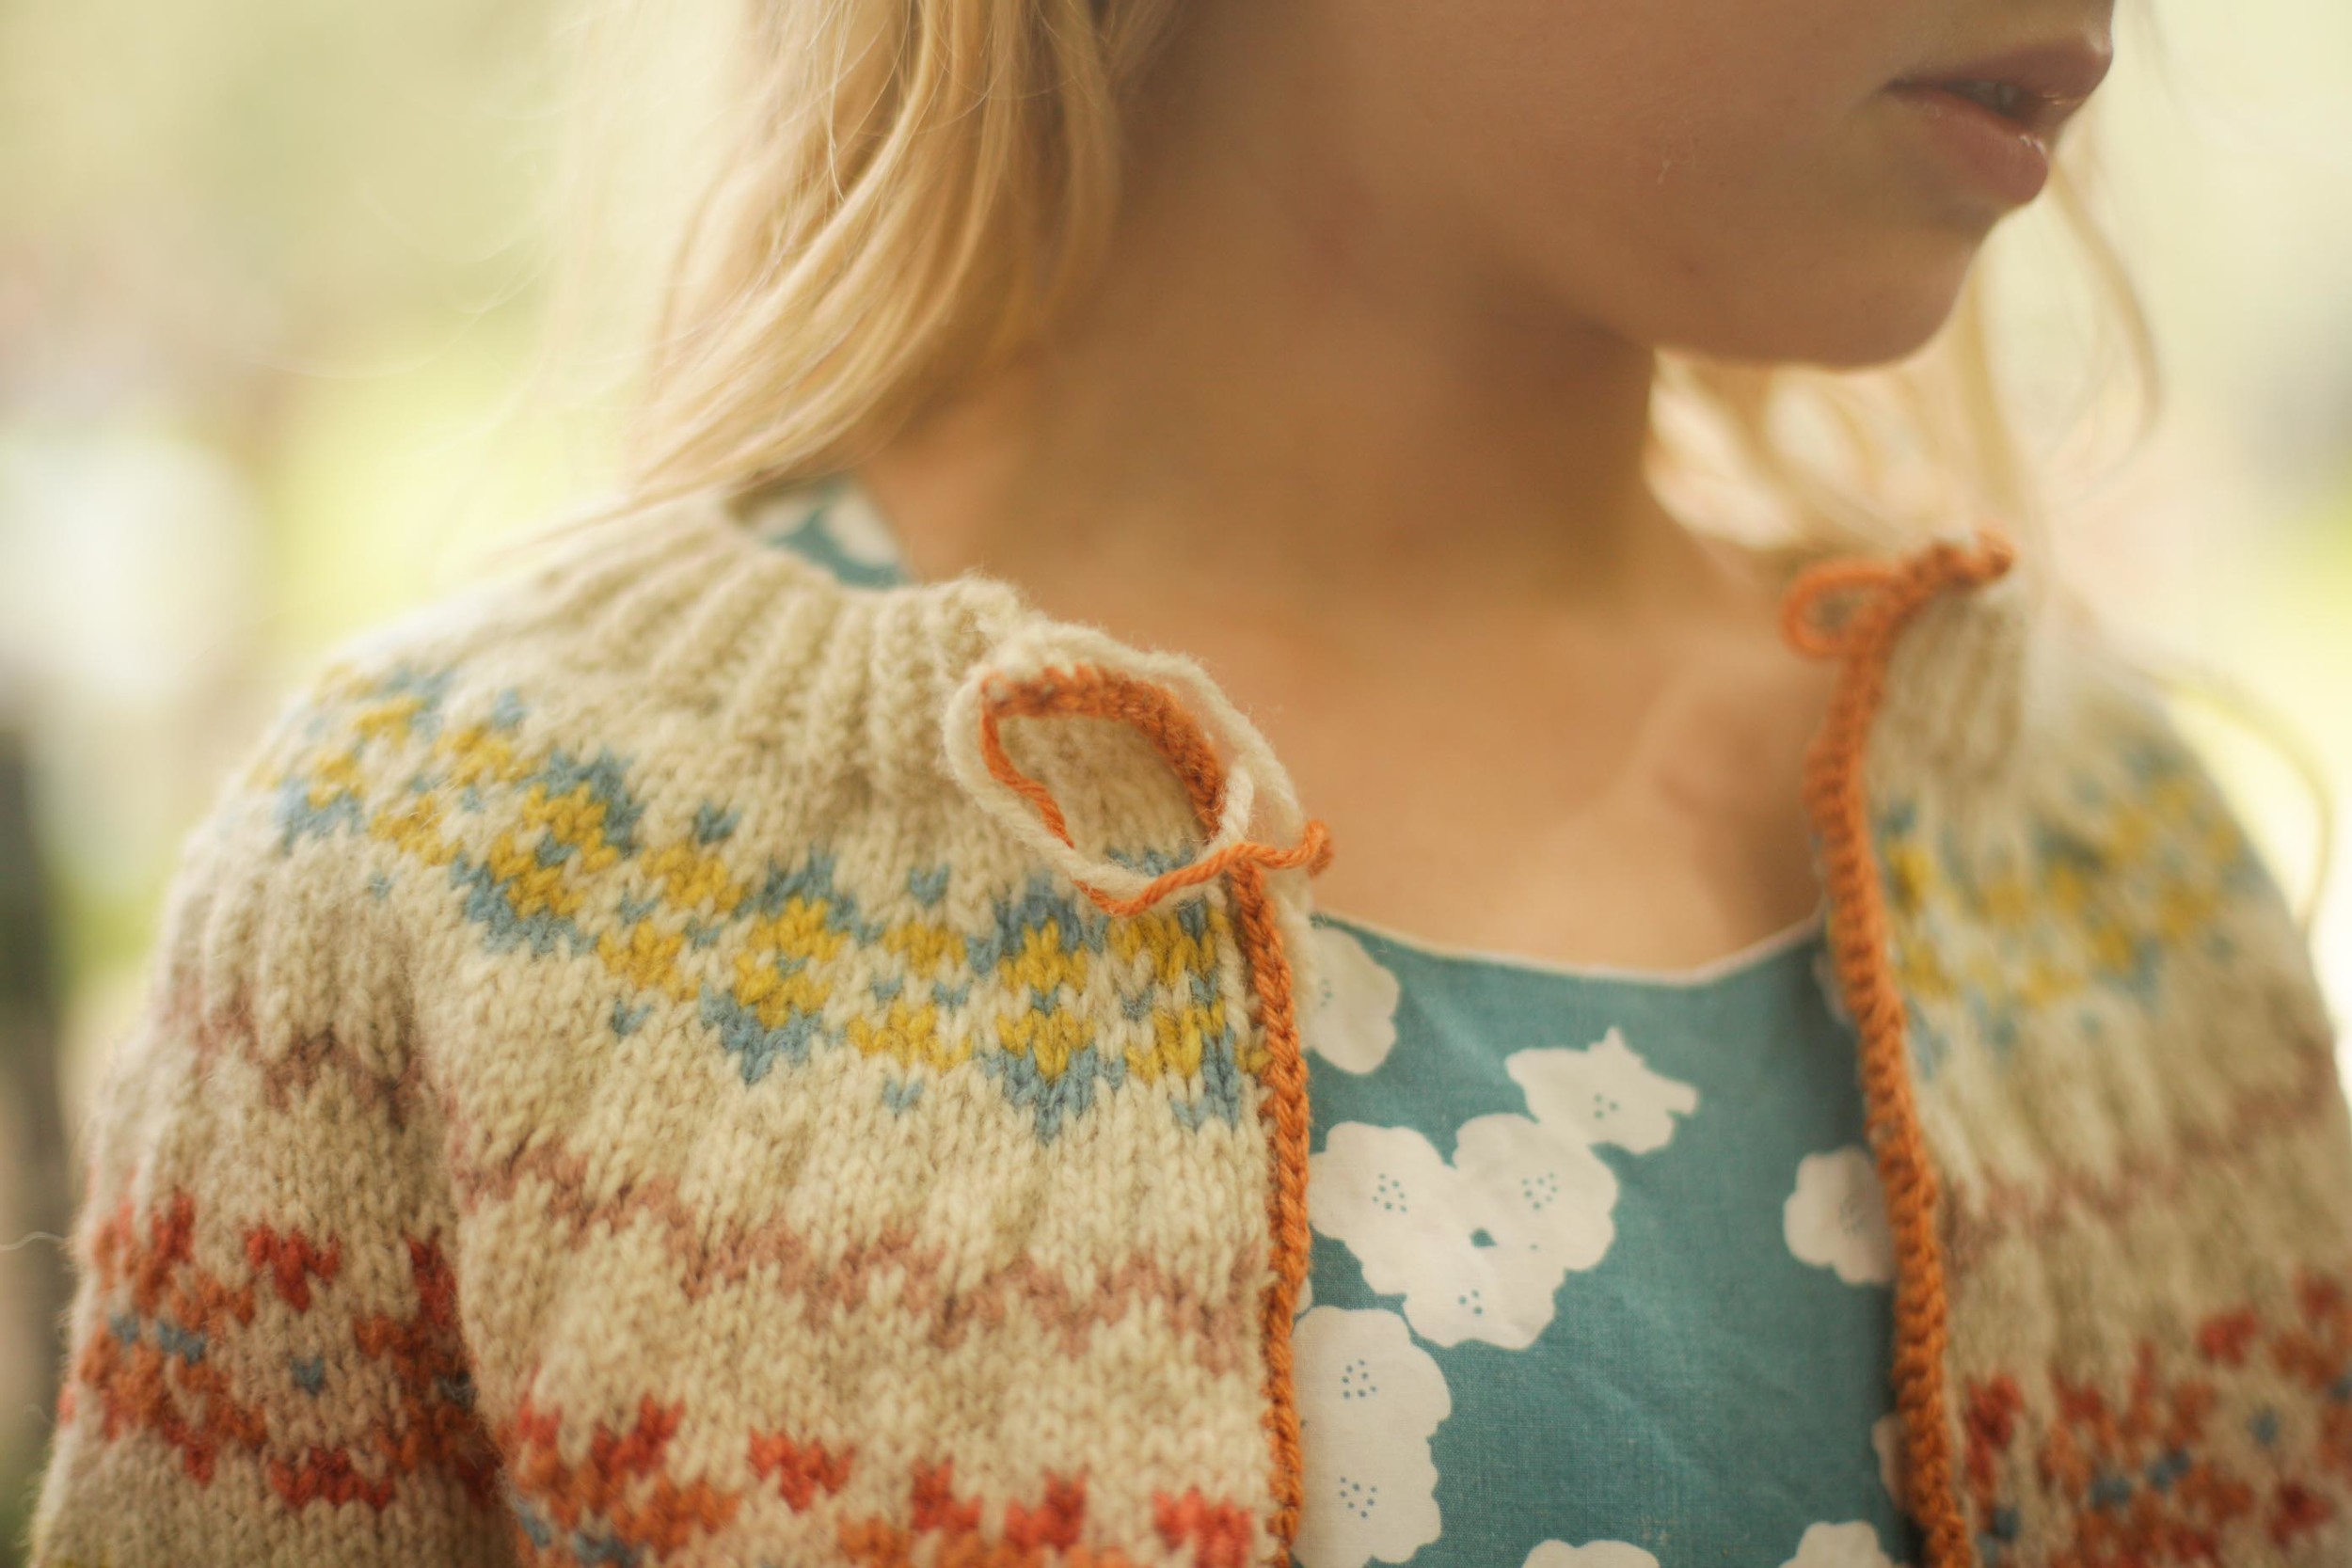
You will love this underarm. It has no gaps and looks great. I use it on every top down seamless pattern I make now. 

Yarn

So yesterday I was talking about how materials matter. How 100% wool does not equal 100% wool in all cases. I know this is a tricky subject when you are a new/intermediate knitter as there are all these new words and who knows what they all mean?

Have I got the podcast for you - two podcasts actually. There is a podcast called Knit FM by Hannah Fettig and Pam Allen and it is a true wealth of information. They cover Yarn - Part 1 and Yarn - Part 2. Get stuck in - if you are even vaguely interested in yarn you will love it. I just love Pam's voice. She sounds so lovely you will want to give her a hug - or maybe that's just me? 

One final thing today - A small few-but-mighty of you took me up on my Stash Less Ripping Challenge. I'm going to send a little something to the brave Libby who ripped out this lovely cabled cardy. Yay Libby!

See you Friday x

Felicia

In Around The Traps, How To Tags knittingtipsandtricks
2 Comments

Why materials matter!

November 11, 2014 thecraftsessions
The perfect pairing of project and materials.

The perfect pairing of project and materials.

When I was a newbie crafter I often purchased materials because I thought they were cute (for the kids), or beautiful (for me), or they were on sale (cheap). I put little thought into the properties of the materials I was using because I didn’t understand how critical they were. I thought that yarn was yarn, and fabric was fabric. And I think this is a common mistake that many new crafters make.

For me, choosing the wrong materials lead to many projects that were technically OK, but just didn't sing. And if you are going to take the time to make something with your hands you really want it to sing, don't you? 

Materials categorically affect the success of your project. They affect the longevity, the usability, the beauty and ultimately the joy the project brings; while it is being created and during it's lifetime. 

When your project is completed, it is the properties of material that matter - does it drape, does it pill, does it stretch, does it have enough weight, does it have enough strength, is it stiff, is it floppy, is it too heavy, too light and most importantly does it work for the thing you are making. Some properties are immediately visible but sometimes you can’t tell until the project is complete. And sometimes, even after a lot of practice you get it wrong. 

As a lovely instagram friend reminded me the other day - a gorgeous material is only gorgeous if paired with the right pattern. The perfect pairing of a project and materials will bring out the best qualities of both the pattern and the materials.

Let's use longevity as an example because it is one of the key things I am looking for. I want my projects to last, and I want them to wear beautifully.

Much of my making is children's clothes. Much of the wearing they do of those clothes is a little harsher than you or I might wear them. Blueberries, watermelon, grass, glue, ink and many many rocks have created havoc on the things I have lovingly made for them. As a loving parent your only option when faced with the carnage is to smile and hold your pain deep deep inside. As a result I have upped-the-anti on the materials I use, based on the number of outfits coming home from school with holes in the bottoms. I'm still making the same patterns but I no longer use flimsy fabrics. For shorts I once used cotton fabrics including jersey and quilting cottons. My baseline is now a lightweight canvas or linen/cotton blend. Something with strength and durability.

I do something similar for kid's frocks. Although the odd one gets made out of something super light and plain (I'm looking at you lovely pale pink Geranium that now has three ink stains and a hole in the front), I generally only make them out of a quilting cotton weight fabric. I trade off beautiful drape for durability.
Lesson - Small person shorts (in our family) need to be made in a light canvas if the aim is to get more than a few weeks wear from them.

I was wondering out loud the other day why I use so many prints in the fabrics I choose, rather than solids (which I love). I have realised the answer is "to disguise the wear and the stains". Again this is something to consider when choosing your materials if you are making for mucky pups like my lot. You will never achieve the gorgeous tone-on-tone linen kidswear look so beautifully epitomised by the Scandinavians, but I've learnt to live with that and you can too ;).
Lesson - Prints increase longevity due to stain disguising powers.

After strength, the next thing to consider is how it wears as well as the beauty of the material. Ask the question - is it still beautiful when used with the pattern I have in mind?

A knitting example - Once when I was a newish knitter I got completely suckered in by all the comments on Ravelry about the softness of Malabrigo Worsted. It is truly an amazingly soft yarn! I took the plunge and ordered a sweaters worth in the gorgeous Paris Nights colourway. I then knitted a whole jumper. At the time this was a massive undertaking that involved emotional strength and guts. Before I had even finished the jumper I could see that it was going to pill like a b@#%ard. Who wants to walk around the streets looking all pill-y? So it became a house cardigan - but it was too depressing to even use for that. I threw it away for it’s sake and mine. It just made me too sad.
Lesson – A super-soft wool is not generally a good sweater wool.

Later I used the very same super-soft Malabrigo Worsted for a Toddler Cowl – a project to which it is entirely suited and it still looks stunning a year or two in. The kid loves it because it is “just so soft mama”.  Perfect pairing. 
Lesson – A super-soft wool makes a great kid cowl.

Now all this talk about the "right" materials may have you thinking that I am talking about expensive yarns and fabrics. To which I would say – not at all!! Two recent projects were tiny baby vests that I made using yarn that was about $4.50 a ball. One was a tiny big squeaky but the other was Alpaca and simply divine. A favourite pairing of materials and pattern was a Wiksten skirt I made by chopping up an old pregnancy dress I loved. It no longer fits as I no longer have DD boobs, but rather than throw it out, I hoarded it because I loved the swish of the fabric. I made it to go on holiday and it is one of the favourite things I have ever made.

Below is a photo of the aforementioned skirt but in an effort to keep it really real in this space I want to give you the following info ;). The photo is a selfie taken in a campsite bathroom that was citrus yellow and royal blue. It was taken at a very very weird angle to make use of the tiny white bathroom door as a backdrop. In real life I am much more woman shaped. 


The right materials are ones that suit the pattern you are using AND with that pattern achieves the properties you want the project to have. 

simple things to remember when choosing materials if you are a newbie
 

Fabrics - If you are choosing materials for clothing think about the weight of the fabrics that you currently wear for that type of garment at the moment. If you are making a frock check the back of the pattern obviously, but then go and feel similar frocks in your cupboard to get an idea of the weight of fabric you should be looking for. Pick up the skirt in your hand and let it fall to see how the fabric drapes. These are the qualities you are looking for in a fabric is what you are looking for when you shop.

Yarn – Look for yarns that have similar properties to the ones suggested in the pattern. But remember that 100% wool and 100% wool are not the same thing. If possible feel them, look on Ravelry, and ask for advice. Look for whether they have ply's twisted together (strands twisted together) or whether they are a single yarn strand or whether they are woollen spun. Some 100% wools are supersoft and floppy. Others are twisted and solid. Others are bouncy and spun. If you aren't sure what any of this means then pop back tomorrow and I will give you a wonderful resource.The more you can learn about fibre the better!!

Feel free to ask me any question you want about what materials to use when. I'll do my best to help.

Felicia x 

In Thoughts On Craft, How To
21 Comments

The post about steeking!

August 1, 2014 thecraftsessions
Unfinished but the steek has been cut! Knitting and photo by Felicia Semple.

Unfinished but the steek has been cut! Knitting and photo by Felicia Semple.

So I finally found the time and space to cut the knitting. The delay was more about finding time when I had clean fingernails, and someone to take a photo for me, than an issue with the steek. Long term camping is not always very glamourous. Especially in the rain - and we have had a lot of rain in the last week. The dirt gets so stuck under your nails, and ingrained in your finger tips that only a good soaking will get it out. And there is nowhere to soak.

I digress. With the help of my middle child, I cut the steek! And I have to say that it is one of the most fun things you can do as a knitter. Even as I write this down I can hear that it sounds a bit nanna. But it's not. It feels devilish. Like smoking at the milk bar around the corner from your house when you were 16. Not that I would have done something like that ;).  

More digression.

This post is not a how-to. More a progress report. 

I have posted a short instagram video clip if you want to watch or have not yet seen a steek live. 

And if you were after a how-to I have two options for you.

1. In person. Sadly/happily our Steeking workshop, which is taught by Julia Billings at this year's retreat, is fully booked out. I'm thinking we should possibly repeat it next year as it was so popular! In the mean time you can experience Jules teaching steeking at Sunspun in Melbourne in October. Please contact them for the details.

2. Online. Have a look at the lovely Kate Davies site where she shows you how it is done. She also has a great post on different types of finishes here.

There is also a fantastic series on steeking by Eunny Jang in her defunct blog. This was how I first got my steeking confidence. It is a great read, as is much of the rest of her site.

The cardigan still isn't finished - which I like. I like that it has been my companion over these last four months as we have travelled about. And while I have knitted numerous other short-term projects over our time away, nothing that has the love that has gone into this work. This project has meaning to me. I learnt, I persisted and I'm hoping to love it. 

It still needs button bands and an extra motif added to each sleeve to make them a little longer. I'll let you know when I'm done. 

Have you ever steeked anything? Does the idea of steeking make you feel the joy? Or some fear….

Felicia x

PS. Only one week to go until registration closes! Feel free to email me if you have any questions about workshop availability.

In How To, Inspiration Tags knitting, knittingtipsandtricks, steeking, colourwork
12 Comments

Learn to Read Your Knitting - Part 3 - Increases

May 27, 2014 thecraftsessions

So my apologies for the big break in this series. I had camera gear issues and travel issues.

In order to take the photos for this series you really need a macro lense. And I had one. A lovely birthday present a few years ago from my family. But then a week or so before we left on holiday my camera died. The fixing shop said that my only option was to buy a new one as they no longer make the part I need. OK - not a great time but I got on ebay and found one. But then my old macro lens won't fit the new camera. So bit by bit I've been trying to sort it out.

In the mean time I finally came up with a way of taking the photos I need. I purchased a little macro thing for the iPhone and off we go. Most of them are OK but the odd photo is a little crappy so my apologies. 

If you are seeing these posts for the first time the two previous subjects we covered are linked below.

Learn to Read Your Knitting - Part 1 - Stitch Structure - This post was called The Secret to Becoming A Great Knitter

Learn to Read Your Knitting - Part 2 - Decreases

And now on to the post….

Increases

Now this is a fun post - if you like this sort of thing. Learning to read your increases will mean that you no longer need to count rows between waist increases, nor will you need to count increase after increase when knitting a top down sweater. You will be able to knit knit knit away, counting your increases when you think you are close and then when you arrive at your correct number of increases, doing a quick stitch count to ensure you are where you need to be. 

We are going to cover the three most commonly used increases (in my experience). They each have different characteristics so it is really important to understand how they work in order to accurately read them.

The three we are going to cover are

  • M1 - Make 1 in the style of Elizabeth Zimmerman.
  • M1L/M1R - Make 1 left and Make 1 right.
  • kfb - Knit front and back which is also sometimes known as kfab or even k1f&b.

And there are three key things about learning to read them.

  • The first is to understand where the stitch is occurring.
  • The second is to understand what they look like.
  • The third is how to count rows since the increase and how to count the number of increase rows you have done.

As I have said in the two previous posts - the best way to understand this for yourself is to actually knit these stitches with some scrap yarn and then have a look at what they look like. Look on the row you have knitted them and then at the end of a few rows. Again - skip the wine while you are at it - this requires a little bit of brain space. 

I am using a different colour yarn for the increase row in order to try to make things a little clearer. I finished with the blue yarn on a purl row and then start on the grey with a knit row that is the increase row. I hope that helps to make it a little clearer.

Where the stitch occurs!

So let's start with where the increase stitch is occurring. What I mean by that is what row is the increase occurring on. Each of these three increases occurs in a different place. 

Make 1

A M1 occurs in the actual row you are knitting as it is just making a twist of the working yarn and placing it onto the right needle. I love this increase for it's simplicity and speed.

The M1 is simply a loop of yarn twisted on to the right hand needle. You don't knit into it until the row after the increase row. 

FeliciaSemplePitch5.jpg

Here is what it looks like next to the previous normal stitch. So if you look at the base of the second last stitch you can see that it is a loop pulled through the blue stitch below. The last grey stitch on the needle is simply a loop over the needle which initially tends to sit snug up against the last normal stitch until you knit it on the next row.

Make 1 Left / Make 1 Right

With the M1L/M1R the increase stitch occurs in the previous row to the one you are now knitting - so the last row. This is because you pick up and knit one of the bars that runs between two stitches from the previous row.  

Before doing a M1L or a M1R you pull the two needles apart slightly to show the bars of yarn running horizontally between the two stitches on the previous row. 

Before doing a M1L or a M1R you pull the two needles apart slightly to show the bars of yarn running horizontally between the two stitches on the previous row. 

This is showing the beginning of a M1L which you can tell as the yarn is slanting towards the left. 

This is showing the beginning of a M1L which you can tell as the yarn is slanting towards the left. 

This shows the finished stitch. As you can see the actual increase stitch occurs on the previous row to the actual increase row as below the new grey stitch there is a blue twist of wool. I'm hoping that makes sense. 

FeliciaSemplePitch11.jpg

When you are doing this stitch in wool that is all the same colour it is really important to understand that the increase occurs on the previous row because as you are counting upwards from the increase you need to remember that you actually have an extra stitch in your row count. Another way to think of it is that you have an extra loop as you are counting up from the increase - so if you have knitted one row since your increase row you will see what looks like three stitches in the row count - the twist of yarn that is the increase, the stitch from the increase row and the stitch on the needle. 

Knit front and back

Kfb or kfab is different again. The increase is created from a stitch in the previous row by first knitting into the front of the stitch and then twisting your needle around and knitting into the back of it. However you don't end up with an extra loop of yarn - instead you have a bar of yarn. This is created as you cross from knitting the stitch at the front to the stitch at the back. Have a look as you do it. It will make more sense. This feature of the increase means that it is very easy to count these increases as you just count from the loop coming out of the bar upwards.

This photo shows the start of kfb. This is the knit stitch.

This photo shows the start of kfb. This is the knit stitch.

FeliciaSemplePitch15.jpg

You leave the stitch on the needle. That is the blue stitch - the grey stitch is the one you have just pulled through it. You now put your needle into the back of the stitch. This is where the bar is created. Can you see how by now knitting into the back of this stitch we are pulling a loop through the blue stitch which will mean the blue stitch will be pulled horizontal - there is your bar. 

The second last grey stitch is the knit stitch and the last grey stitch on the right needle is the increase stitch with the bar below it.

What they look like!

So we have already kind of seen what they look like above but I thought it would be good to have a look at what they look like when you create them AND what they look like after you have knitted one more row. 

A M1 on the increase row.

A M1 on the increase row.

Make 1

A M1 looks simply like a loop on the row you do the increase on and then after knitting one more row has a count of two stitches if you count the stitch on the needle and the increase stitch. This is what it will look like if you are knitting from a pattern that says something like this;

Row 1: Increase row

Row 2: Purl one row. 

You can see that there is a twist of grey yarn and then the stitch on the needle. So the increase row and one more row.

You can see that there is a twist of grey yarn and then the stitch on the needle. So the increase row and one more row.

And this is what it looks like if you have an increase rows and then knit three rows.

And this is what it looks like if you have an increase rows and then knit three rows.

Make 1 Left / Make 1 Right

I only showed a M1L above but the below photo shows a M1L, then two knit stitches, then a M1 R.

A M1 L after it has just been knit. You can tell it is a M1L rather than a M1R as the blue loop leans left on the top of the loop.

A M1 L after it has just been knit. You can tell it is a M1L rather than a M1R as the blue loop leans left on the top of the loop.

And here is the stitch after you have knitted the increase row and one more row.

Slightly crappy photo but you can see here (reading from right to left) a M1L then two normal knit stitches and then a M1R. Under each M1 stitch there is a small hole. Generally this is not too visible. I am slightly stretching the knitting to make the increase stitch visible. Please note that although you have only knitted the increase row plus one more row, so 2 rows, that there is actually three stitches counting upwards. The blue increase stitch and then then two grey stitches. 

A terrible photo but just about the pin you can see the twist of the M1L, two stitches and then the M1R. Then there is the increase row and three more rows.

Knit front and back

This increase is probably the simplest to read because of the neat bar. The bar means that sometimes you don't want to use this increase, especially if you don't want the increases to be as noticeable. 

This photo actually shows two kfb in a row which is a common raglan increase technique. You can see to the left of my thumb a grey normal stitch and then a stitch coming out of a blue bar, then another normal stitch and then another grey stitch coming out of a blue bar.

This is kfb after the increase row and three more rows. As you can see there are four loops coming out of the bar including the one on the needle.

How to count increase rows!

Make 1

OK - so in the photo above we have three increase rows. We have done six rows of knitting since the first increase (including the increase row), four rows of knitting since the second row of knitting (including the increase row) and two rows since the last increase (includes the increase row as well as the stitch on the needles).

Make 1 Left / Make 1 Right

So just to be super repetitive - this increase is actually made in the row below the increase row. This is very obvious in my two colour knitting but not so much when you are knitting in a single colour. 

So you can see here that the first increase is in the blue row. There are three increases each side of two normal knit stitches. And we have done six rows (including the increase row) since the first increase.

Knit front and back

So this is two kfb in a row which is a common increase technique for a raglan. The stitch marker (I should have left it in!) would go just to the right of the central row of knit stitches in the image.

In a pattern this would read - knit until one stitch before marker then kfb, slip marker, kfb then knit until…..

This image is the same as the last increase we covered - except that there aren't two knit stitches separating the increases. There are three increases each side of the marker and we have knit six rows including the first increase row. 


I have just realised that I have forgotten to do a yarn over (yo). I will cover it if I get time, but a simple way to think of it (knowing all you now know) is to understand that when you do a yo the increase actually occurs in the row after the increase row….another day maybe.

That is all I have time for tonight as I am about to get kicked out of the wifi place. Let me know what you think! Clear, not clear? Anything else you want me to cover….I have a few ideas...

Felicia x

In How To Tags learntoreadyourknitting, knitting
18 Comments

Getting bottom up sweaters to fit beautifully

March 4, 2014 thecraftsessions
FeliciaSemple-18.jpg

So I'm away on a bit of a road trip. About 9000k in the last three weeks - so fun. And the super lucky thing about it is that I have got to share the driving, which means a fair whack of knitting time each and every day. Obviously the parenting malarkey has got in the way a little bit of the quiet-uninterupted-knitting-time-on-a-road-trip you may be imagining. But I have been productive none the less.

And so - I've finished Lila. The lovely Lila as she is known in our household. And lovely she is.

All details of my version can be found on Ravelry.

FeliciaSemple-15.jpg
FeliciaSemple-13.jpg

I really think Lila is the perfect pattern - and Carrie Bostick Hoge it's designer, is a genius. Genius!

What I love about the pattern is it's all round cosiness and comfort - while still retaining an elegant shape. Elegant isn't a word I use too often about something in my wardrobe but in this case it is appropriate. Lila may just be the perfect sweater for autumn, winter and spring. I see myself wearing it over a frock and tights, or maybe a Wiksten Tank dress and jeans. And over my pyjamas - totally perfect for that.

That said - while I love the result - my (first) version is a fairly major stuff up. I am trying to channel my mistakes are how you learn post and forget that I wrote a blog post about how to choose the perfect sweater pattern to enable you to make the sweater you really want.  

I wanted ease - for the cosiness factor. The lovely woman with the curls in the photos has a few inches of ease and it looked great. What could go wrong?

Well friends, I chose the wrong size. See the critical bit with any oversized jumper, in my opinion, is that it fits you really well around the shoulders. This doesn't. It is sloppy and the arms are too big. I recovered it slightly after blocking by committing a cardinal knitting sin, and throwing it in the dryer. And it did pop back into size a little. 

This shows too big sleeves and underarms...and probably the body too...

This shows too big sleeves and underarms...and probably the body too...

This shows the extra fabric around the underarm. 

This shows the extra fabric around the underarm. 

So how much ease is too much? I am have a 35" bust and I chose a 38" size in the pattern and ended up with a 38". And for me that is too big. And the lesson here is that for me I need a pattern that has little to no ease at the bust when the actual sweater is oversized. 

But after saying all that I love it, and it was fun to knit and so am very happy to do it again. I see myself with other colours and will be knitting this again. Perhaps in lovely soft grey like the sample. Yum.

Anyway there was a point to this post and it was to tell you about how I knit my bottom up sweaters to give them a better chance of fitting. Knitting a sweater from the bottom up means that you can't try it on as you go. And trying it on as you go (like you are able to do when you knit top down) can make it much easier to get the fit right.

FeliciaSemple-11.jpg

Getting bottom up sweaters to fit beautifully.

The order you knit a bottom up sweater is the critical bit. Normally you knit the sleeves and body up to the underarm, before joining them and knitting the yoke. The issue with this is that you don't know the length of the yoke (as it hasn't yet been knit) so your body or sleeve length might not finish where you want them too. 

Huh? How does that work? Well the pattern might state a yoke length BUT your row gauge might be very different from the pattern, and therefore the length of your actual yoke could be anything from 1 to even 3 inches different to the pattern. What this means in reality is that a pattern that is supposed to fit right under your undearms doesn't, and instead ends up about 2 inches away from your underarm. This means that your sleeves will be two inches longer than the pattern states. 

I hope that makes sense? Row gauge is the key and these days it isn't always stated AND I personally have never been able to get the same row gauge a pattern states. It seems to be a tricky thing to achieve - to get the same row and stitch gauge as someone else.

The difference of an inch or two of sleeve length can be really annoying. Say you like a sweater that you can pull down over your hands in winter, an inch or two shorter than necessary results in futile pulling. Or conversely you may be the kind of person who hates sleeves around your wrists. That extra inch or two could drive you nuts.

Love this sleeve length for a cosy winter jumper.

Love this sleeve length for a cosy winter jumper.

And once the body and sleeves have been knitted it is very difficult to fix without totally pulling out the yoke or some other crazy long-winded work around.

So what to do? How to get the sleeve and the body to the right length? 

This is tricky but I have a super simple answer! The most common issue is sleeve length so initially I am going to deal with that but I apply the same thing to body length* at the bottom.

Step 1: 

Choose the right size - Ha!
And swatch and wash your swatch. Blocking your sweater can drastically change the fit of your garment. The more you know about how your yarn will behave at a given gauge the better. So if you know that your swatch grows in length by about 10% then you need to knit your sleeves 10% shorter than your desired length!!

Step 2:

Knit the body up to the underarms. See below for clarification *.

Step 3: 

Don't knit the sleeves!!

Step 4: 

Read the pattern and look for the stitch count for when you knit to the top of the sleeve - so just before you join the body and the sleeves. Provisionally cast on that number of stitches using waste yarn.

There are hundreds of tutuorials for a provisional cast on. I am lazy and just cast on the right number of stitches, then purl one row. I then cut it off with scissors.....lazy lazy but I can never seem to remember provisional cast-ons without my friend youtube on hand and that is just a hassle.

Step 5:

Join the body and the sleeves as the pattern suggests BUT rather than joining actual sleeves join your provionally cast on sleeve stitches to the actual body.

Step 6:

Knit the yoke as described.

Step 7:

Undo the provional cast on (cut it off in my case) and knit the sleeves top-down. This ensures you get the sleeves to fit because you can try it on and modify the decreases as appropriate to your arms. AND you can ensure you get the sleeves the right length. Yihaa!

FeliciaSemple-14.jpg

So - a simple answer that you can use on any bottom up in the round pattern, to help you get a great fit.

Wishing you a lovely week! 

Felicia x

* This trick also works with the body length and fit if want more control over those. In that case you would just do a provisional cast on for the sleeve and the body. Join them together using the working yarn and then knit your yoke. Then knit your body and your sleeves top down. Best of both worlds. Bottom up yoke and top down sleeves and body.

In How To
22 Comments
← Newer Posts Older Posts →

Welcome! I'm Felicia - creator of The Craft Sessions and Soul Craft Festival.

This blog aims to celebrate the connection between hand-making and our well-being.
These posts aim to foster a love of hand-making and discuss the ways domestic handcrafts elevate our everyday.

I love the contributions you make to this space via your comments and learn so much from each and every one. x

Thoughts On Craft

Simple Sewing 101

Stash Less

The RetreaT

Featured
Making Fast Fashion: Some More Of The Grey
Apr 19, 2022
Making Fast Fashion: Some More Of The Grey
Apr 19, 2022
Apr 19, 2022
Is My Making Fast Fashion?
Apr 12, 2022
Is My Making Fast Fashion?
Apr 12, 2022
Apr 12, 2022
Why Gauge Matters
Apr 5, 2022
Why Gauge Matters
Apr 5, 2022
Apr 5, 2022
Craft As Simple Mundane Forward Movement
Mar 29, 2022
Craft As Simple Mundane Forward Movement
Mar 29, 2022
Mar 29, 2022
Craft As A Virtuous Cycle*
Mar 22, 2022
Craft As A Virtuous Cycle*
Mar 22, 2022
Mar 22, 2022
Craft & The Slow Nostalgic Finish
Mar 15, 2022
Craft & The Slow Nostalgic Finish
Mar 15, 2022
Mar 15, 2022

popular posts

Craft As A Project V’s Craft As A Practice

Our Fear Of Going Back

Making Is Not Inherently Creative

Why All Crafters Need A Visual Diary

Craft As A Manifestation Of Love And Loss

Moving On From Perfectionism

The Secret To Becoming A Great Knitter!

Simple Sewing 101 - Part 1

Craft In The Middle Of Motherhood

Another #theyearofthescrap #ellenscardigan using some #oldmaidenaunt alpaca silk from many years ago. What I love about this little cardy is it’s simplicity and how little yarn it uses. Perfect for scrap knitting. I now have a little pile of ba
New blog post: Craft as elevating the mundane! I think this idea is so important. 🌿 'Making is about enriching the moments of our lives; it’s about making the mundane (and not the extraordinary) more abundant and that bit more lush…. el
Block 8/12 - I’m so excited to be back making this for my smallest for her 10th birthday. It’s a #stash_less #theyearofthescrap quilt that is based on an incredible #geesbend quilt. And it’s all scraps and precious bits and pieces.
Another #theyearofthescrap #ellenscardigan using some #oldmaidenaunt alpaca silk from many years ago. What I love about this little cardy is it’s simplicity and how little yarn it uses. Perfect for scrap knitting. I now have a little pile of ba New blog post: Craft as elevating the mundane! I think this idea is so important. 🌿 'Making is about enriching the moments of our lives; it’s about making the mundane (and not the extraordinary) more abundant and that bit more lush…. el Block 8/12 - I’m so excited to be back making this for my smallest for her 10th birthday. It’s a #stash_less #theyearofthescrap quilt that is based on an incredible #geesbend quilt. And it’s all scraps and precious bits and pieces.
The Blog Archives!
  • April 2022
  • March 2022
  • February 2022
  • December 2021
  • March 2021
  • February 2021
  • November 2020
  • July 2020
  • June 2020
  • May 2020
  • April 2020
  • March 2020
  • February 2020
  • December 2019
  • March 2019
  • February 2019
  • January 2019
  • December 2018
  • November 2018
  • October 2018
  • August 2018
  • July 2018
  • May 2018
  • April 2018
  • March 2018
  • February 2018
  • January 2018
  • December 2017
  • November 2017
  • October 2017
  • September 2017
  • August 2017
  • July 2017
  • June 2017
  • May 2017
  • April 2017
  • March 2017
  • February 2017
  • January 2017
  • November 2016
  • October 2016
  • September 2016
  • August 2016
  • July 2016
  • June 2016
  • May 2016
  • April 2016
  • March 2016
  • February 2016
  • January 2016
  • December 2015
  • November 2015
  • October 2015
  • September 2015
  • August 2015
  • July 2015
  • June 2015
  • May 2015
  • April 2015
  • March 2015
  • February 2015
  • January 2015
  • December 2014
  • November 2014
  • October 2014
  • September 2014
  • August 2014
  • July 2014
  • June 2014
  • May 2014
  • April 2014
  • March 2014
  • February 2014
  • January 2014
  • December 2013
  • November 2013
  • October 2013
  • September 2013
  • August 2013
  • July 2013
  • June 2013
Featured
Making Fast Fashion: Some More Of The Grey
Apr 19, 2022
Making Fast Fashion: Some More Of The Grey
Apr 19, 2022
Apr 19, 2022
Is My Making Fast Fashion?
Apr 12, 2022
Is My Making Fast Fashion?
Apr 12, 2022
Apr 12, 2022

We Live and work on the traditional lands of the Wurundjeri people of the Kulin nation.
We acknowledge that sovereignty was never ceded and pay our respect to elders past, present and emerging.

Copyright the Craft Sessions 2020

Logo designed by the lovely Mara of Printspace and Girling Design