• The CraftSessions Story
  • Our Past Retreats
  • Blog
  • Newsletter
  • Contact
Menu

The Craft Sessions

Street Address
City, State, Zip
Phone Number

The Craft Sessions

  • About
    • The CraftSessions Story
    • Our Past Retreats
  • Blog
  • Newsletter
  • Contact

Stash Less - Falling Off the Wagon

February 20, 2015 thecraftsessions

In the last Stash Less post I wrote about how I thought I had found the key - and it was true. Having the budget meant that there was opportunity cost in everything I purchased. Having the making list meant that I knew what I really wanted to make and could be more focused with less buzzzzzz about all the ideas floating around in my head and on the interweb. Having the list of triggers meant that I had something against which I could review all potential purchases. All of these things have made a big big difference to my thinking. But we still have a way to go….. 

We are now nearly five months into the process and I've learnt a lot. One thing I've learnt is that the whole thing is hard. Another is that I really need to practice new habits. 

But in the last week, for some as-yet-unknown reason I've had a little blip. I've practiced my little heart out over the last week. And well, I've also fallen off the wagon.

More about my fall in a minute. But first let's look at where we were at.

A review of the spending so far.  

$5 - Knitting needle gauge 
$10  - Knitting pattern Flet (gee it's pretty) (gee it's as-yet unused)
$39 - Cotton and needles 
$24 - Cotton and pattern tracing stuff 
$10 - Knitting pattern Keel (on the needles)
$52 - Kate Davies new book Yokes (with postage) (again as yet unused)
$67 - Liberty in one of my all time favourite patterns
$54 - Fabric for kids Christmas stockings and cotton
$1.50 - Zip for star cushion
$88 - Wool for the boy's birthday jumper (swatted and ready to go)
Grand total until the fall was $350

The great thing about having this list and reviewing it is that I can see that for the most part I am on the right track. The only thing that I really was off base with was probably the pattern Flet and Yokes. Everything else is either being used or will be used soonish. 

This makes me happy!

A little pre-fall information

Before we go into what I did, I think it's really important to note that in the moment I've managed to justify all of it. I have been masterful in my reasoning and my rationale. It's been really interesting to look back on - now that the moment has passed - I'm really quite admiring of how I justified it.

In addition to the falling-of-wagonness you will hear about in a moment, I also spent a good thirty minutes with $90 worth, of (super pretty) wool in a shopping cart, uhmming and ahhhing about whether I should hit the go button. I shouldn't. And I didn't. But I wanted to. A combination of FOMA and wanting to own the pretty. Wanting the thrill of the purchase. An hour after walking away I felt really good. I don't need wool. At the rate I am ripping things out, I have enough yarn to last me at least two years of solid knitting. 

The fall

So what happened. I spent $219 in the last week. And $127 of that was on totally unnecessary stuff that doesn't follow the rules. 

Exhibit A. I spent $77 on new season Nani Iro. It will arrive by mail sometime soon. I did cleverly avoid an old habit of only buying a little bit to make the purchasing less "bad". I purchased enough for a dress. I do have quite a stack of dress fabric - which I showed you in this post. I forgot momentarily that...

“Enough is as good as a feast.”
— Mary Poppins

And so it is. 

Exhibit B. Another purchase that fell into the same category was the 1m of new Cotton and Steel Mustangs I purchased to make the top shown in the photo at the top of the post. I purchased it because I know my kid would love it - but she does have more clothes that she will ever wear out. I can't decide if I care about this one or not. It wasn't FOMA or any of the other reasons. It was joy for the kid. 

Exhibit C. My third and final totally frivolous non-rule-following purchase was that I purchased 1m of another Cotton and Steel Grey Cross fabric. Again it was super pretty. But the reason for purchasing it meant that I came up with a new trigger - "Just in case" purchasing. Hmm. I justified it by saying that I didn't have the right fabric for part of the boys quilt and needed the grey "just in case". I didn't need the grey. At all. 

The final two things were necessary for the making list. $82 for batting for boys quilt and some baby quilts and $8 on cotton. Totally fine.

So all in all - I spent 4.5 months worth of budget in a week. And 2.5 months of that spending was unnecessary and just because I wasn't paying enough attention and really being conscious about why I am doing Stash Less. I'm chalking it up to a learning experience. 

Where does that leave us?

Spending to date since October 1st. About $570. 

What is really annoying about it is that even as I am writing about it I'm still justifying it in my head - "Beautiful Nani Iro that you love is only released once a year (or so)". "Your little girl will totally LOVE the mustangs dress and how fun to be able to do that for her". "The crosses will come in handy". But you know what…..I know, and you know, that none of it was necessary. All of it was excessive. And while I don't want to waste time feeling bad about it, it was a good reminder that I can be very clever at tricking myself when I want to be.

I'm feeling just a little frustrated with the whole idea, with the budget, with the process and with myself. That said, I am also really happy I thought it up, really happy I'm doing it, and really happy I'm learning things. But frustrated none the less. 

Some successes - small but important 

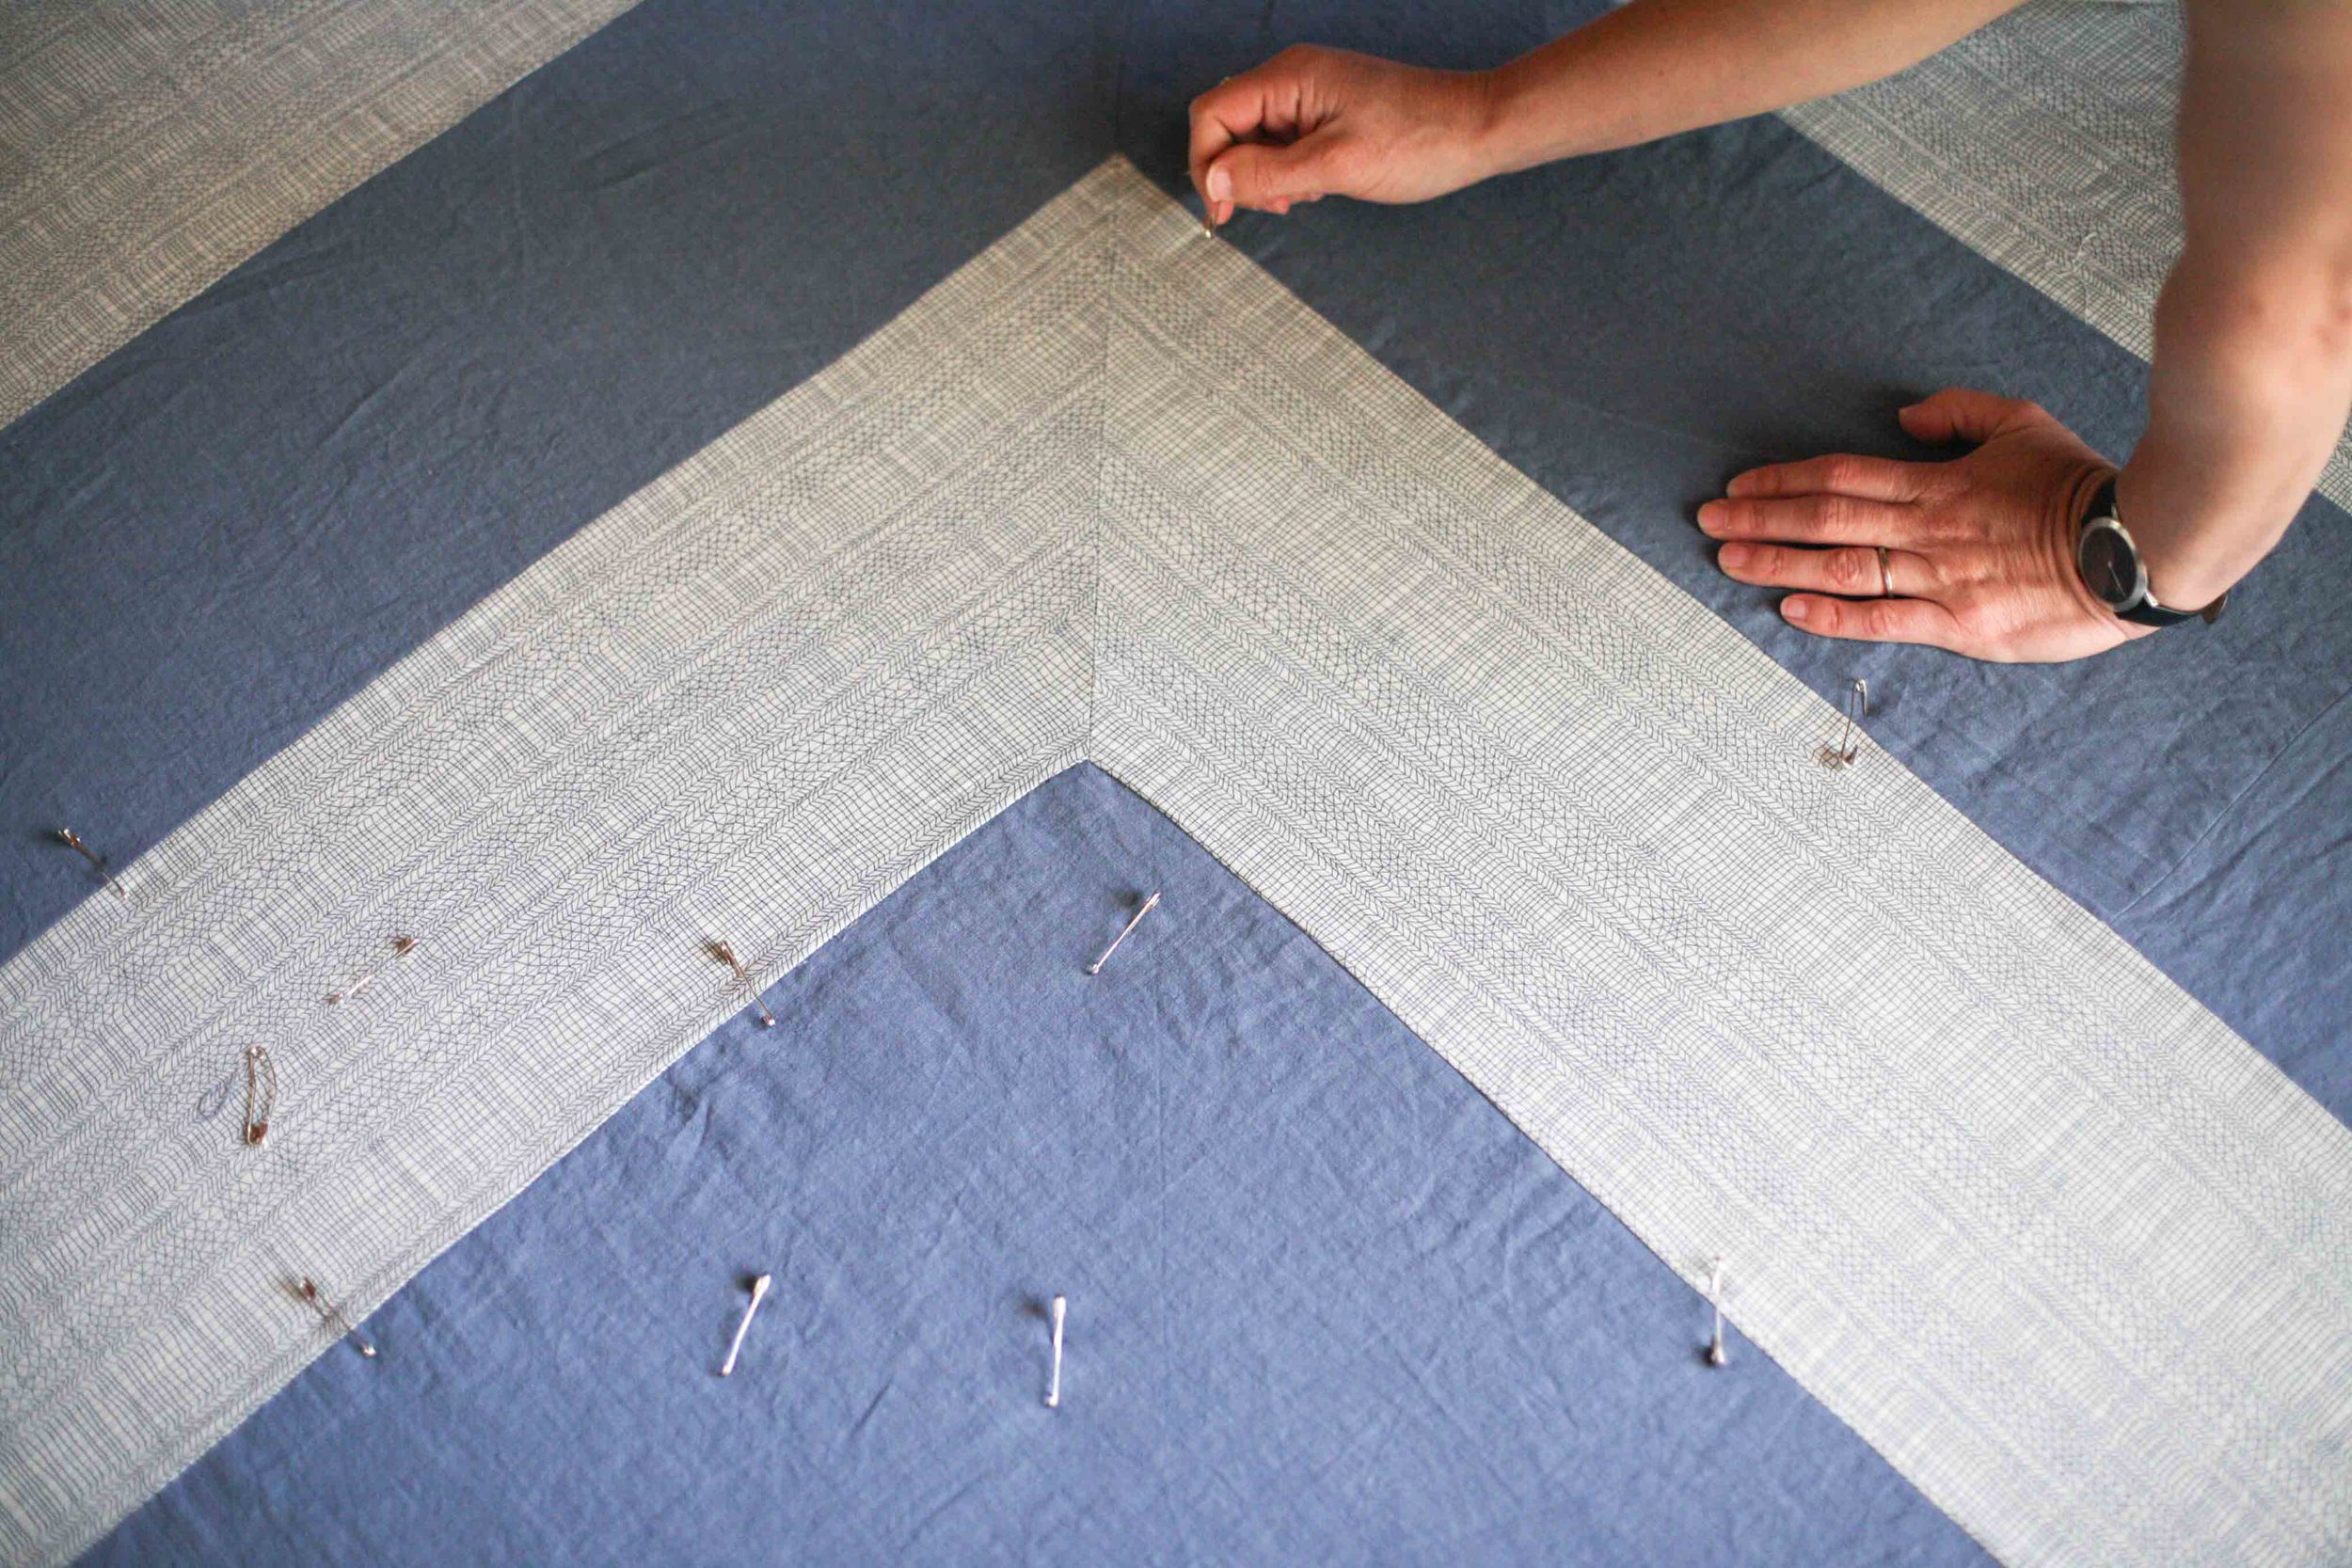
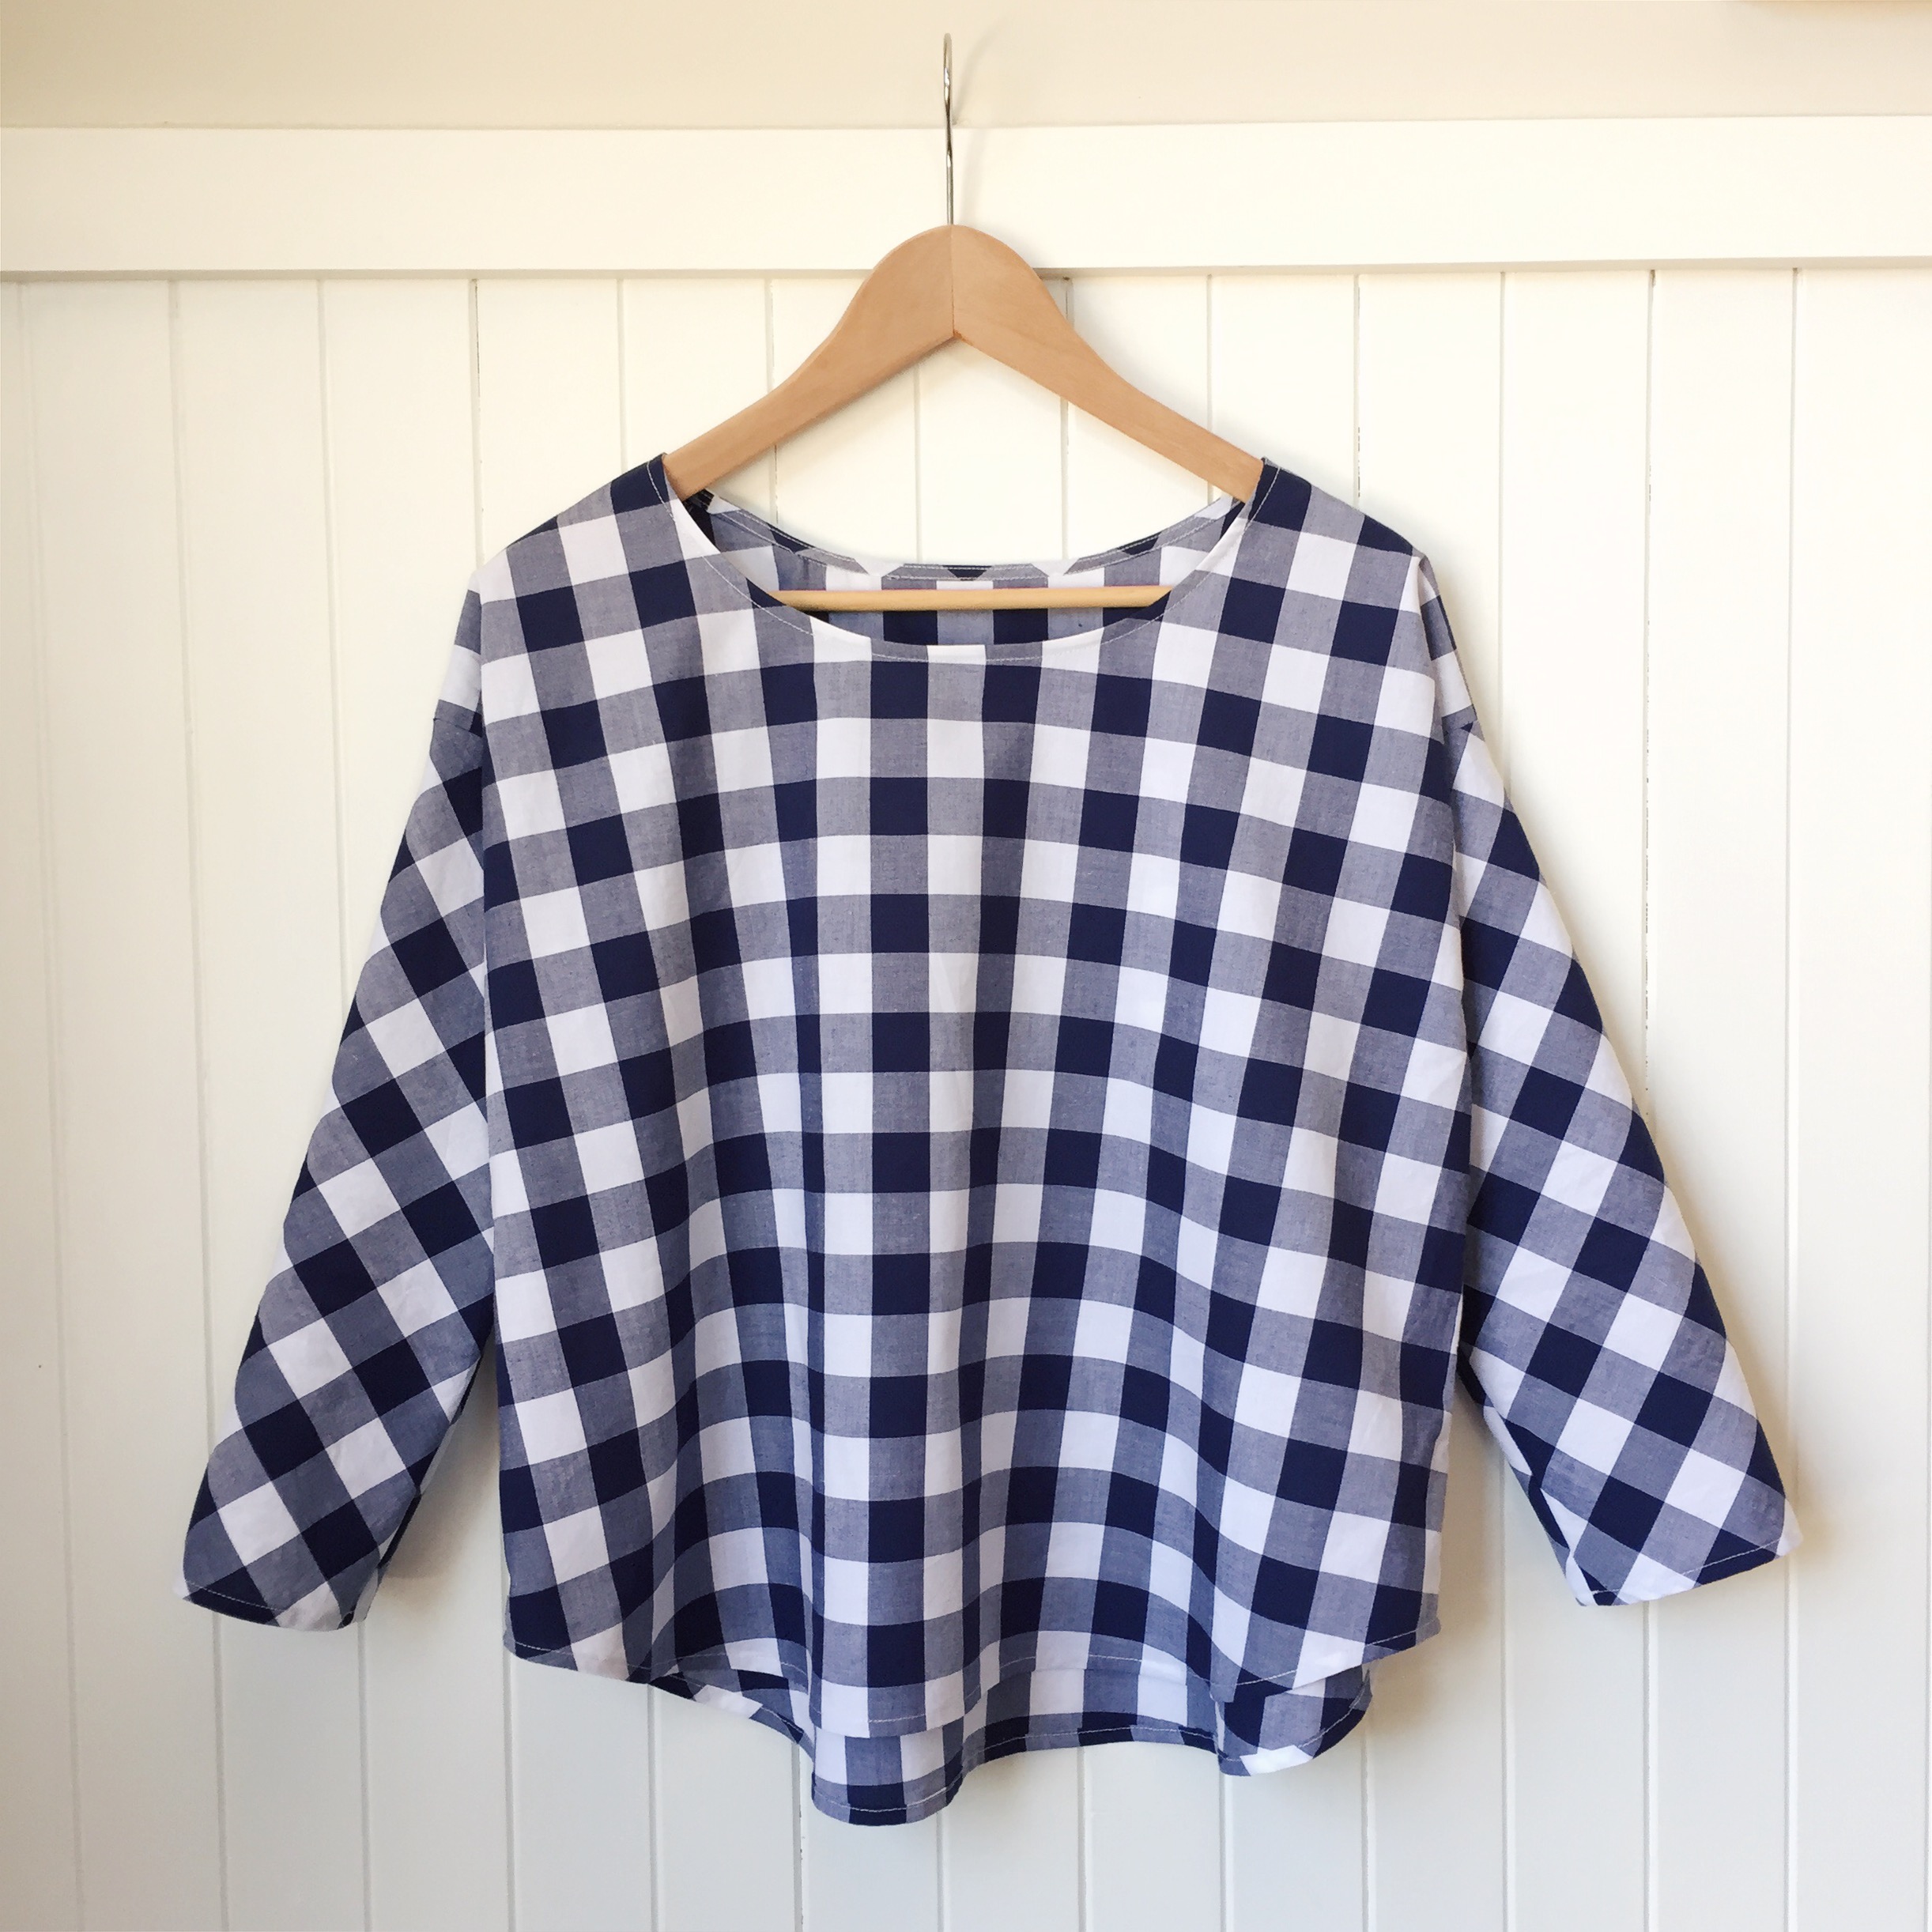
Just so we don't totally finish on a bum note. I wanted to tell you about some successes I'm having. Over the weekend I cut into some Nani Iro I've been hoarding and made the beautiful Alice from Tessuti you see above. And I made a Grainline Hemlock with some cotton that wasn't expensive but that I was holding on to (hoarding) onto "just in case". Feeling totally chuffed with myself for making two things I will wear all the time, and two things that I needed. And two things that I would have previously have had a hard time actually cutting. 

I'd love an update if any of you are working on your own stashes. What you've learned? And if you've had frustrations or setbacks I'd love to hear them too. Setbacks are where it is at today.

In solidarity and wagon-fallingoffedness.

Felicia x

PS. I have now made a Stash Less page that includes all the posts to date in this series. 

In Stash Less
31 Comments

Incidental craft in Europe - Part 1

February 18, 2015 thecraftsessions
Dubrovnik

Dubrovnik

As many of you reading would remember, last year my family went camping. We drove from Denmark to Greece, and then back up through Italy to the UK. I talk a little about how we travelled in that previous post but what I didn't talk about was the craft we saw along the way. 

What do I mean when I say "incidental"craft? 

As we didn't plan our route at all, we often didn't know anything about where we were, until we parked up for the day. Then tourist information or google would fill in the gaps. This, combined with the fact that we were camping with three little kids ;), meant I didn't really have the time (or the headspace) to really delve into the traditions and the history of each individual countries crafting culture. The daily chores of looking after kids, finding food, travelling and camping totally filled our days.  

Some of you reading might think this sounds like crazy talk; with Europe at your feet how could you not take advantage of all the fibre goodness it had to offer. But here's the thing - the goal of this trip was family togetherness, and that meant that everyone's needs had to be considered all of the time. We were asking a lot of our kids - they were only 3, 6 and 7 when we left. Many days the kids were too overexcited/tired/grumpy/hungry/dirty to see the sights that were on our doorstep, let alone go on a trek to see a wool shop. Crazily they don't care about wool. Very occasionally when we stopped in a big city I would purposefully seek something out. But most days generally "incidental" craft was really where it was at.

Crafting tourism is something I think I need to save until they have got bigger or maybe even until they have left home? Those with older kids should chime in here - does it get easier to wool shop?

What they often looked like right before they started to wrestle on the ground in a small pile of bodies. 

What they often looked like right before they started to wrestle on the ground in a small pile of bodies. 

So when I did see craft, I was pretty happy. And I realised the other day that I didn't show you anything I found - and that seemed a little crazy. So I've pulled off a few photos of places where craft was clearly visible on the street.

Initially I thought I would do this all in one post. But it's getting a little long so I'll post some more next week. Next up we will have Sarajevo and Albania. 


Split, Croatia

Split

Split

This was the first place I really encountered craft at a market, or on the street. The lady in the photo came from a knitting family. She or one of her relatives knitted everything on her stall. I (being the stupid tourist ;)) asked where did her wool come from. "Croatia". Obviously. 

We purchased some socks from her - which had some side toe shaping I really liked and recently copied in the first pair of socks I had made for myself. I also got some super cute slippers for the girls. A little crazy but they love them. 

The wool was fairly rustic and definitely not for the feint hearted. Sadly they only lasted a few months before I wore holes in them. 

The wool was fairly rustic and definitely not for the feint hearted. Sadly they only lasted a few months before I wore holes in them. 

Showing the interesting toe shaping that I part copied when I made my Irish Oats recently. 

Showing the interesting toe shaping that I part copied when I made my Irish Oats recently. 

DUBROVNIK, CROATIA

I was expecting more knitting frankly but I didn't see a single bit. Instead I saw many many gorgeous examples of the famous Dubrovnik embroidery. This stuff is truly amazing. I watched a few women for a minute here and there and managed to buy a few small gifts. I wish I had purchased something for myself! 

Just a random stunning photo of the stunning Dubrovnik. 

Just a random stunning photo of the stunning Dubrovnik. 

Hot and tired kids.

Hot and tired kids.

FeliciaSemple-15.jpg
I saw her while walking along the wall - and then made everyone figure out how to wiggle through the backstreets to get to her.

I saw her while walking along the wall - and then made everyone figure out how to wiggle through the backstreets to get to her.

Another view from the wall.

Another view from the wall.

The lady we saw from the wall gave the girls bracelets.

The lady we saw from the wall gave the girls bracelets.

An incredibly bad photo as it was inside but there was an amazing family run business a few streets away from the gate. Their work was a notch or three up from much of what we saw on the street. So incredibly beautiful and detailed. 

An incredibly bad photo as it was inside but there was an amazing family run business a few streets away from the gate. Their work was a notch or three up from much of what we saw on the street. So incredibly beautiful and detailed. 

This man had the most beautiful pair of hand knit socks - on the day though I felt quite bad for him. It was about 35degrees!

This man had the most beautiful pair of hand knit socks - on the day though I felt quite bad for him. It was about 35degrees!

This lady was sewing on the street. 

This lady was sewing on the street. 


If you want to ask anything about our trip then feel free. I'll do my best to answer.

Felicia x

In Inspiration
3 Comments

The Best Hemming Trick Ever (in my opinion)

February 13, 2015 thecraftsessions

There was this episode of The Good Wife where in order for anyone to say anything to the presiding judge they had to add "in my opinion" to every statement they made. Anyhoo…. In my opinion this is the best hemming trick of all time! It is a technique for doing a double-folded hem, without any measuring, that is accurate, tidy and simple. 

I use this hemming technique on practically everything - and I generally ignore pattern instructions that tell me something different. The only time I don't use it is when I am making something "special", using a super fine fabric, or something silky or synthetic. Generally as I only use natural fibres this works like a dream. That all said, I am sure there is a professional dressmaking reason why more people don't suggest it, but after 35 years of sewing I can't figure it out. And as most of what I make is my kids clothes, and simple garments like the Scout Tee then this is perfect! It works for skirts and sleeves and pant legs and shirt bottoms - totally multi-purpose. 

I've written a disclaimer down the bottom. Please give it a read. I really want you to be happy.

How to get a super tidy hem with no fuss. 

I should start by staying that this trick really isn't a trick. It is just a super super simple way of ensuring that you get a neat hem with no measuring. I'm sure it has a name somewhere on the interweb and that there will be other tutorials. I just haven't come across them AND I don't come across many people who do hem this way so I thought I would share.

Step 1: Run the basting stitch.

Sew a basting stitch at the point at which you want the hem to be turned up - making sure that the row of basting stitch is twice the width of the finished hem you want. If possible sew the basting stitch in a contrasting colour at least on the right side of the fabric. It doesn't matter what your bobbin cotton is (assuming the bobbin colour is on the wrong side of your fabric). 

The basting stitch on the left was sewed at 1.5cm and the one on the right at 2.5cm. I also do some at about 4 or 5cm - which gives a heavier hem. Contrasting thread on the right side of the fabric.

The basting stitch on the left was sewed at 1.5cm and the one on the right at 2.5cm. I also do some at about 4 or 5cm - which gives a heavier hem. Contrasting thread on the right side of the fabric.

The key to this whole thing is that you accurately run the basting stitch using the seam guide on your machine. When I am making a wide hem, and the basting stitch is about 5cm from the raw edge, I use a piece of washi tape stuck to my machine as a seam guide. An accurate basting seam is the key!!!

I change the width of the hem depending on the weight of the fabric and obviously the desired length of the sleeve, top, dress etc. On a thinner fabric like a voile I generally run my basting stitch at 1.5cm (or even 1.2cm), and then on something thicker or for the hem of pants, shorts or a dress I might run the basting stitch at 5cm. 

Step 2: Iron up the hem using the basting as a guide.

Iron the hem up using the basting stitch as a guide. The basting stitch should be on the fold exactly. The reason you want a contrasting colour is that you should be able to clearly see the basting stitch on the edge of the fold

Step 3: Fold the raw edge to the fold.

With the fabric sitting on your ironing board - wrong side up - use your thumb and your forefinger to pinch the raw edge of the fabric into the fold and press at the same time. Pin it down and move on.

I kindof pinch the raw edge towards the fold.

I kindof pinch the raw edge towards the fold.

You can feel when the raw edge hits the folded edge.

You can feel when the raw edge hits the folded edge.

After pinching it together I slide my pointer along my thumb to fold as much of the fabric as I can with one sweep - this is tricky to explain. Give it a go.

After pinching it together I slide my pointer along my thumb to fold as much of the fabric as I can with one sweep - this is tricky to explain. Give it a go.

Normally I iron as I go. I haven't ironed this yet.

Normally I iron as I go. I haven't ironed this yet.

This takes a little practice because it involves doing a couple of things - rolling the fabric exactly to the fold and ironing at the same time  - without burning your fingers. Go slow. Do a tiny bit at a time. Again the key is to make sure that you are accurately hitting the fold. You can do this by feel. There is no need to open the fold up - you can feel it. Just a bit of practice.

Ironed.

Ironed.

This is what it looks like opened out. You don't need to open it out - this photo is just to make it clearer.

This is what it looks like opened out. You don't need to open it out - this photo is just to make it clearer.

Step 4: Sew the hem.

To topstitch down the hem. 
This is another super part of the technique. Because you know the exact measurement of the hem, because it is totally even, as long as you can sew a straight line with some degree of accuracy, you can sew the hem from the right side without worrying you aren't going to catch it. Sewing a hem from the right side of the fabric gives you a more even finish. I usually take my hem measurement and minus 2mm or 3mm from it to give me the measurement that I use to topstitch the hem down. Again washi tape can help. 

To blindstitch.

I would blind stitch on a birthday frock or a nice frock for me. I would still do quite a big hem as I would want the weight to hold down the skirt. 

Prepare as above but then fold back the inside of the hem to do your blind stitch. Google blindstiching if you need to! 

Step 5:

Pull out your basting stitch by pulling gently. When you first remove the basting stitch you may end up with little needle holes. These normally disappear after the first wash and press!

And now to the disclaimer!! As I haven't done this with every fabric and every sewing setup I can't guarantee these tiny holes will disappear. Please check on a scrap of your fabric. As I mentioned above I just want you to be happy in your sewing life! 

UPDATE: I just wanted to add one more photo which might help those of you trying to do the hemming trick around a tight curve for something like a shirt tail hem. Snip a few little notches about a third of the way towards the basting line before folding - as you see in the photo below. It will then sit flat. 

Enjoy!

Felicia x

In How To
25 Comments

Around the Traps - Kid's patterns

February 11, 2015 thecraftsessions
FeliciaSemple-16.jpg


Stash Less in action today my friends. Rather than purchasing patterns that I don't have time to use, I am listing them here, so I can go back to them when I do. 

New stuff I've found or have been meaning to try. 

Just last week I saw this adorable pattern for the first time - the Mini Hudson pants. I so so love the shape of it and am particularly obsessed with the mid calf version. The only issue is that none of my kids like wearing trackies. I don't know why….. wish I did. My last post features me basting the quilt while wearing trackies so it isn't like I haven't been setting an example.

Another pattern that I have never made, but have been meaning to for the longest time, is the Flashback Skinny Tee. Brienne has some gorgeous versions of it here with some fabric paint detailing. I will get to this the next time I need to make some for my boy child. There are so many amazing versions of this tee on the web if you are looking for inspiration. 

Oliver and S has three patterns that I am a little obsessed with and again don't own. The playtime tunic I have mentioned before. And then recently the Bento Tee. So so cute. I'm also loving some of the roller skating dresses I'm seeing around the traps - like this one from Kristin at Skirt as a Top.  She also has made a super cute version of the Mini Hudson pants. 

I also love the Edelweiss Dress by Hey June. I haven't made it but I mean too. There are a few super pretty versions if you google images it.

If you are looking for homemade kids clothes inspiration you can't go past the online magazine Stylo. Goregeous styling, all the patterns are detailed, and it really shows what you can do if you get a little creative.

My other favourite source of inspiration is Kids Clothes Week. I participate now and then when I need a bit of a kick start. It now runs four times a year so there is always one just around the corner. It's free to sign up to their site and then you get access to all the photos and details of the pretty pretty things people are making. It is a sure fire way to find new patterns and get inspired. There are SO. many. gorgeous. patterns in their database. Patterns I hadn't come across before. Having a look at the old photo pool though (if you aren't a signer-uperer) is also an option.

Things that I have talked about before on the blog
 

My favourite sewing book for kids - Happy Handmade

Also in the past I've talked about baby sweaters, my favourite girl cardy's and my favourite girls dress pattern. I've also done a post on the super gorgeous City Gym Shorts which has to be THE best shorts pattern ever, and the beautifully shaped Banyan Tee. 

And finally a totally random post from Brienne about why she sews and knits with a quote I just love. 

I'll be back on Friday with my all-time favourite sewing trick! Until then I'd love to hear your favourite kid patterns?

Felicia x

In Around The Traps
15 Comments

Going against (my) nature.

February 10, 2015 thecraftsessions

People don't normally quilt with linen - and there is a good reason why. It shifts in all directions; it has movement and lacks stability. It's structure is not fixed - like a cotton. When we painstakingly cut our shapes out for a quilt pattern, what we are normally looking for is precision. Using linen distorts your pattern - your straight lines end up a lot less straight.

I'm a fan of precision. I have an undergrad degree in measurement. That is why (as Anna pointed out to me this week!) my urge to quilt with linen is so interesting. Our nature is part of us; our tendency to do things in a particular way and look for certain qualities in what we are creating. A big part of mine is about loving order in what I make. Loving logic and maths and symmetry. I struggle to create things that lack these qualities - unless I have purposely decided before I begin that it is a hack job type situation. 

What Anna pointed out to me while we were basting this quilt was that I seem to be pushing against my own nature. Looking for ways around my nature - creating disorder out of the orderly process of putting together a quilt. And through the process, maybe learning how to live with me-created wonk. Or even better yet - maybe learning how to embrace the wonk. 

The linen/cotton mix of the denim stripe has a more fixed structure - so two corners of the quilt have straight lines. 

The linen/cotton mix of the denim stripe has a more fixed structure - so two corners of the quilt have straight lines. 

Anna is smart - just have a look at that first image on her website! She is an artist and an art teacher, is very thoughtful and she often has words for things I struggle to explain. I talk and talk, and she turns my curly thinking into something I understand. And I love her for it. Working with her to baste a quilt, either hers or mine, is one of the simple joys in my life. We have done it before and we will do it again. One of the things I love most is the process of putting a quilt together encourages discussion about the big stuff; life, love and ideas. The basting providing time and space to discuss future projects, and ideas, and allow them time to take shape. We are often discussing craft as we baste; it's value and meaning in our lives. The way it allows us to see and understand more about ourselves and what makes us tick. The way craft can make clear to us, through all the tiny choices we make as we create, what we value and who we are. 

One idea that has come up over the years is that what we are attracted to in other people's work is sometimes what we ourselves would struggle to create. If you look at my craft-textiles board on pinterest you see two very distinct types of quilts. Those that are incredibly precise and ordered, and then those that are abstract, loose, improvisational. Order and precision I can do. But, while I adore improv and looseness, the idea of doing something like that myself makes me feel kinda stressed (what do you mean the corners wouldn't line up?) . 

“There’s a sunset and a sunrise every day. You can choose to be there for it, you can choose to put yourself in the way of beauty.”
— Cheryl Strayed’s late mother Bobbi, from Wild

Ever since I saw the film Wild with my women the other night, I've been thinking about the idea of "putting yourself in the way of beauty". Making a choice to live beauty, to make beauty. By choosing materials that work against my (strong) instinct to control things it's almost like I'm forcing myself to create something that I would consider beautiful. I love the looseness but if I tried to create it I would just keep making things neat. I almost can't help it!  If I hadn't made the choice to use those particular materials I wouldn't be able to create it - the looseness that I think is beautiful. The materials themselves are choosing the shape of the finished product and it's one I have little chance of controlling.

This quilt has involved so much fudging! Fudging to retain my strong straight-line design while accepting in part that I can't achieve it in linen. So many contradictions. I've wanted to pull it out and start again many times - but I didn't. I decided to go with it, fudge a bit and see where it lead. By using the materials I've used, I end up with a finished product I am proud to have created but that doesn't come naturally to me.

Stash Less - Why Restrictions Rock - has then stretched me even further. By creating a rule that means that I can't just buy more of the dirty blue linen, I was forced to (shock, horror) improvise and use some denim linen cotton to fill in the gaps when I ran out.  

By nature I would have created an orderly two colour design - the second blue gives the quilt some interest and some depth. What the process has produced is something that is more beautiful than I would have created if I had made it as designed with one colour blue and straight perfect lines. 

I totally fudged one side of the centre by ironing it when we were basting and hand sewed this extra flap down. You can see why in the photo at the top of the post on the right hand side of the main square. None of it is square.

I totally fudged one side of the centre by ironing it when we were basting and hand sewed this extra flap down. You can see why in the photo at the top of the post on the right hand side of the main square. None of it is square.

That isn't camera distortion my friends - the corner of the quilt that is totally distorted. 

That isn't camera distortion my friends - the corner of the quilt that is totally distorted. 

To use linen in a quilt and then to not follow it where it leads seems to me to be going against it's nature. But the fact that I chose it, and the fact that I am following it's lead, making the piece it wants to make is almost going against my nature.

That said (and again as Anna pointed out to me ;)) part of my nature is to challenge my nature! 

Have you ever intentionally or unintentionally worked outside your comfort zone? And did you love the result?

Felicia x

In Thoughts On Craft
4 Comments
← Newer Posts Older Posts →

Welcome! I'm Felicia - creator of The Craft Sessions and Soul Craft Festival.

This blog aims to celebrate the connection between hand-making and our well-being.
These posts aim to foster a love of hand-making and discuss the ways domestic handcrafts elevate our everyday.

I love the contributions you make to this space via your comments and learn so much from each and every one. x

Thoughts On Craft

Simple Sewing 101

Stash Less

The RetreaT

Featured
Making Fast Fashion: Some More Of The Grey
Apr 19, 2022
Making Fast Fashion: Some More Of The Grey
Apr 19, 2022
Apr 19, 2022
Is My Making Fast Fashion?
Apr 12, 2022
Is My Making Fast Fashion?
Apr 12, 2022
Apr 12, 2022
Why Gauge Matters
Apr 5, 2022
Why Gauge Matters
Apr 5, 2022
Apr 5, 2022
Craft As Simple Mundane Forward Movement
Mar 29, 2022
Craft As Simple Mundane Forward Movement
Mar 29, 2022
Mar 29, 2022
Craft As A Virtuous Cycle*
Mar 22, 2022
Craft As A Virtuous Cycle*
Mar 22, 2022
Mar 22, 2022
Craft & The Slow Nostalgic Finish
Mar 15, 2022
Craft & The Slow Nostalgic Finish
Mar 15, 2022
Mar 15, 2022

popular posts

Craft As A Project V’s Craft As A Practice

Our Fear Of Going Back

Making Is Not Inherently Creative

Why All Crafters Need A Visual Diary

Craft As A Manifestation Of Love And Loss

Moving On From Perfectionism

The Secret To Becoming A Great Knitter!

Simple Sewing 101 - Part 1

Craft In The Middle Of Motherhood

Another #theyearofthescrap #ellenscardigan using some #oldmaidenaunt alpaca silk from many years ago. What I love about this little cardy is it’s simplicity and how little yarn it uses. Perfect for scrap knitting. I now have a little pile of ba
New blog post: Craft as elevating the mundane! I think this idea is so important. 🌿 'Making is about enriching the moments of our lives; it’s about making the mundane (and not the extraordinary) more abundant and that bit more lush…. el
Block 8/12 - I’m so excited to be back making this for my smallest for her 10th birthday. It’s a #stash_less #theyearofthescrap quilt that is based on an incredible #geesbend quilt. And it’s all scraps and precious bits and pieces.
Another #theyearofthescrap #ellenscardigan using some #oldmaidenaunt alpaca silk from many years ago. What I love about this little cardy is it’s simplicity and how little yarn it uses. Perfect for scrap knitting. I now have a little pile of ba New blog post: Craft as elevating the mundane! I think this idea is so important. 🌿 'Making is about enriching the moments of our lives; it’s about making the mundane (and not the extraordinary) more abundant and that bit more lush…. el Block 8/12 - I’m so excited to be back making this for my smallest for her 10th birthday. It’s a #stash_less #theyearofthescrap quilt that is based on an incredible #geesbend quilt. And it’s all scraps and precious bits and pieces.
The Blog Archives!
  • April 2022
  • March 2022
  • February 2022
  • December 2021
  • March 2021
  • February 2021
  • November 2020
  • July 2020
  • June 2020
  • May 2020
  • April 2020
  • March 2020
  • February 2020
  • December 2019
  • March 2019
  • February 2019
  • January 2019
  • December 2018
  • November 2018
  • October 2018
  • August 2018
  • July 2018
  • May 2018
  • April 2018
  • March 2018
  • February 2018
  • January 2018
  • December 2017
  • November 2017
  • October 2017
  • September 2017
  • August 2017
  • July 2017
  • June 2017
  • May 2017
  • April 2017
  • March 2017
  • February 2017
  • January 2017
  • November 2016
  • October 2016
  • September 2016
  • August 2016
  • July 2016
  • June 2016
  • May 2016
  • April 2016
  • March 2016
  • February 2016
  • January 2016
  • December 2015
  • November 2015
  • October 2015
  • September 2015
  • August 2015
  • July 2015
  • June 2015
  • May 2015
  • April 2015
  • March 2015
  • February 2015
  • January 2015
  • December 2014
  • November 2014
  • October 2014
  • September 2014
  • August 2014
  • July 2014
  • June 2014
  • May 2014
  • April 2014
  • March 2014
  • February 2014
  • January 2014
  • December 2013
  • November 2013
  • October 2013
  • September 2013
  • August 2013
  • July 2013
  • June 2013
Featured
Making Fast Fashion: Some More Of The Grey
Apr 19, 2022
Making Fast Fashion: Some More Of The Grey
Apr 19, 2022
Apr 19, 2022
Is My Making Fast Fashion?
Apr 12, 2022
Is My Making Fast Fashion?
Apr 12, 2022
Apr 12, 2022

We Live and work on the traditional lands of the Wurundjeri people of the Kulin nation.
We acknowledge that sovereignty was never ceded and pay our respect to elders past, present and emerging.

Copyright the Craft Sessions 2020

Logo designed by the lovely Mara of Printspace and Girling Design